
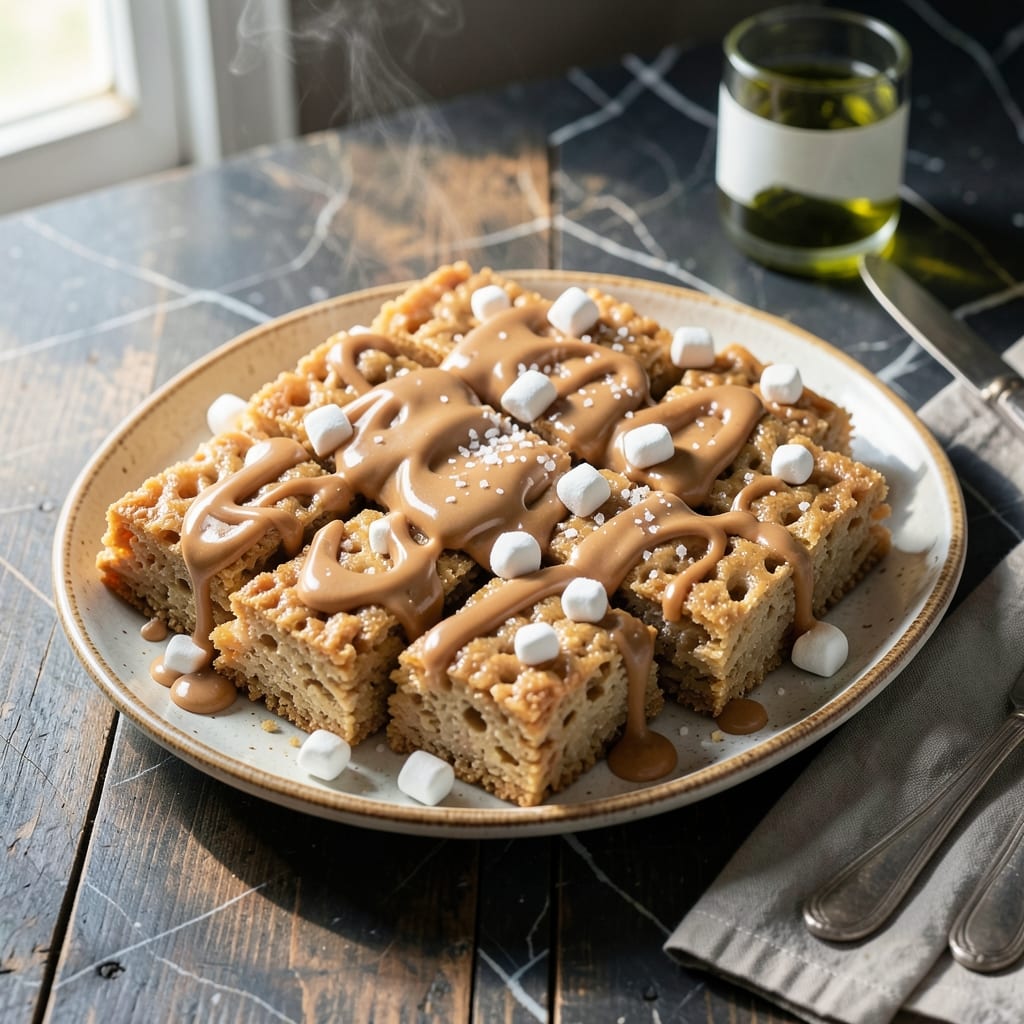
There’s something about the combination of peanut butter and marshmallows that transforms a simple cereal treat into something extraordinary. This no-bake recipe brings together creamy, nutty richness with classic crispy texture in minutes.
The secret lies in melting the marshmallows and peanut butter together until silky smooth, then folding in the cereal until every piece is perfectly coated. The mixture sets quickly, so you’ll need to work fast to press it into the pan.
What emerges is a batch of treats with golden edges, a slightly sticky exterior, and a chewy center that gives just the right amount of resistance. Each bite delivers the perfect balance of sweet, salty, and nutty flavors.
These keep well at room temperature for days, making them ideal for gatherings or satisfying sudden cravings. The process is as enjoyable as the results.
Ingredients for Peanut Butter Rice Krispie Treats Recipe Marshmallow
Just seven ingredients transform into these no-bake chewy peanut butter cereal treats.
| Ingredient | Amount | Notes |
|---|---|---|
| Rice Krispies Cereal 🥣 | 6 cups | Standard variety preferred |
| Miniature Marshmallows 🍬 | 10 cups | Or 40 large marshmallows |
| Creamy Peanut Butter 🥜 | 1 ½ cups | Smooth, not natural style |
| Unsalted Butter 🧈 | ½ cup | 1 stick, for melting |
| Pure Vanilla Extract 🌿 | 2 tsp | For depth of flavor |
| Sea Salt 🧂 | ½ tsp | Fine grain for even distribution |
| Light Corn Syrup 💧 | ¼ cup | Keeps treats chewy |
The marshmallows are non-negotiable here. Jet-Puffed or Kraft brands melt the most smoothly—avoid off-brands that can turn grainy. For the peanut butter, Jif Creamy or Skippy are ideal (their texture blends seamlessly). The cereal should be fresh Rice Krispies—stale ones lose their snap. Unsalted butter lets you control the salt level, which is key for balancing the sweetness.
Need a nut-free version? Sunflower seed butter works perfectly as a one-to-one swap. Out of corn syrup? Honey or maple syrup can substitute, but the texture will be slightly different. For extra richness, swap half the peanut butter for Nutella. The vanilla is optional but adds depth—real extract only, no imitation stuff.
These keep beautifully at room temperature in an airtight container for up to 3 days. For longer storage, freeze for up to 6 weeks—thaw at room temperature for 15 minutes before serving. Press plastic wrap directly on the surface to prevent drying out.
Why You’ll Love This Recipe
- One Pot Wonder: I melt the butter, marshmallows, and peanut butter together in a single saucepan—no extra bowls, no fuss.
- That PB-Marshmallow Magic: The creamy peanut butter and melted marshmallows create this rich, gooey base that clings to every crispy bite.
- Lunchbox MVP: I pack these for school snacks, potlucks, or even a quick breakfast when we’re running late.
- Stays Fresh for Days: They keep perfectly in an airtight container, so I can make a batch Sunday and still have treats by Wednesday.
Step-by-Step Instructions for Peanut Butter Rice Krispie Treats
This no-bake method delivers perfectly chewy, richly flavored treats with minimal effort.
Step 1: Melt and Combine the Butter Base
In a large saucepan, melt the 0.5 cup unsalted butter over low heat. I always use a light-colored pan for this—it helps you monitor the color as the mixture develops. Once melted, immediately add the 10 cups miniature marshmallows and stir constantly.
The marshmallows will begin to soften and melt within 3-4 minutes. Watch for the mixture to become completely smooth with no visible marshmallow lumps. At this point, stir in the 0.25 cup light corn syrup—this is what gives the treats their signature chewiness. Remove from heat immediately after the corn syrup is fully incorporated to prevent scorching.
Step 2: Incorporate Peanut Butter and Flavorings
Working quickly while the mixture is still hot, stir in the 1.5 cups creamy peanut butter. The heat from the marshmallow mixture will soften the peanut butter, making it easier to blend uniformly. I find that using a silicone spatula helps scrape every bit from the sides of the pan.
Next, add the 2 tsp pure vanilla extract and 0.5 tsp sea salt. The vanilla deepens the flavor profile, while the salt balances the sweetness perfectly. Stir until everything is completely smooth and the peanut butter is fully integrated—this should take no more than 30 seconds of vigorous stirring.
Step 3: Fold in the Rice Krispies Cereal
Add all 6 cups Rice Krispies cereal to the saucepan at once. Using a spatula, gently fold the cereal into the marshmallow-peanut butter mixture until every piece is evenly coated. The cereal will begin to soften slightly from the heat, but maintain its crisp texture.
Be careful not to press too hard—you want to preserve the airy quality of the cereal. The mixture should look glossy and uniform, with no dry spots or uncoated cereal. This step typically takes 1-2 minutes of gentle folding.
Step 4: Press and Set the Treats
Transfer the mixture to a 9×13-inch baking dish lined with parchment paper. Using the spatula or lightly buttered hands, press the mixture evenly into the pan. I prefer to press firmly but not compact it too tightly—this ensures the treats hold their shape while remaining tender.
For the cleanest cuts later, use an offset spatula to smooth the top surface. Let the treats cool at room temperature for 30 minutes before slicing. If you’re in a hurry, you can refrigerate for 15 minutes, but room temperature cooling yields the best texture.
Step 5: Cut and Serve
Once completely set, lift the treats from the pan using the parchment paper and transfer to a cutting board. Using a sharp knife, cut into 16 equal squares. For clean cuts, dip the knife in hot water and wipe it clean between each cut.
The treats should have a glossy, slightly sticky surface with visible Rice Krispies throughout. Each piece will be rich with peanut butter flavor, perfectly chewy from the marshmallow and corn syrup, and studded with crisp cereal bits. Serve immediately or store in an airtight container at room temperature for up to 3 days.
Pro Tips For Making Peanut Butter Rice Krispie Treats Recipe Marshmallow
- Melt Butter Low: Use medium-low heat when melting butter and marshmallows—high heat will scorch the marshmallows and make the mixture bitter. I learned this the hard way after ruining a batch with burnt, grainy texture.
- Warm the Peanut Butter: Stir the peanut butter into the marshmallow mixture while it’s still warm; cold peanut butter seizes up and creates clumps. About 30 seconds of stirring usually does the trick.
- Skip Old Cereal: Use fresh Rice Krispies—stale cereal won’t crisp up properly and leaves the treats chewy instead of that perfect snap. Check the box date if you’ve had it sitting in the pantry for months.
- Press Lightly: When pressing the mixture into the pan, use a buttered spatula and a gentle touch—packing too tightly makes them dense and hard. A light press keeps them tender and easy to cut.
Best Sauces and Condiments for peanut butter rice krispie treats recipe marshmallow
Chocolate Drizzle
Melt 1 cup semi-sweet chocolate chips with 2 tbsp coconut oil in 30-second bursts in the microwave. Drizzle over cooled treats using a fork. The slight bitterness cuts through the sweetness perfectly. I use Ghirardelli chips for the smoothest texture. 💫
Salted Caramel
Warm ½ cup store-bought caramel sauce and drizzle over treats, then sprinkle with flaky sea salt. The salty-sweet contrast elevates every bite. Smucker’s caramel works well here—just thin it with 1 tsp milk if too thick.
Peanut Butter Glaze
Whisk ½ cup powdered sugar, ¼ cup creamy peanut butter, and 2-3 tbsp milk until smooth. Drizzle over treats for an extra peanut butter punch. This glaze sets quickly, so work fast.
Honey Mustard Dip
Combine ¼ cup yellow mustard, 2 tbsp honey, and 1 tsp lemon juice for a tangy dip. The acidity balances the richness beautifully. I serve this on the side for dipping.
Crushed Nuts
Press ½ cup chopped peanuts or pecans into the top before the treats set. This adds crunch and visual appeal. Lightly toast the nuts first for deeper flavor.
White Chocolate Swirl
Melt ½ cup white chocolate chips and swirl into the mixture before pressing into the pan. This creates marbled treats with pockets of creamy white chocolate.
Nutrition Facts
Frequently Asked Questions
Can I use natural peanut butter instead of creamy?
Natural peanut butter can work but may separate or make the mixture oily. Stick with creamy for best results. The stabilized texture blends more smoothly.
How do I keep treats from sticking to the pan?
Line your 9×13-inch pan with parchment paper before pressing in the mixture. This makes removal and cutting much easier.
Why did my treats turn out hard?
Overcooking the marshmallow mixture or pressing too firmly can cause this. Work quickly and press gently for perfect chewy texture.
Can I make these gluten-free?
Yes! Use gluten-free Rice Krispies and ensure all other ingredients are certified gluten-free. The texture will be identical.

- Potato Candy Recipe 1933: Vintage Peanut Butter Roll Delight - October 30, 2026
- Potato Chip Cookie Recipe With Pecans: Buttery Crunch Meets Nutty Richness - October 30, 2026
- Potato Patty Recipe No Egg: Crispy Edges Without the Binder - October 30, 2026