
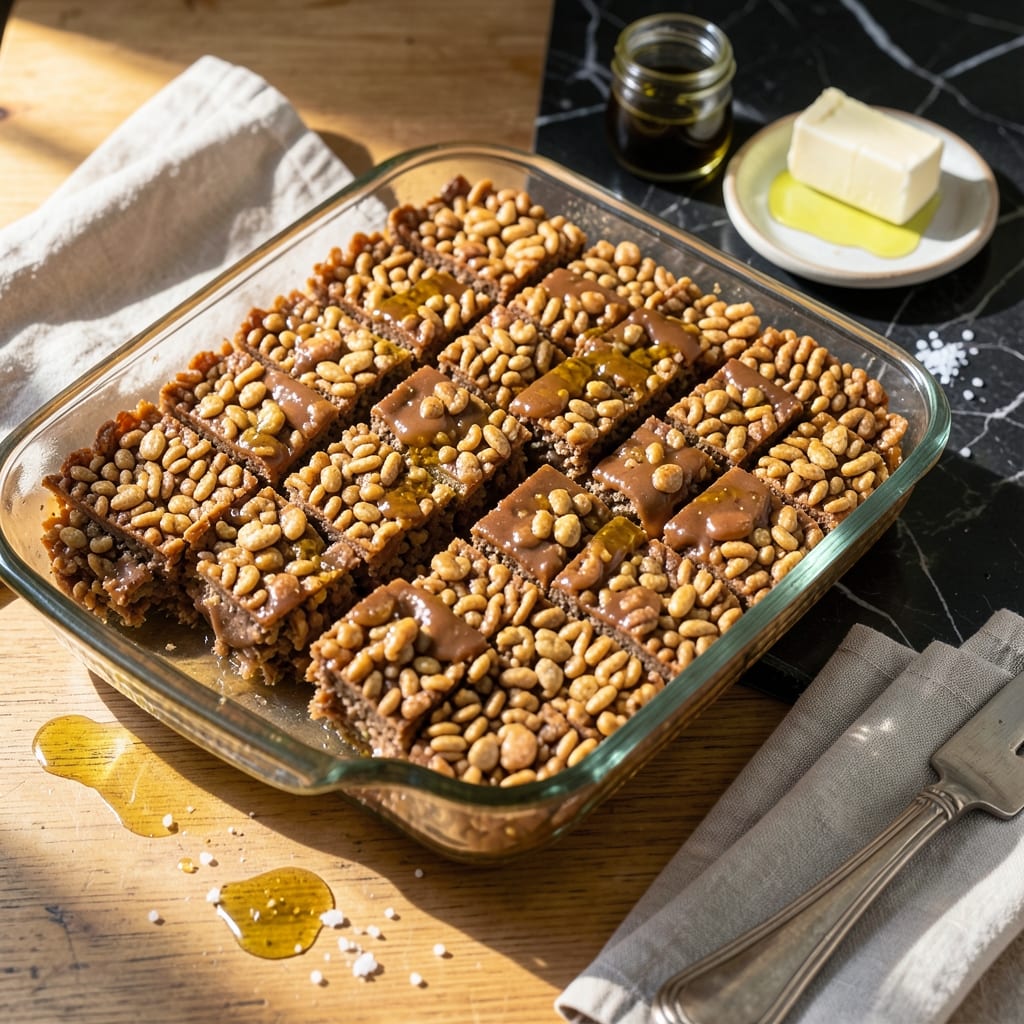
This peanut butter Rice Krispies treat offers a delightful twist on the classic, using honey instead of marshmallows for natural sweetness.
The combination of creamy peanut butter and crispy cereal creates a texture that’s both satisfying and nostalgic. It’s a no-bake recipe that comes together in minutes.
You’ll love how the honey binds everything together while keeping the treats light and airy. Each bite delivers a perfect balance of nutty richness and subtle sweetness.
Ideal for snacking, lunchboxes, or a last-minute dessert. This version proves you don’t need marshmallows for a delicious result.
Ingredients for Peanut Butter Rice Krispies Recipe Without Marshmallows
Seven simple ingredients transform into these nostalgic, no-bake peanut butter treats with natural honey sweetness.
| Ingredient | Amount | Notes |
|---|---|---|
| Creamy Peanut Butter 🥜 | 1 cup | Natural or conventional, well-stirred |
| Honey 🍯 | ¾ cup | Raw or pasteurized, room temperature |
| Rice Krispies Cereal 🥣 | 6 cups | Fresh for maximum crispiness |
| Unsalted Butter 🧈 | ¼ cup | Or vegan butter for dairy-free |
| Vanilla Extract 🌿 | 1 tsp | Pure extract for best flavor |
| Sea Salt 🧂 | ¼ tsp | Fine grain for even distribution |
| Ground Cinnamon 🌶️ | ½ tsp | Optional for warm spice note |
The peanut butter is doing heavy lifting here—Jif or Skippy for classic flavor, but natural works too (just stir in that oil). Local honey from farmers markets adds depth you won’t get from grocery store brands. I grab my Rice Krispies from Kroger or Target—any generic brand is fine, but freshness matters more than the label (check the date).
No honey? Maple syrup or agave at the same amount works, though the flavor shifts slightly. Swap butter for coconut oil if going dairy-free. Out of vanilla? Skip it—the peanut butter still shines. The cinnamon? Totally optional but worth it (trust me on this).
These keep in an airtight container for 5-7 days at room temp. Freeze for up to 3 months if you need to hide them from yourself. They soften slightly over time, but the crunch comes back after a quick refresh in the microwave (10 seconds).
Why You’ll Love This Recipe
- No-Bake Magic: I just melt butter, honey, and peanut butter together, stir in the cereal, and it’s done—no oven, no fuss.
- Sweet & Nutty: The honey and vanilla give it this warm, deep sweetness that pairs perfectly with the rich peanut butter.
- Lunchbox Hero: My kids beg for these in their lunches, and honestly, I sneak a square for my afternoon pick-me-up too.
- Budget Stretch: A box of cereal and a jar of peanut butter go a long way—this batch feeds a crowd for pennies.
Step-by-Step Instructions for Peanut Butter Rice Krispies Without Marshmallows
This no-fuss method delivers perfectly crispy, honey-sweetened treats in minutes.
Step 1: Melt and Combine the Wet Ingredients
In a large saucepan over low heat, melt the 0.25 cup Unsalted Butter completely, swirling occasionally. I keep the heat gentle to prevent browning—you want just melted, not toasted.
Once melted, add the 1 cup Creamy Peanut Butter and stir until smooth and fully combined. The mixture should be glossy and pourable, not thick or separated. If using natural peanut butter, make sure it’s well-stirred first to incorporate the oils.
Pour in the 0.75 cup Honey, 1 tsp Vanilla Extract, 0.25 tsp Sea Salt, and 0.5 tsp Ground Cinnamon. Stir continuously for 1-2 minutes until the honey loosens and everything blends into a uniform, caramel-colored liquid. The edges should just start to bubble lightly.
Step 2: Fold in the Rice Krispies Cereal
Remove the saucepan from heat and immediately add all 6 cups Rice Krispies Cereal. I use a silicone spatula to fold the cereal into the peanut butter mixture, pressing gently to ensure every piece gets coated.
Work quickly but carefully—the cereal will start to soften if left in the warm mixture too long. You want each piece glistening with the peanut butter mixture, not soggy. The mixture should look slightly glossy and hold together when pressed.
If the mixture seems too thick or dry, add a splash of warm water and stir—this helps distribute the coating evenly without making it greasy.
Step 3: Press and Shape the Treats
Transfer the mixture to a parchment-lined 9×13-inch baking dish. Use a spatula or the back of a spoon to press it down evenly, filling all the corners. I like to press firmly here—the more compact the mixture, the better it holds its shape when cut.
For extra crispiness, I sprinkle a few additional Rice Krispies on top and press them in lightly. This creates a nice texture contrast. Let the mixture sit at room temperature for 10-15 minutes to set completely.
Step 4: Cut and Serve
Once the mixture is cool and firm to the touch, use a sharp knife to cut into 16 squares or your preferred shape. For clean cuts, I dip the knife in hot water and wipe it between each slice—this prevents sticking and dragging.
Serve immediately for the best texture—the edges should be slightly crisp, with a chewy, peanut buttery center. If storing, keep in an airtight container at room temperature for up to 3 days, though they’re best eaten fresh the same day.
These treats are naturally sweet from the honey, with a subtle warmth from the cinnamon and a satisfying crunch from the Rice Krispies. The peanut butter adds a rich, nutty depth that makes them irresistible.
Pro Tips For Making Peanut Butter Rice Krispies Recipe Without Marshmallows
- Melt Butter Slowly: Use low heat when melting the butter to prevent it from browning or burning, which can add a bitter taste to your peanut butter mixture.
- Warm the Honey: Microwave the honey for 15-20 seconds before mixing—it blends into the peanut butter much more smoothly and evenly.
- Fold Quickly: Once the cereal is mixed with the peanut butter mixture, work fast before it starts to set, or you’ll end up with a dense, uneven texture.
- Press Firmly: When pressing the mixture into the pan, use the back of a spoon or a spatula to really compact it—this keeps the bars from crumbling when you cut them.
Storing and Reheating Leftovers
Room Temperature Storage
Let your treats cool completely before storing. I use airtight containers with a tight seal to keep them fresh for up to 5 days. Line the container with parchment paper to prevent sticking. 💡
Refrigerator Storage
For longer freshness, store in the fridge for up to 10 days. Place treats in a single layer in an airtight container with parchment between layers. They’ll firm up slightly but soften at room temperature within 15 minutes.
Freezer Storage
These freeze beautifully for up to 3 months. Wrap individual treats in plastic wrap, then place in a freezer bag. Squeeze out excess air to prevent freezer burn. Label with the date for easy tracking.
Thawing Treats
Remove from the freezer and let thaw at room temperature for 30-45 minutes. For faster results, microwave in 5-second intervals until soft. Avoid over-heating as it can make them sticky.
Reviving Stale Treats
If your treats lose their crunch, place them in a 200°F oven for 5-7 minutes. Let cool completely before serving. This method restores crispiness without drying them out. ✨
Packing for Gifts
Layer treats between parchment paper in a decorative tin. They’ll stay fresh for 3-4 days at room temperature. Include a note with storage instructions for the recipient’s convenience.
Nutrition Facts
Frequently Asked Questions
Can I use crunchy peanut butter instead?
Crunchy peanut butter adds extra texture and nuttiness. The pieces stay slightly firm, giving a pleasant bite. Just stir it well before measuring for even distribution.
Why does my mixture seem too dry?
This usually happens with natural peanut butter or thick honey. Add 1-2 tablespoons of warm water to loosen the mixture. Stir thoroughly before mixing with cereal.
How can I make these vegan?
Swap the butter for coconut oil and use vegan honey alternatives like agave or maple syrup. The flavor will differ slightly but still taste delicious.
Can I add chocolate chips?
Yes! Fold in 1 cup of chocolate chips after mixing the cereal. Press them slightly into the mixture so they stick. Let cool completely before cutting.

- Potato Candy Recipe 1933: Vintage Peanut Butter Roll Delight - October 30, 2026
- Potato Chip Cookie Recipe With Pecans: Buttery Crunch Meets Nutty Richness - October 30, 2026
- Potato Patty Recipe No Egg: Crispy Edges Without the Binder - October 30, 2026