
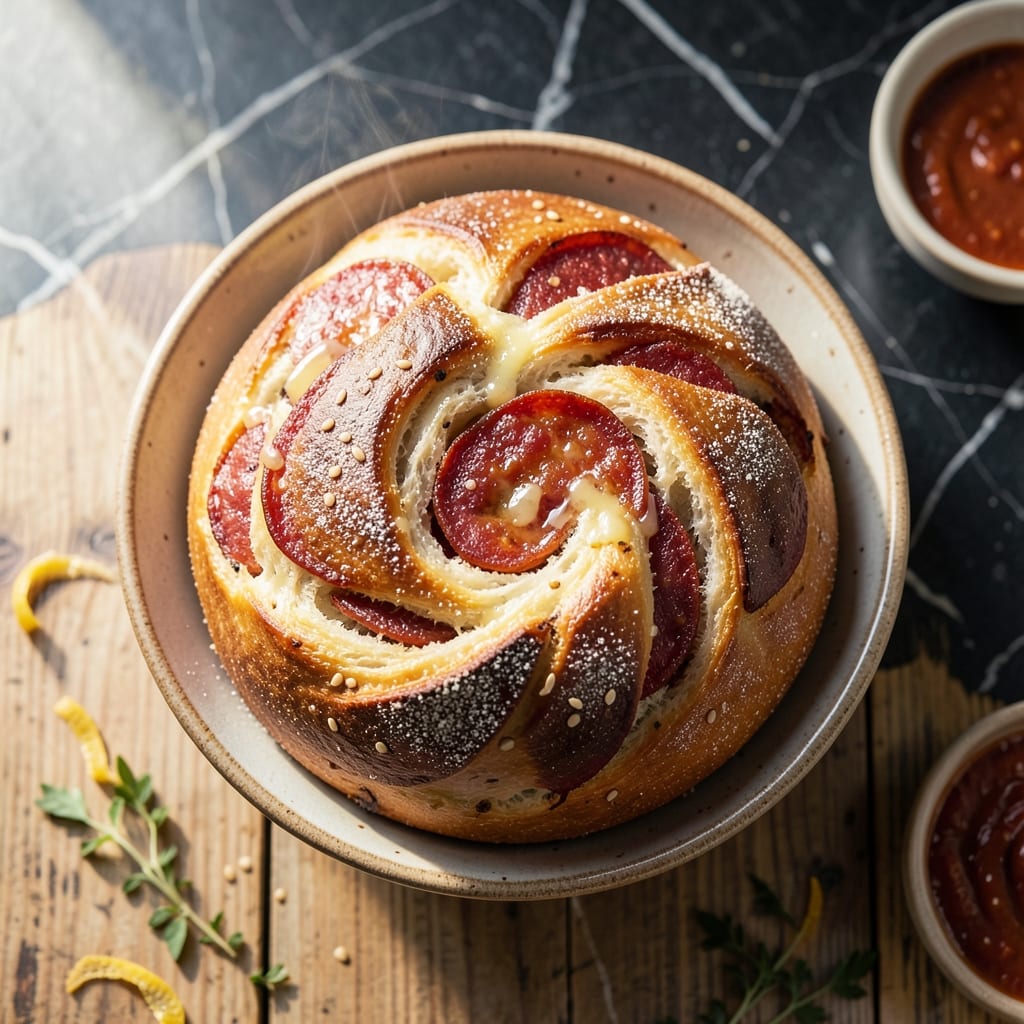
Few things compare to the satisfaction of pulling a golden, flaky pepperoni bread from the oven, knowing you built those perfect layers yourself. My grandmother taught me the importance of patience with dough and the magic of a well-spiced filling.
This creation brings the flavors of Italian-American bakeries to your kitchen with a crisp exterior and a rich, spicy filling. The dough requires just a few simple ingredients and a bit of time to rise, ensuring those coveted flaky layers.
The pepperoni and cheese filling creates a gooey, savory center that contrasts beautifully with the buttery crust. Every bite delivers the comfort of a traditional classic with a homemade touch that store-bought versions simply can’t match.
Serve warm for the best experience, when the layers are at their most delicate and the filling is perfectly melted. This is the kind of dish that turns an ordinary meal into something to celebrate.
Ingredients for Pepperoni Bread Recipe from Scratch
Simple ingredients transform into golden, flaky layers with a spicy filling.
| Ingredient | Amount | Notes |
|---|---|---|
| All-Purpose Flour 🌾 | 3 ½ cups | Plus extra for dusting |
| Warm Water 💧 | 1 cup | About 110°F for yeast |
| Active Dry Yeast 🍞 | 1 package | 2 1/4 tsp equivalent |
| Granulated Sugar 🍚 | 1 tbsp | Feeds the yeast |
| Salt 🧂 | 1 tsp | Fine sea salt preferred |
| Unsalted Butter 🧈 | ½ cup | Melted, for dough |
| Olive Oil 🫒 | 2 tbsp | For brushing dough |
| Pepperoni Slices 🍕 | 6 oz | Diced or whole |
| Mozzarella Cheese 🧀 | 8 oz | Shredded for filling |
| Provolone Cheese 🧀 | 4 oz | Shredded for filling |
| Parmesan Cheese 🧀 | ¼ cup | Freshly grated for topping |
| Dried Oregano 🌿 | 1 tsp | For filling seasoning |
| Garlic Powder 🧄 | 1 tsp | For filling seasoning |
| Red Pepper Flakes 🌶️ | ½ tsp | Adjust for spice preference |
The flour is the foundation here. King Arthur all-purpose is my go-to—consistent quality and perfect protein content for flaky layers. The yeast needs to be fresh (check the expiration date), and Fleischmann’s or Red Star are reliable. For the butter, Land O’Lakes unsalted gives that rich, buttery flavor without overpowering the filling. Warm the milk to just the right temp—too hot kills the yeast, too cool won’t activate it.
No mozzarella? Low-moisture part-skim works but isn’t as gooey. Swap provolone for fontina or Monterey Jack if that’s what you’ve got. The pepperoni can be turkey pepperoni for a lighter option. Fresh garlic instead of powder? Use 2 cloves minced. Want extra flavor? Add a pinch of fennel seeds to the filling—classic Italian-American move.
Dough can rise in the fridge overnight (just cover it tight). Leftovers? Wrap in foil and reheat at 350°F for 10 minutes. The bread freezes beautifully for up to 2 months—slice before freezing for easy portions.
Why You’ll Love This Recipe
- No-Knead Dough: Honestly, the yeast does all the work—just mix flour, water, sugar, and salt, then let it rise while you do something else.
- Crispy Cheesy Bite: That buttery crust with melted pepperoni inside? I’ll be real: it’s the reason my kids beg for this every Friday.
- Party or Lunchbox: Between us, it’s as at home in a school lunch as it is on a game-day table.
- Pocketbook Pleaser: All-purpose flour and pepperoni stretch farther than you’d think—feeds four for the cost of one takeout pizza.
Step-by-Step Instructions for Pepperoni Bread
Here’s the method that guarantees those flaky layers packed with cheesy, spicy goodness.
Step 1: Activate the Yeast and Prepare the Dough
In a large bowl, combine the 1 cup Warm Water, 1 tbsp Granulated Sugar, and 1 package Active Dry Yeast. Stir gently and let it sit for 5-10 minutes until the mixture becomes frothy and doubled in size—this tells you the yeast is alive and active.
Next, add the 3.5 cups All-Purpose Flour and 1 tsp Salt to the yeast mixture. Pour in the 0.5 cup Unsalted Butter (melted and cooled slightly) and mix until a soft dough forms. The dough should pull away from the sides of the bowl but still be slightly sticky to the touch.
Step 2: Knead and Let the Dough Rise
Turn the dough out onto a lightly floured surface and knead for 8-10 minutes until it becomes smooth and elastic. You’ll know it’s ready when you can poke it and it springs back slowly. I like to use the heel of my hand to push the dough away, then fold it back over itself repeatedly—this builds the gluten structure for those flaky layers.
Place the dough in a greased bowl, cover it with a clean kitchen towel, and let it rise in a warm, draft-free spot for 1-1.5 hours or until doubled in size. Real talk: if your kitchen is cold, place the bowl near a warm oven (turned off) to speed up the process.
Step 3: Roll Out the Dough and Add the Filling
Once the dough has risen, punch it down to release the air and turn it out onto a floured surface. Roll it into a 12×16-inch rectangle with a rolling pin, keeping the thickness as even as possible. Brush the surface lightly with 2 tbsp Olive Oil—this adds flavor and helps the layers separate as it bakes.
Sprinkle the 8 oz Mozzarella Cheese and 4 oz Provolone Cheese evenly over the dough, leaving a 1-inch border around the edges. Top with the 6 oz Pepperoni Slices, then sprinkle with 1 tsp Dried Oregano, 1 tsp Garlic Powder, and 0.5 tsp Red Pepper Flakes for that spicy kick. The cheese should melt beautifully into the dough, creating gooey pockets of flavor.
Step 4: Roll, Seal, and Bake to Golden Perfection
Starting from the long side, tightly roll the dough into a log, pinching the seam and the ends to seal in all that delicious filling. Place the log seam-side down on a baking sheet lined with parchment paper. Use a sharp knife to cut 3-4 diagonal slits across the top—this allows steam to escape and prevents cracking while baking.
Bake in a preheated 375°F oven for 25-30 minutes until the bread is golden brown and the cheese is bubbling out of the slits. Halfway through baking, brush the top with a bit more olive oil to enhance the browning. You’ll smell the irresistible aroma of baked pepperoni and cheese—your signal that it’s almost done.
Step 5: Finish with Parmesan and Serve Warm
Remove the bread from the oven and immediately sprinkle the top with 0.25 cup Parmesan Cheese. Let it cool for 5-10 minutes before slicing—this helps the filling set slightly so it doesn’t all ooze out when you cut into it.
Slice between the slits you made earlier and serve warm. Each piece should reveal those flaky, buttery layers with melty cheese and pepperoni peeking out. The outside will be crisp and golden, while the inside stays soft and packed with flavor. This is the kind of bread that disappears fast, so be ready to make another batch!
Pro Tips For Making Pepperoni Bread Recipe From Scratch
- Proof the Yeast: Always bloom your active dry yeast in warm (110°F) water with a pinch of sugar for 5-10 minutes until foamy—I learned this the hard way after my first few loaves refused to rise.
- Use Room-Temp Ingredients: Take your flour and water out of the fridge 30 minutes before mixing; cold ingredients make the dough sluggish and hard to work with.
- Skip Overloading Pepperoni: More than 1 cup of pepperoni per loaf makes the bread greasy and hard to seal—resist the urge to stuff it, even if it looks sparse.
- Brush with Butter: After baking, brush the top with melted butter for a softer crust; sounds simple, but it actually changes the outcome.
Pro Cooking Tips for Perfect Results
Dough Temperature Control
I always check my warm water with a thermometer—110°F is perfect for yeast activation. Too hot and you’ll kill the yeast; too cold and it won’t bloom. I learned this the hard way in Nonna’s kitchen. 🌡️
Layering Technique
When adding fillings, leave that 1-inch border religiously. I use King Arthur flour for dusting—it prevents sticking without altering the dough’s texture. Press the filling gently into the dough so it adheres during rolling.
Sealing the Log
Pinch the seam tightly and roll it seam-side down. I dampen the edge with water first for a better seal. The diagonal slits should be ¼-inch deep—deep enough to vent but not cut through to the filling.
Baking Position
Place your baking sheet on the middle rack for even browning. I rotate the pan 180° halfway through baking. That 375°F temperature is non-negotiable for perfect golden color.
Resting Period
Let it rest 5-10 minutes before slicing. I know it’s torture with that aroma filling your kitchen, but it prevents the filling from oozing out. That Parmesan topping melts beautifully during this time. 💡
Knife Choice
A serrated bread knife gives the cleanest slices. I run it under hot water between cuts. Use a gentle sawing motion—don’t press down or you’ll squish those beautiful layers we worked so hard to create.
Nutrition Facts
Frequently Asked Questions
Can I use a different type of cheese?
Try fontina or Monterey Jack for a milder flavor. For extra tang, mix in some Asiago. Just keep the total cheese weight similar for best results.
How do I prevent the filling from leaking?
Pinch the seam tightly when rolling and leave a 1-inch border. Chill the log for 15 minutes before baking to help set the filling.
Can I make this dough ahead of time?
Yes! Prepare the dough, let it rise, then refrigerate overnight. Punch it down and proceed with the recipe the next day. Cold dough may need 5-10 minutes to warm before rolling.

- Pina Colada Dip Recipe Red Lobster: Tropical Creaminess With Toasted Coconut - October 12, 2026
- Pickled Sweet Cherry Peppers Recipe Canning: Tangy Heat for Pantry Staples - October 12, 2026
- Peppercorn Sauce Recipe Vegan: Rich Umami Depth Without Cream - October 12, 2026