
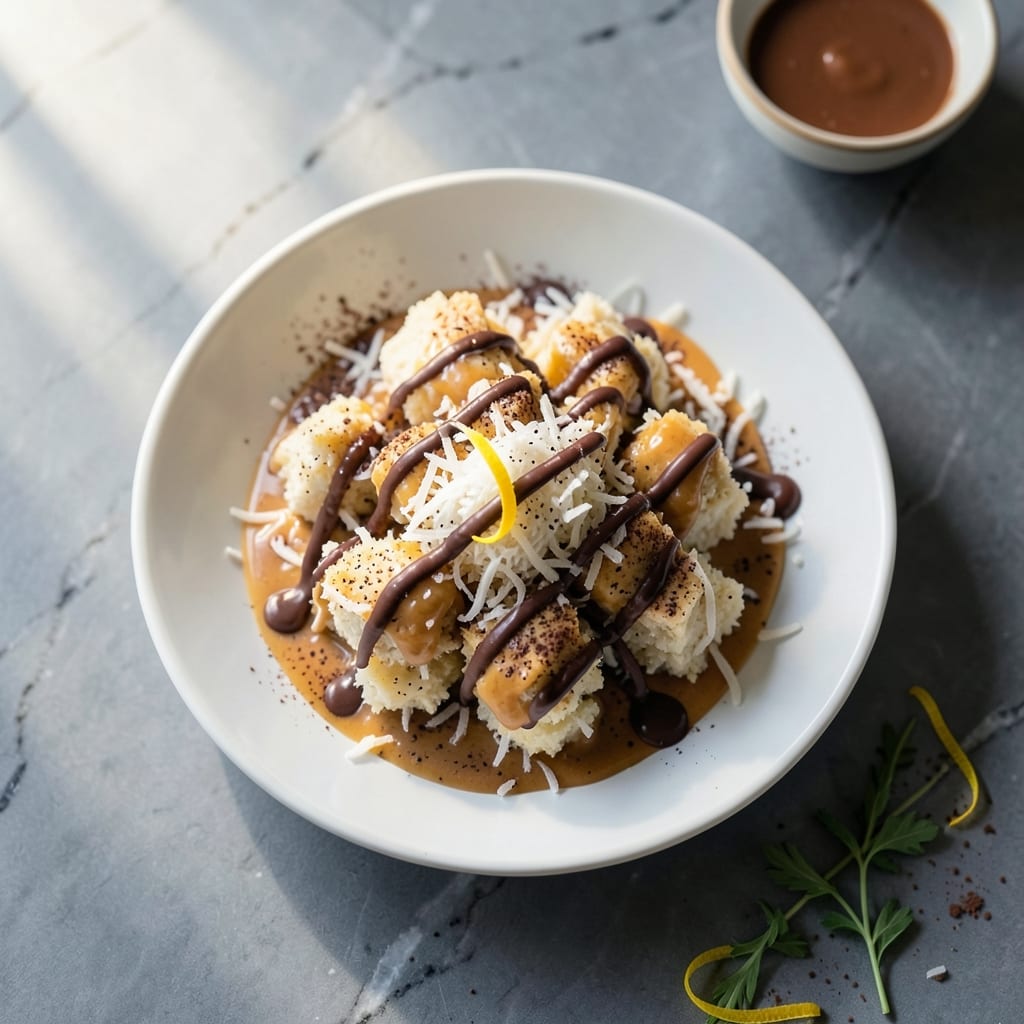
These no-bake coconut squares deliver elegant petit four results without turning on your oven. A simple mixture of coconut, condensed milk, and vanilla forms the base, chilled until firm before being cut into perfect bite-sized pieces.
The magic happens in the chocolate dip—a smooth coating that transforms each square into a sophisticated treat. I’ve perfected the ratio to ensure the chocolate sets quickly while maintaining a delicate snap with every bite.
What you get is a foolproof dessert that looks impressive but requires minimal effort. The coconut base stays chewy beneath its glossy chocolate shell, creating a texture contrast that’s hard to resist.
Ideal for parties, gifts, or an easy sweet fix. This method guarantees consistent, professional-quality results every time.
Ingredients for Petit Four Recipe No Bake
Nine ingredients for elegant, no-bake petit four squares with chocolate dip.
| Ingredient | Amount | Notes |
|---|---|---|
| Shredded Coconut 🥥 | 4 cups | Sweetened or unsweetened, flaked |
| Sweetened Condensed Milk 🥛 | 1 can | 14 oz can, full-fat |
| Vanilla Extract 🌿 | 1 tsp | Pure vanilla for best flavor |
| Salt 🧂 | ¼ tsp | Fine sea salt preferred |
| Semi-Sweet Chocolate 🍫 | 12 oz | Chips or bar, chopped |
| Coconut Oil 🫒 | 1 tbsp | For chocolate thinning |
| Heavy Cream 🥛 | 2 tbsp | Optional for glossier chocolate |
| Powdered Sugar 🧁 | 2 tbsp | For dusting finished squares |
| Almond Extract 🌰 | ¼ tsp | Optional for depth |
| Light Corn Syrup 🧈 | 1 tbsp | Keeps base chewy |
The coconut base needs good texture—Bob’s Red Mill or Let’s Do Organic shredded coconut has the right chew. Sweetened condensed milk is non-negotiable here (the canned kind, not evaporated). Eagle Brand is my go-to. Vanilla extract should be pure, not imitation, for that smooth depth. Skip the salt if your coconut is already sweetened enough (taste as you go).
No shredded coconut? Quick oats pulsed in a food processor work in a pinch (texture won’t be identical). Out of condensed milk? Caramelized sweetened milk (dulce de leche) adds a twist. Semi-sweet chocolate can be swapped for dark (60-70%) if you prefer less sweetness. Coconut oil substitute? Neutral oil like vegetable does the job, but loses the coconut aroma.
These keep beautifully in the fridge for 1 week or freezer for 3 months (layer with parchment). Chocolate sets faster in a cool kitchen. Dust with powdered sugar just before serving—keeps them looking fresh and elegant.
Why You’ll Love This Recipe
- No Oven Needed: Honestly, just mix, shape, and chill—no baking, no fuss.
- Coconut-Chocolate Bliss: The chewy coconut and rich chocolate coating make every bite ridiculously good.
- Gift or Snack: I pack these for potlucks or keep them in the fridge for a quick sweet fix.
- Budget-Friendly Batch: Five simple ingredients stretch into dozens of treats without breaking the bank.
Step-by-Step Instructions for Chocolate-Dipped Coconut Squares
This no-bake method delivers perfect texture with minimal effort and maximum flavor.
Step 1: Combine the Coconut Base
In a large bowl, stir together the 4 cups Shredded Coconut, 1 can Sweetened Condensed Milk, 1 tsp Vanilla Extract, 0.25 tsp Salt, and 1 tbsp Light Corn Syrup until evenly coated. I use a silicone spatula for this—it scrapes the bowl clean and handles the sticky mixture better than a spoon.
The mixture will be thick and slightly glossy from the condensed milk. If using 0.25 tsp Almond Extract, add it now for a subtle nutty depth. Press the combination firmly into a parchment-lined 8×8-inch baking dish to create an even layer with no gaps.
Step 2: Chill Until Firm
Cover the dish with plastic wrap pressed directly onto the surface to prevent a skin from forming. Refrigerate for at least 2 hours, or until the base is completely set and holds its shape when pressed with a finger.
Here’s the thing—this resting time is non-negotiable. If you try to cut too soon, the squares will crumble. I often make this the night before serving to let the flavors meld completely. The coconut absorbs the condensed milk during this time, transforming from loose shreds into a cohesive, chewy base.
Step 3: Prepare the Chocolate Coating
In a microwave-safe bowl, combine the 12 oz Semi-Sweet Chocolate, 1 tbsp Coconut Oil, and 2 tbsp Heavy Cream. Microwave in 20-second bursts, stirring between each, until 80% melted. The residual heat will finish the melting process.
Let the chocolate mixture cool for 5 minutes—it should be slightly thick but still pourable. If it’s too thin, the coating won’t set properly; if too thick, it won’t adhere smoothly. This is the moment that matters: the temperature needs to be just right for that glossy finish.
Step 4: Dip and Set the Petit Fours
Cut the chilled coconut base into 1-inch squares. Using a fork, dip each square into the chocolate mixture, turning to coat all sides. Let excess drip off for 5 seconds before placing on a parchment-lined tray.
Return the tray to the refrigerator for 30 minutes to allow the chocolate to set completely. Don’t skip this (I learned the hard way)—premature handling will leave fingerprint marks. The chocolate should be firm to the touch with a matte sheen.
Just before serving, dust lightly with 2 tbsp Powdered Sugar for a professional finish. The contrast between the snowy white sugar and dark chocolate is visually stunning, and that first bite delivers the perfect balance of chewy coconut and rich chocolate.
Pro Tips For Making Petit Four Recipe No Bake
- Toast the Coconut: Lightly toast the shredded coconut in a dry pan for 2-3 minutes before mixing. I learned this the hard way—it adds a nutty depth that raw coconut just can’t match.
- Warm the Condensed Milk: Microwave the sweetened condensed milk for 15-20 seconds to loosen it. Sounds weird, but it works—it blends into the coconut way more evenly.
- Chill Before Cutting: Let the mixture set in the fridge for at least 2 hours, or it’ll crumble when you try to slice it. After burning three batches, I finally figured out patience is the thing that matters most here.
- Use a Double Boiler: Melt the semi-sweet chocolate gently over simmering water to avoid seizing. My grandmother swore by this, and she was right—direct heat turns chocolate grainy in seconds.
Serving Suggestions for This Dish
Plating for Elegance
Arrange these squares on a white porcelain platter for maximum visual impact. The dark chocolate and coconut contrast beautifully against a light background. I space them ½ inch apart to prevent sticking. 💫
Garnish Ideas
Sprinkle with toasted coconut flakes or edible gold leaf for special occasions. A few fresh raspberries add a pop of color and tart contrast. The powdered sugar dusting is non-negotiable—it completes the petit four aesthetic.
Serving Temperature
Serve chilled but not ice-cold—take them out 10 minutes before serving. This softens the chocolate slightly for easier biting. The coconut base should remain firm but yield slightly when pressed.
Portion Control
These are rich, so 2-3 squares per person is perfect for dessert. For parties, display on a tiered stand to encourage grazing. I always include small parchment squares for guests to handle them easily.
Beverage Pairings
A chilled espresso or dry sparkling wine cuts through the sweetness beautifully. For non-alcoholic options, mint iced tea provides a refreshing contrast. The bitter notes balance the chocolate perfectly. ✨
Nutrition Facts
Frequently Asked Questions
Can I use unsweetened coconut instead?
Yes, but add 2-3 tbsp extra powdered sugar to balance the flavor. Unsweetened coconut can make the base taste flat without adjustment.
Why did my chocolate coating turn dull?
This happens if the chocolate overheats or cools too quickly. Melt in 20-second bursts and let cool slightly before dipping for a glossy finish.
How long can I store these?
They keep in an airtight container for up to 1 week refrigerated or 3 months frozen. Thaw in the fridge overnight before serving.
Can I skip the corn syrup?
It helps maintain chewiness, but you can omit it. The squares will be slightly firmer but still delicious. Use 1 extra tbsp condensed milk as a substitute.

- Pina Colada Dip Recipe Red Lobster: Tropical Creaminess With Toasted Coconut - October 12, 2026
- Pickled Sweet Cherry Peppers Recipe Canning: Tangy Heat for Pantry Staples - October 12, 2026
- Peppercorn Sauce Recipe Vegan: Rich Umami Depth Without Cream - October 12, 2026