
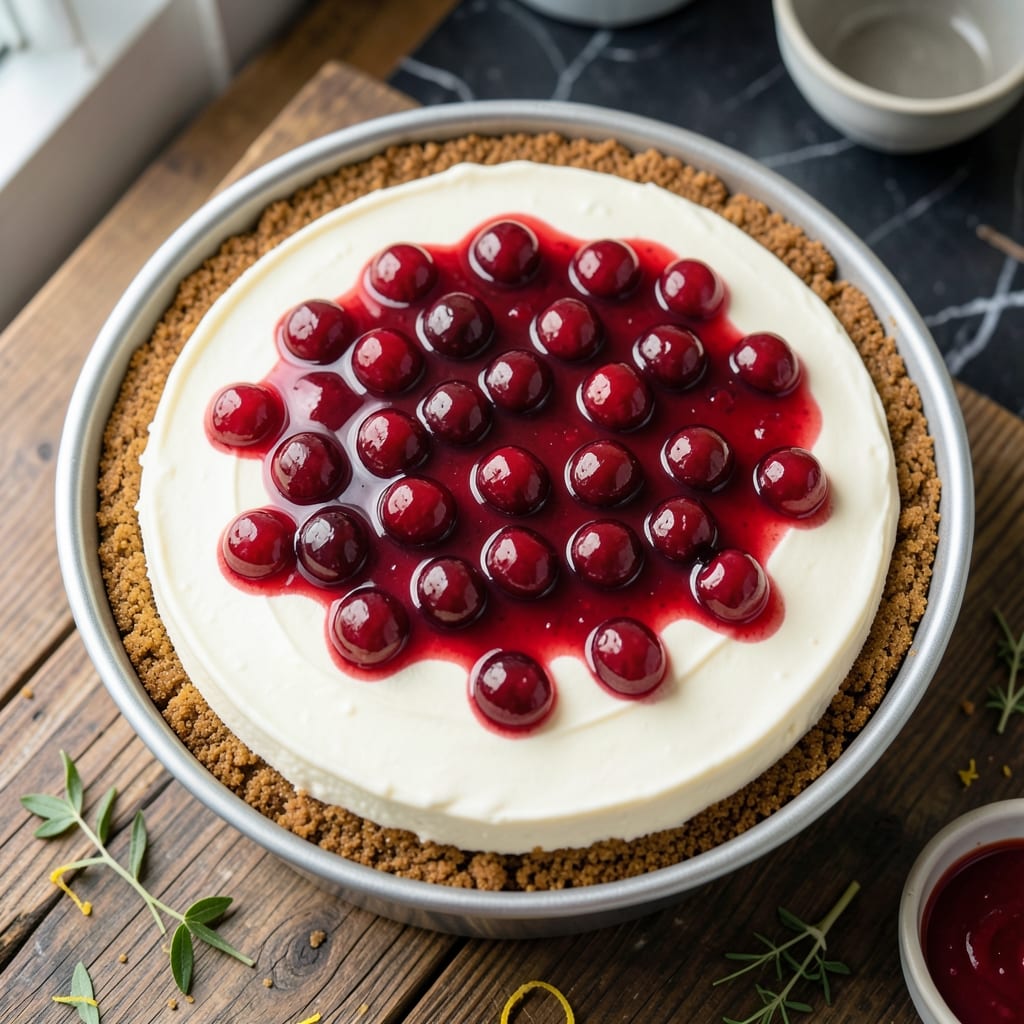
This no-bake cherry cheesecake delivers velvet-smooth texture without turning on the oven. The graham cracker crust provides the perfect buttery base for the creamy filling, while the cherry topping adds just the right amount of fruity contrast.
Using Philadelphia cream cheese ensures a rich, consistent texture that sets beautifully in the refrigerator. The key is allowing each layer to chill completely before adding the next—this prevents mixing and creates clean, distinct layers in every slice.
The result is a dessert that looks as impressive as it tastes, with a firm yet creamy filling that holds its shape when sliced. It’s ideal for warm weather or when you need a make-ahead treat with minimal effort.
Perfect for potlucks, holidays, or any occasion that calls for a showstopping dessert.
Ingredients for Philadelphia Cream Cheese Cherry Cheesecake Recipe No Bake
Nine simple ingredients create this impressive no-bake dessert with layers of flavor.
| Ingredient | Amount | Notes |
|---|---|---|
| Graham Cracker Crumbs 🍪 | 2 cups | About 14 full crackers crushed |
| Unsalted Butter 🧈 | ½ cup | Melted for crust binding |
| Philadelphia Cream Cheese 🧀 | 32 oz | Four 8-oz blocks, softened |
| Granulated Sugar 🍚 | 1 ½ cups | Divided for filling and topping |
| Vanilla Extract 🌿 | 2 tsp | Pure vanilla for best flavor |
| Heavy Whipping Cream 🥛 | 1 cup | Cold, for whipped topping |
| Canned Cherry Pie Filling 🍒 | 2 cans | 21 oz each, drained slightly |
| Lemon Juice 🍋 | 1 tbsp | Freshly squeezed preferred |
| Salt 🧂 | ¼ tsp | Fine grain for balance |
| Confectioners Sugar 🍬 | ¼ cup | For dusting finished cheesecake |
The cream cheese is non-negotiable here—Philadelphia brand gives that perfect velvety texture that sets just right. Don’t skimp on full-fat either (trust me on this one). For the graham crackers, Honey Maid or store-brand both work. I grab mine from Walmart in the baking aisle. Make sure your butter is unsalted so you control the sweetness level.
No Philadelphia cream cheese? Regular cream cheese works but might be slightly less firm. Short on cherry pie filling? Luck Leaf or Comstock are solid store brands—just drain the excess liquid. Heavy cream can be swapped with Cool Whip (thawed) for a lighter texture. The vanilla should be pure extract, not imitation, for the best flavor depth.
Assemble in a springform pan for easy release. Keeps covered in the fridge for 5 days—if it lasts that long. For best texture, let it sit at room temperature 20 minutes before slicing (don’t skip this part).
Why You’ll Love This Recipe
- I’ll be real: I love that I can prep this the night before and it tastes even better after sitting in the fridge overnight.
- No Oven Needed: I just mix, chill, and serve—no baking required, which means no heating up the kitchen on a hot day.
- Creamy Cherry Bliss: The Philadelphia cream cheese makes it so rich and smooth, with that pop of cherry topping cutting through the sweetness.
- Crowd Pleaser: Honestly, I’ve brought this to potlucks, birthdays, even a random Tuesday dessert night and it disappears every time.
Step-by-Step Instructions for Philadelphia Cream Cheese Cherry Cheesecake No Bake
Here’s how to build this no-bake cheesecake with a perfect graham cracker base and creamy filling.
Step 1: Create the Graham Cracker Crust
Combine the 2 cups Graham Cracker Crumbs with the 0.5 cup Unsalted Butter in a bowl, mixing until the crumbs are evenly moistened and resemble wet sand. Press this mixture firmly into the bottom of a 9-inch springform pan using a measuring cup or glass to compact it tightly.
Chill the crust in the refrigerator for 15 minutes to set. This prevents it from crumbling when you add the filling. The crust should hold together when pressed but not be rock-hard.
Step 2: Whip the Cream Cheese Filling
In a large mixing bowl, beat the 32 oz Philadelphia Cream Cheese until completely smooth with no lumps. Add 1.5 cups Granulated Sugar, 2 tsp Vanilla Extract, and 0.25 tsp Salt, mixing until fully incorporated and creamy.
Scrape down the sides of the bowl occasionally to ensure everything blends evenly. The mixture should be silky and light, with no visible sugar grains—this takes about 3-4 minutes on medium speed.
Step 3: Fold in Whipped Cream and Assemble
In a separate bowl, whip the 1 cup Heavy Whipping Cream and 1 tbsp Lemon Juice until stiff peaks form. Gently fold this into the cream cheese mixture using a spatula, being careful not to deflate the whipped cream. The filling should be smooth, light, and fluffy.
Spoon the filling over the chilled crust and smooth the top with an offset spatula. Tap the pan gently on the counter to remove any air bubbles for a perfectly level surface.
Step 4: Chill and Add the Cherry Topping
Refrigerate the cheesecake for at least 6 hours (overnight is best) to allow it to set completely. When ready to serve, spread the 2 cans Canned Cherry Pie Filling evenly over the top, leaving a small border if desired.
The cheesecake is ready when the filling is firm to the touch and doesn’t jiggle when moved. The cherry topping should glisten slightly but not be watery.
Step 5: Finish with Confectioners Sugar
Just before serving, dust the top lightly with 0.25 cup Confectioners Sugar using a fine-mesh sieve. This adds a delicate sweetness and a professional touch to the presentation.
Slice with a warm, wet knife for clean cuts, wiping the blade between each slice. The cheesecake should hold its shape but still be creamy and velvety smooth.
Pro Tips For Making Philadelphia Cream Cheese Cherry Cheesecake Recipe No Bake
- Chill the Crust: Press the graham cracker crust into the pan and refrigerate for at least 30 minutes before adding the filling—I learned this the hard way after my crust crumbled into the cheesecake layer.
- Soften the Cream Cheese: Let the Philadelphia cream cheese sit out for 1-2 hours until fully soft, or microwave in 10-second bursts. Cold cream cheese leaves lumps no matter how hard you mix.
- Skip the Overmixing: Fold the cherry topping in just until combined, or you’ll end up with a pink, runny mess instead of distinct swirls.
- Use a Springform Pan: A springform pan makes removal effortless and gives clean slices—after struggling with a pie dish once, I never went back.
Essential Equipment for This Dish
Springform Pan
A 9-inch springform pan is absolutely essential for this no-bake cheesecake. The removable sides make it easy to release the dessert without damaging the delicate crust or cream layers. I recommend Wilton or Cuisinart brands for durability. 💡
Electric Mixer
You’ll need a stand mixer or hand mixer to achieve that ultra-smooth cream cheese filling. A stand mixer like KitchenAid gives you the control to beat the cream cheese thoroughly without overheating it. Beat on medium speed for best results.
Mixing Bowls
Have at least 2 large mixing bowls ready—one for the crust, one for the filling. I prefer stainless steel or glass because they don’t absorb odors. A third bowl comes in handy for whipping the cream separately.
Offset Spatula
An offset spatula is my secret weapon for spreading the filling evenly and smoothing the top. The angled blade helps you reach the edges without disturbing the crust. Ateco makes excellent professional-quality ones that last forever.
Fine-Mesh Sieve
For that professional bakery finish, dust the confectioners sugar through a fine-mesh sieve. This ensures even distribution and prevents clumps. I keep mine from OXO in my baking drawer—it’s perfect for this task. ✨
Measuring Cups
Accurate measurements matter, especially for the crust. Use dry measuring cups for the graham cracker crumbs and liquid measuring cups for the butter and cream. A full set of nested cups makes the process much smoother.
Nutrition Facts
Frequently Asked Questions
Can I use a different pan if I don’t have a springform?
A regular pie dish works, but you’ll need to line it with parchment for easy removal. A springform is best for clean slices.
How long can this be stored in the fridge?
It stays fresh for 5 days covered. For best texture, let it sit at room temperature for 20 minutes before serving.
Why did my cheesecake not set?
It likely didn’t chill long enough. Ensure it refrigerates for at least 6 hours, or overnight for perfect firmness.
Can I use fresh cherries instead of canned?
Yes, but cook them down with 1/4 cup sugar and 1 tbsp cornstarch to thicken first.

- Pina Colada Dip Recipe Red Lobster: Tropical Creaminess With Toasted Coconut - October 12, 2026
- Pickled Sweet Cherry Peppers Recipe Canning: Tangy Heat for Pantry Staples - October 12, 2026
- Peppercorn Sauce Recipe Vegan: Rich Umami Depth Without Cream - October 12, 2026