
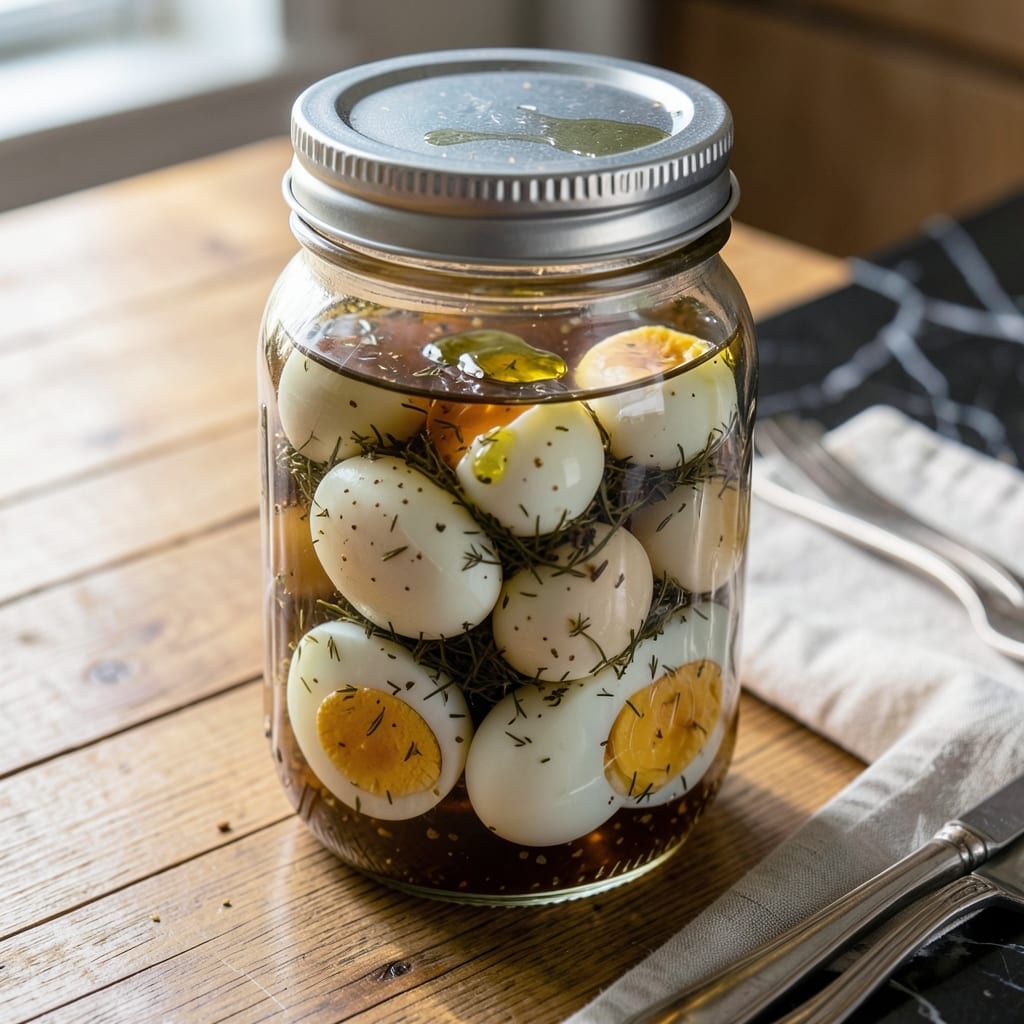
Transform leftover pickle juice into a flavorful snack with this simple pickling method for hard-boiled eggs.
I developed this technique to reduce waste while creating a tangy, protein-packed treat. The process requires no special equipment—just eggs, brine, and a few hours of patience.
By the time they’re ready, you’ll have firm yet tender eggs with a distinctive dill flavor that intensifies over time. The longer they soak, the more pronounced the taste becomes.
Perfect for meal prep or quick snacks, this method turns everyday ingredients into something special. Here’s how to make them.
Ingredients for Pickled Egg Recipe Using Pickle Juice
Simple ingredients transform leftover brine into tangy, protein-rich pickled eggs in hours.
| Ingredient | Amount | Notes |
|---|---|---|
| Hard-Boiled Eggs 🥚 | 8 whole | Peeled and cooled completely |
| Dill Pickle Juice 🥒 | 2 cups | From dill pickle jar, strained |
| White Vinegar 💧 | ½ cup | For acidity balance |
| Granulated Sugar 🍚 | 1 tbsp | Adjust to taste preference |
| Pickling Spice 🌿 | 1 tsp | Optional for complexity |
| Dried Dill Weed 🍃 | 1 tsp | Enhances pickle flavor |
| Garlic Cloves 🧄 | 3 cloves | Smashed for infusion |
| Yellow Mustard Seeds 🌶️ | 1 tsp | Adds subtle spice |
| Red Pepper Flakes 🔥 | ½ tsp | For mild heat |
| Bay Leaves 🍃 | 2 whole | For aromatic depth |
| Black Peppercorns 🌶️ | 1 tsp | Whole for infusion |
| Kosher Salt 🧂 | ½ tsp | Optional if brine is salty |
The pickle juice is your foundation—use high-quality dill pickle brine like Claussen or Vlasic for best results. Look for juice with visible dill and garlic pieces, indicating robust flavor. The vinegar should be distilled white vinegar (5% acidity) for consistent pickling. For the eggs, fresh large eggs hard-boil more evenly than older ones. Most grocery stores carry these items in the condiments aisle.
No pickle juice? Substitute with 2 cups water + 1 cup white vinegar + 2 tbsp salt + dill seasoning. Short on time? Pre-boiled eggs from the store work fine—just ensure they’re peeled. For heat lovers, increase red pepper flakes to 1 tsp. The sugar can be omitted entirely for a more tart profile, or replaced with honey (though this will slightly alter the flavor).
Store in a clean, airtight container in the refrigerator. They’ll keep for 3-4 weeks, with flavor intensifying daily. For best texture, wait at least 24 hours before eating. Perfect for meal prep—grab one for a quick, protein-packed snack anytime.
Why You’ll Love This Recipe
- 5-Minute Prep: I just dump the hard-boiled eggs in leftover pickle juice, add a splash of vinegar and sugar, and they’re good to go.
- Tangy Punch: That dill pickle juice gives them a sharp, briny kick that’s way more interesting than plain eggs.
- Picnic Staple: I pack these for potlucks or lunchboxes—they keep for weeks and everyone devours them.
- Zero Waste: Honestly, I love using up that last bit of pickle juice instead of tossing it.
Step-by-Step Instructions for Pickled Eggs Using Pickle Juice
This method transforms ordinary eggs into tangy, flavorful treats with minimal effort.
Step 1: Prepare the Hard-Boiled Eggs
Ensure the 8 whole Hard-Boiled Eggs are fully cooled and peeled. I always run them under cold water immediately after boiling to stop the cooking process and make peeling easier. This prevents that unappetizing green ring around the yolk.
Gently place the peeled eggs in a clean, sterilized quart-sized jar. The jar must be large enough to accommodate all the eggs and the brine without overflowing. A wide-mouth jar makes adding and removing the eggs much simpler.
Step 2: Combine the Brine Ingredients
In a saucepan, combine the 2 cups Dill Pickle Juice, 0.5 cup White Vinegar, 1 tbsp Granulated Sugar, and 0.5 tsp Kosher Salt. Heat over medium heat just until the sugar and salt dissolve completely, stirring occasionally.
This heating step ensures the sugar and salt integrate fully into the brine, which is critical for consistent flavor. Don’t let the mixture boil—just warm it enough to dissolve the solids. Remove from heat once the solution is clear.
Step 3: Add the Aromatics and Spices
To the warm brine, add the 1 tsp Pickling Spice, 1 tsp Dried Dill Weed, 3 cloves Garlic Cloves (smashed), 1 tsp Yellow Mustard Seeds, 0.5 tsp Red Pepper Flakes, and 2 whole Bay Leaves. Stir well to distribute the spices evenly.
The garlic cloves should be smashed to release their oils, but left whole to prevent overpowering the brine. The 1 tsp Black Peppercorns can be added whole—they’ll infuse the brine with subtle heat without making it spicy. Let the mixture steep for 5 minutes off the heat.
Step 4: Pour the Brine and Seal
Carefully pour the warm brine over the eggs in the jar, ensuring all the eggs are fully submerged. Use a spoon to gently press down on the eggs if needed. The liquid should cover the eggs by at least ½ inch to ensure even pickling.
Seal the jar tightly and let it cool to room temperature. This cooling period allows the flavors to begin penetrating the eggs immediately. Once cooled, refrigerate the jar for at least 12 hours before sampling.
Step 5: Refrigerate and Wait for Full Flavor Development
Store the jar in the refrigerator for a minimum of 24 hours for the best flavor. I’ve found that 48 hours yields the optimal balance of tang and depth. The eggs will develop a firm texture and absorb the complex flavors from the brine.
These pickled eggs will keep in the refrigerator for up to 2 weeks. The longer they sit, the more intense the flavor becomes, but the texture remains pleasingly crisp. Serve chilled as a snack, in salads, or alongside charcuterie for a tangy contrast.
Pro Tips For Making Pickled Egg Recipe Using Pickle Juice
- Peel Under Water: Run hard-boiled eggs under cold water while peeling—the shells slide right off and you won’t lose half the white to stubborn bits. I learned this the hard way after ruining a dozen eggs with my impatience.
- Use Fresh Pickle Juice: Skip the jar that’s been sitting in the fridge for months—fresh pickle juice has more acidity and flavor, which actually changes the outcome. Sounds weird, but it works.
- Simmer the Brine: Heat the pickle juice, vinegar, sugar, and spices just until the sugar dissolves, then cool completely before adding eggs. Hot brine cooks the yolks and turns them that unappetizing green-gray.
- Add a Splash More Vinegar: If your pickle juice is mild, boost it with an extra ¼ cup white vinegar for that tangy bite. My grandmother swore by this, and she was right.
Dietary Considerations for This pickled egg recipe using pickle juice
Low-Carb Friendly
These pickled eggs contain virtually no carbs, making them perfect for keto and low-carb diets. Each egg has less than 1g net carbs, so you can enjoy them guilt-free. I often pack them for a protein boost during busy days. 💪
Gluten-Free Naturally
All ingredients in this recipe are inherently gluten-free, including the brine and spices. Just ensure your pickle juice comes from a gluten-free brand like Heinz or Vlasic, as some may contain additives. No modifications needed for gluten-sensitive individuals.
High-Protein Snack
With about 6g of protein per egg, this is an excellent way to increase your daily intake. The pickling process preserves all the natural protein, making these ideal for post-workout or meal prep. I love keeping a jar in my fridge for quick, healthy snacks.
Sodium Considerations
Pickle juice is naturally high in sodium, with each serving providing about 200-300mg. If you’re watching your intake, I recommend reducing the soaking time to 24-48 hours for milder flavor and less sodium absorption. 💡
Dairy-Free and Vegan-Friendly Brine
The brine itself is completely dairy-free and vegan, though obviously the eggs are not. For a plant-based version, you could use pickled tofu or vegetables in the same brine. The flavor profile works beautifully with many alternatives.
Allergen Information
These contain only eggs as a common allergen. The brine ingredients (vinegar, spices, garlic) are typically safe for most dietary restrictions. Always check pickle juice labels for potential sulfite or mustard allergens if sensitive.
Nutrition Facts
Frequently Asked Questions
How long do I need to wait before eating them?
Wait at least 12 hours for noticeable flavor, but 24-48 hours yields the best tangy taste. The eggs will continue developing flavor for up to 2 weeks in the fridge.
Can I reuse the pickle juice for multiple batches?
Yes, but the flavor weakens with each use. For best results, use fresh brine for new batches. The acidity remains safe, but the dill and garlic notes fade over time.
Why did my eggs turn rubbery?
Overcooking during hard-boiling causes this texture. Ensure eggs are cooked for exactly 9-12 minutes then shocked in ice water. Older eggs also peel easier but may be slightly tougher.
Can I add other vegetables to the jar?
Try adding onions, carrots, or jalapeños. They’ll absorb the same tangy flavor and complement the eggs. Just ensure all items are fully submerged in brine.

- Pina Colada Dip Recipe Red Lobster: Tropical Creaminess With Toasted Coconut - October 12, 2026
- Pickled Sweet Cherry Peppers Recipe Canning: Tangy Heat for Pantry Staples - October 12, 2026
- Peppercorn Sauce Recipe Vegan: Rich Umami Depth Without Cream - October 12, 2026