
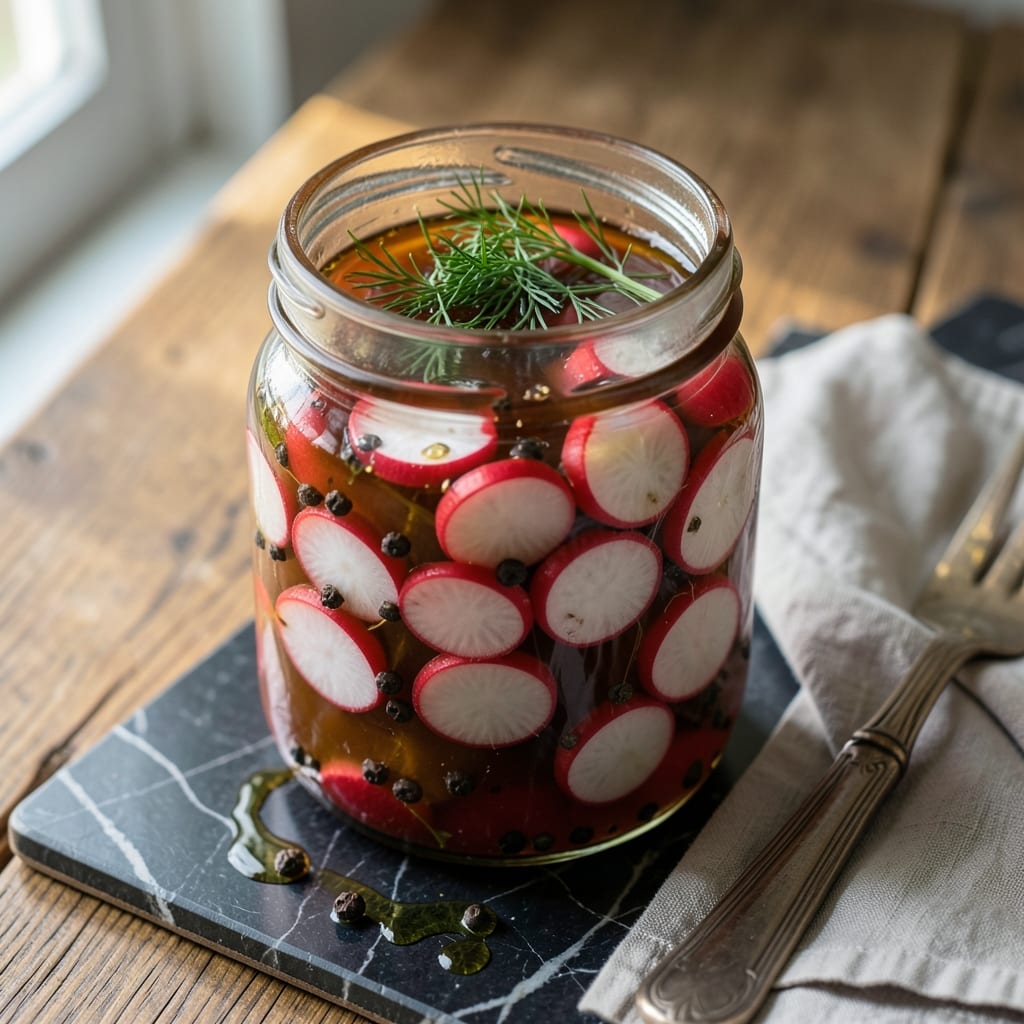
This quick-pickle method transforms radishes into a vibrant, tangy condiment in under 30 minutes. The apple cider vinegar base delivers bright acidity that complements the crisp radish texture.
No special equipment is needed—just combine vinegar, sugar, and salt with sliced radishes in a jar. The brine infuses the radishes with bold flavor while maintaining their signature crunch.
Perfect for topping tacos, salads, or charcuterie boards, these pickles add a pop of color and zesty contrast to any dish. They keep well refrigerated for up to 3 weeks.
This foolproof technique ensures consistent results every time, with minimal hands-on effort.
Ingredients for Pickled Radish Recipe Apple Cider Vinegar
These bright, tangy ingredients create a foolproof quick-pickle with minimal effort.
| Ingredient | Amount | Notes |
|---|---|---|
| Radishes 🥬 | 1 lb | Thinly sliced, about 8 medium |
| Apple Cider Vinegar 🍏 | 1 ½ cups | Raw, unfiltered preferred |
| Granulated Sugar 🍚 | 2 tbsp | Adjust to taste preference |
| Kosher Salt 🧂 | 1 tbsp | Diamond Crystal brand recommended |
| Cold Water 💧 | ½ cup | Filtered or distilled |
| Black Peppercorns 🌶️ | 1 tsp | Lightly crushed for brine |
| Mustard Seeds 🌿 | 1 tsp | Yellow or brown variety |
| Red Pepper Flakes 🔥 | ½ tsp | Optional for heat |
| Fresh Dill 🌿 | 2 tbsp | Chopped, stems removed |
| Garlic Cloves 🧄 | 2 cloves | Thinly sliced lengthwise |
The radishes are the star—look for firm, vibrant red bunches with fresh green tops at Whole Foods or your local farmers market. The apple cider vinegar must be raw and unfiltered (like Bragg brand) for that complex, fruity acidity. For salt, Diamond Crystal kosher dissolves cleanly without metallic aftertaste. Mustard seeds add subtle depth, but skip if you prefer a simpler profile.
No apple cider vinegar? White wine vinegar works but lacks depth—add a pinch of brown sugar to compensate. Rice vinegar at half the amount offers a milder alternative. For sugar, turbinado or coconut sugar add interesting notes. Short on radishes? Daikon or turnips pickle beautifully with the same brine. The dill can be swapped for fresh tarragon if you’re feeling fancy.
These keep refrigerated for 3 weeks—though the crunch softens slightly after 10 days. Store in a clean glass jar with a tight lid. Brine can be reused once for a second batch (boil 5 minutes first). Perfect for taco nights or charcuterie spreads.
Why You’ll Love This Recipe
- I’ll be real: I’ve kept a jar in the fridge for weeks, and they only get better the longer they sit.
- 5-Minute Prep: I slice the radishes thin, mix the vinegar, sugar, and salt with water, and that’s it—no cooking, no fuss.
- Tangy Crunch: The apple cider vinegar gives them this bright, zingy kick that’s still balanced by the radishes’ natural peppery bite.
- Taco Night Hero: Honestly, these pickled radishes are my secret for cutting through rich carnitas or fatty pork belly in any dish.
Step-by-Step Instructions for Pickled Radishes with Apple Cider Vinegar
This streamlined brine method delivers crisp, tangy radishes in minimal time with maximum flavor.
Step 1: Prepare the Radishes and Aromatics
Thinly slice the 1 lb Radishes into uniform rounds, about ⅛-inch thick, using a sharp knife or mandoline for consistent texture. Uniform slices ensure even pickling and professional presentation. Chop the 2 tbsp Fresh Dill finely, discarding any tough stems.
Thinly slice the 2 cloves Garlic Cloves lengthwise into slivers. Lightly crush the 1 tsp Black Peppercorns with the flat side of your knife to release their aroma. This preparation maximizes the infusion of flavors into the brine.
Step 2: Create the Pickling Brine
In a medium saucepan, combine the 1.5 cups Apple Cider Vinegar, 2 tbsp Granulated Sugar, 1 tbsp Kosher Salt, 0.5 cup Cold Water, 1 tsp Mustard Seeds, and 0.5 tsp Red Pepper Flakes. The raw, unfiltered vinegar provides depth and complexity to the final product.
Bring the mixture to a gentle simmer over medium heat, stirring just until the sugar and salt dissolve completely. Avoid boiling vigorously, as this can cause the vinegar to evaporate and alter the brine’s acidity. Remove from heat once the solution is clear and homogeneous.
Step 3: Combine and Begin Pickling Process
Pack the sliced radishes tightly into clean, heatproof jars or containers. Distribute the chopped dill, garlic slivers, and crushed peppercorns evenly among the jars, tucking them between the radish slices. This ensures every bite has balanced flavor.
Carefully pour the hot brine over the radishes, completely submerging them. Use a spoon to press down gently, removing any air bubbles. The radishes should be fully covered by liquid to prevent spoilage and ensure even pickling.
Step 4: Cool and Refrigerate for Quick Results
Let the jars cool to room temperature, about 30-45 minutes. This gradual cooling prevents the glass from cracking and allows the flavors to begin developing. You’ll notice the radishes start to soften slightly and the brine takes on a faint pink hue.
Once cooled, seal the jars and refrigerate. For quick pickling, the radishes will be ready in as little as 4 hours, though 24 hours yields optimal flavor development. The longer they sit, the more pronounced the tang and spice become.
Store in the refrigerator for up to 1 month. The radishes will maintain their crisp texture and vibrant color throughout this period, making them a reliable addition to sandwiches, salads, or charcuterie boards.
Pro Tips For Making Pickled Radish Recipe Apple Cider Vinegar
- Slice Evenly: Cut radishes into uniform 1/4-inch slices so they pickle at the same rate—no one wants half-crunchy, half-soggy bites. I learned this the hard way after my first batch had wild texture differences.
- Dissolve Sugar First: Heat the vinegar, sugar, and salt just until the granules disappear, then cool before adding radishes. Sounds fussy, but it prevents grainy brine that ruins the texture.
- Skip the Tap: Use cold filtered or bottled water for the brine—chlorine in tap water can dull the radishes’ color and flavor. After a few lackluster batches, I finally made the switch.
- Wait 24 Hours: Let them sit in the fridge for a full day before tasting. I was skeptical until I tried it—radishes mellow and absorb the vinegar’s tang much better after a patient overnight rest.
Creative Variations of These Flavors
Sweet & Spicy Twist
Add 1 tbsp honey or maple syrup to the brine for a sweet-tangy balance. Boost heat with 1 sliced jalapeño or ½ tsp cayenne pepper. This variation pairs perfectly with grilled meats or sharp cheeses. 🌶️
Asian-Inspired Flavor
Swap apple cider vinegar for rice vinegar (use 1 cup), and add 1 tbsp grated ginger, 2 sliced scallions, and 1 star anise pod to the brine. Ideal for topping ramen or banh mi sandwiches.
Herb-Forward Profile
Replace dill with 2 tbsp fresh thyme or rosemary, and add 1 bay leaf to the brine. The earthy notes complement roasted vegetables or cheese platters beautifully. I love this with aged cheddar.
Smoky Chipotle Version
Stir 1 tsp smoked paprika and 1 canned chipotle pepper (minced) into the brine. The smoky depth works wonderfully with Mexican dishes or barbecue. This is my go-to for taco nights. 🔥
Citrus Zing
Add 1 strip of orange or lemon peel (removed after 24 hours) and ½ tsp coriander seeds to the brine. The bright citrus notes elevate seafood dishes or light salads.
Garlic Lover’s Batch
Double the garlic to 4 cloves and add 1 tsp garlic powder to the brine. Perfect for garlic bread toppings or pairing with bold flavors like blue cheese. The aroma is irresistible.
Nutrition Facts
Frequently Asked Questions
How long do these pickles stay crisp?
They keep their signature crunch for about 10 days in the fridge. After that, the texture softens slightly but remains delicious for up to 3 weeks.
Can I reuse the pickling brine?
Yes! Boil the brine for 5 minutes to sterilize, then reuse it once for a fresh batch. The flavors will be slightly muted the second time.
What if my radishes turn mushy?
This usually means they sat too long in the brine. Stick to the 24-hour minimum for best texture. Slicing them too thin can also cause softness.
Do I need special jars?
Any clean, heatproof glass jar with a tight lid works. Mason jars are ideal, but repurposed pasta sauce jars are fine too. Just ensure they’re spotless.

- Pina Colada Dip Recipe Red Lobster: Tropical Creaminess With Toasted Coconut - October 12, 2026
- Pickled Sweet Cherry Peppers Recipe Canning: Tangy Heat for Pantry Staples - October 12, 2026
- Peppercorn Sauce Recipe Vegan: Rich Umami Depth Without Cream - October 12, 2026