
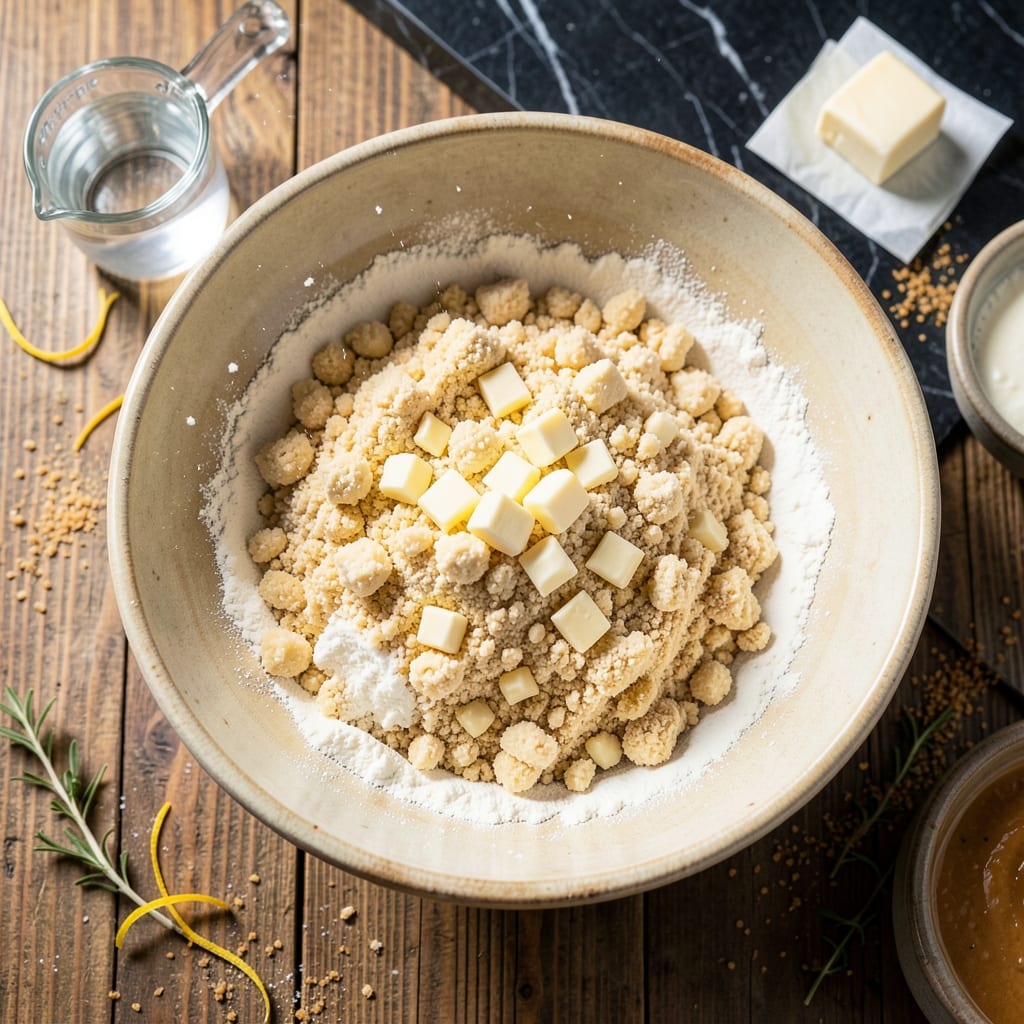
This Bisquick crust delivers flaky results without the fuss of traditional pastry. I developed this method for busy bakers who want homemade quality with minimal effort.
The secret is using cold ingredients and handling the dough gently. Bisquick provides the perfect base, while a touch of vinegar tenderizes the gluten for that coveted flaky texture.
You’ll have a golden, crisp crust ready in 15 minutes of prep time. It works for both sweet and savory pies, making it a versatile shortcut for any occasion.
No rolling pin required—just press the dough into your pan for an easy, foolproof result. Let’s get started.
Ingredients for Pie Crust Recipe Using Bisquick
Bisquick, butter, and a secret splash of vinegar make this no-fuss crust
| Ingredient | Amount | Notes |
|---|---|---|
| Bisquick Baking Mix 🥣 | 2 cups | Cold, straight from the fridge |
| Cold Water 💧 | ⅓ cup | Ice cold for flakiness |
| White Vinegar 🍶 | 1 tsp | Tenderizes the gluten strands |
| Unsalted Butter 🧈 | ½ cup | Cold and cubed into small pieces |
| All-Purpose Flour 🌾 | ¼ cup | For dusting work surface |
| Granulated Sugar 🍚 | 1 tsp | Optional for sweet crusts |
| Salt 🧂 | ¼ tsp | Fine grain for even distribution |
| Ground Cinnamon 🌿 | ¼ tsp | Optional for sweet applications |
The Bisquick is your foundation here—grab the original formula from any grocery store. Cold is critical: keep the mix in the fridge until you’re ready to use it. For the butter, Land O’Lakes or Cabot are solid choices (unsalted so you control the salt level). Vinegar might seem odd, but that teaspoon of white distilled is doing heavy lifting for texture. No substitutions here—it’s science, not taste.
No Bisquick? Homemade baking mix (flour + baking powder + salt + shortening) works at a 1:1 ratio. For a richer crust, swap the water for ice-cold whole milk. Need it sweeter? Bump the sugar to a tablespoon. The vinegar can be apple cider in a pinch (same amount), but stick to white for neutral flavor. Butter must stay cold—no melting!
Dough keeps in the fridge for 2 days wrapped tightly in plastic. For longer storage, freeze the shaped crust for up to 3 months. Thaw overnight in the fridge before using. Baked crusts hold at room temp for 24 hours—perfect for make-ahead pies.
Why You’ll Love This Recipe
- Five-Minute Mix: I dump the Bisquick, butter, and a splash of vinegar, roll it out—no resting, no fuss.
- Buttery Layers: The cold butter and vinegar trick gives it that flaky, melt-in-your-mouth texture every time.
- Sweet or Savory: I’ve used this crust for apple pie one day and quiche the next—honestly, it never lets me down.
- Pantry Staples: Between us, I always have Bisquick and butter on hand, so this crust saves me a last-minute store run.
Step-by-Step Instructions for Pie Crust Using Bisquick
Here’s the method for foolproof flaky layers in record time.
Step 1: Cut the Fat Through the Dry Mix
In a large bowl, combine the 2 cups Bisquick Baking Mix with the 0.5 cup Unsalted Butter that’s been cut into small cubes. I use a pastry cutter here, but two forks work too—just keep at it until the mixture resembles coarse crumbs with pea-sized butter pieces visible throughout.
You’ll notice the butter starts to soften but shouldn’t melt. If your kitchen is warm, chill the bowl for 5 minutes between cuts. This cold fat is what creates those flaky layers we’re after, so don’t rush this step.
Step 2: Bind with Liquid for the Perfect Dough
Create a well in the center of your crumbly mixture. Add the 0.33 cup Cold Water and 1 tsp White Vinegar all at once. Using a fork, gently stir until the dough just begins to come together. It’ll look shaggy, but that’s exactly right.
Here’s the thing—overmixing develops gluten, which makes crust tough. The vinegar tenderizes the gluten strands, ensuring a flaky texture. If the dough seems too dry, add ice water 1 tablespoon at a time, but with proper measurement, you shouldn’t need it.
Step 3: Rest and Roll for Even Layers
Turn the dough onto a surface lightly dusted with the 0.25 cup All-Purpose Flour. Shape it into a disk about 1 inch thick, wrap it in plastic, and refrigerate for 30 minutes. This rest period lets the gluten relax and the butter firm up again.
When ready to roll, dust your surface and rolling pin with more of the all-purpose flour. Roll from the center outward, turning the dough a quarter turn after each pass to maintain an even thickness. Aim for about ⅛ inch thick—any thinner and it might tear when transferring.
Step 4: Customize and Fit to Pie Dish
For sweet applications, sprinkle the 1 tsp Granulated Sugar and 0.25 tsp Ground Cinnamon over the rolled dough before fitting it to your pie dish. For savory uses, add just the 0.25 tsp Salt to the Bisquick mixture in Step 1.
Gently fold the dough in half and then in quarters to make it easier to transfer to your pie dish. Unfold and press it into the bottom and up the sides, being careful not to stretch it. Trim the edges, leaving a ½ inch overhang, then crimp or flute as desired. Chill the crust in the dish for 15 minutes before blind-baking or filling.
Pro Tips For Making Pie Crust Recipe Using Bisquick
- Chill the Butter: Cut the unsalted butter into small cubes and freeze for 10 minutes before mixing—I learned this the hard way after my first three crusts turned out tough from warm butter.
- Measure Bisquick Right: Spoon the Bisquick into your measuring cup and level it off; scooping directly from the box packs it down and can make your crust dense.
- Skip the Overmixing: Stir just until the dough comes together, even if it looks a bit shaggy—overworking it develops gluten and turns your crust chewy instead of flaky.
- Add Vinegar Last: Mix the white vinegar into the cold water first, then add it to the dry ingredients; this keeps the acid from reacting with the Bisquick too early and toughening the dough.
Regional Styles of These Flavors
Southern Comfort Style
In the South, we love a good buttery crust with a hint of sweetness. I add an extra 1 tbsp sugar and a pinch of nutmeg to the Bisquick mix for that classic Southern pie experience. This works beautifully with pecan or sweet potato fillings. 💛
Midwestern Savory Twist
Midwestern bakers often prefer a savory crust for their meat pies. I skip the sugar entirely and add ½ tsp garlic powder and ¼ tsp black pepper to the dry mix. This pairs perfectly with chicken pot pie or quiche.
Texas Two-Step
Everything’s bigger in Texas, including flavor. I mix ½ tsp smoked paprika and ¼ tsp cayenne into the Bisquick for a subtle kick. This crust elevates spicy fillings like chili or barbecue-inspired pies. 🌶️
New England Tradition
New Englanders keep it classic. I stick to the base recipe but use cold lard instead of butter for an extra-flaky texture. This is the go-to crust for traditional apple or pumpkin pies.
Pacific Northwest
Out west, we embrace whole grains. I replace ½ cup Bisquick with whole wheat Bisquick for a nuttier flavor. This works well with fruit fillings like blackberry or marionberry.
Amish Country
The Amish community swears by simplicity. I use just Bisquick, water, and butter with no additives. The result is a crisp, clean-tasting crust that lets the filling shine.
Nutrition Facts
Frequently Asked Questions
Can I use Bisquick Heart Smart instead?
Yes, Bisquick Heart Smart works as a 1:1 substitute. The texture may be slightly less flaky, but it still produces a tender crust. Keep all other ingredients and steps the same.
Why do I need to keep the ingredients cold?
Cold butter creates steam pockets during baking, which makes the layers separate for that classic flaky texture. Warm ingredients will melt the butter, resulting in a dense, tough crust.
Can I make this ahead of time?
Shape the dough into a disk, wrap tightly, and refrigerate for up to 2 days or freeze for 3 months. Thaw overnight in the fridge before rolling.
What if my dough cracks when rolling?
Don’t worry—just press the edges together to seal. If it’s too dry, add ice water 1 tablespoon at a time. Dust with flour to prevent sticking.

- Pina Colada Dip Recipe Red Lobster: Tropical Creaminess With Toasted Coconut - October 12, 2026
- Pickled Sweet Cherry Peppers Recipe Canning: Tangy Heat for Pantry Staples - October 12, 2026
- Peppercorn Sauce Recipe Vegan: Rich Umami Depth Without Cream - October 12, 2026