
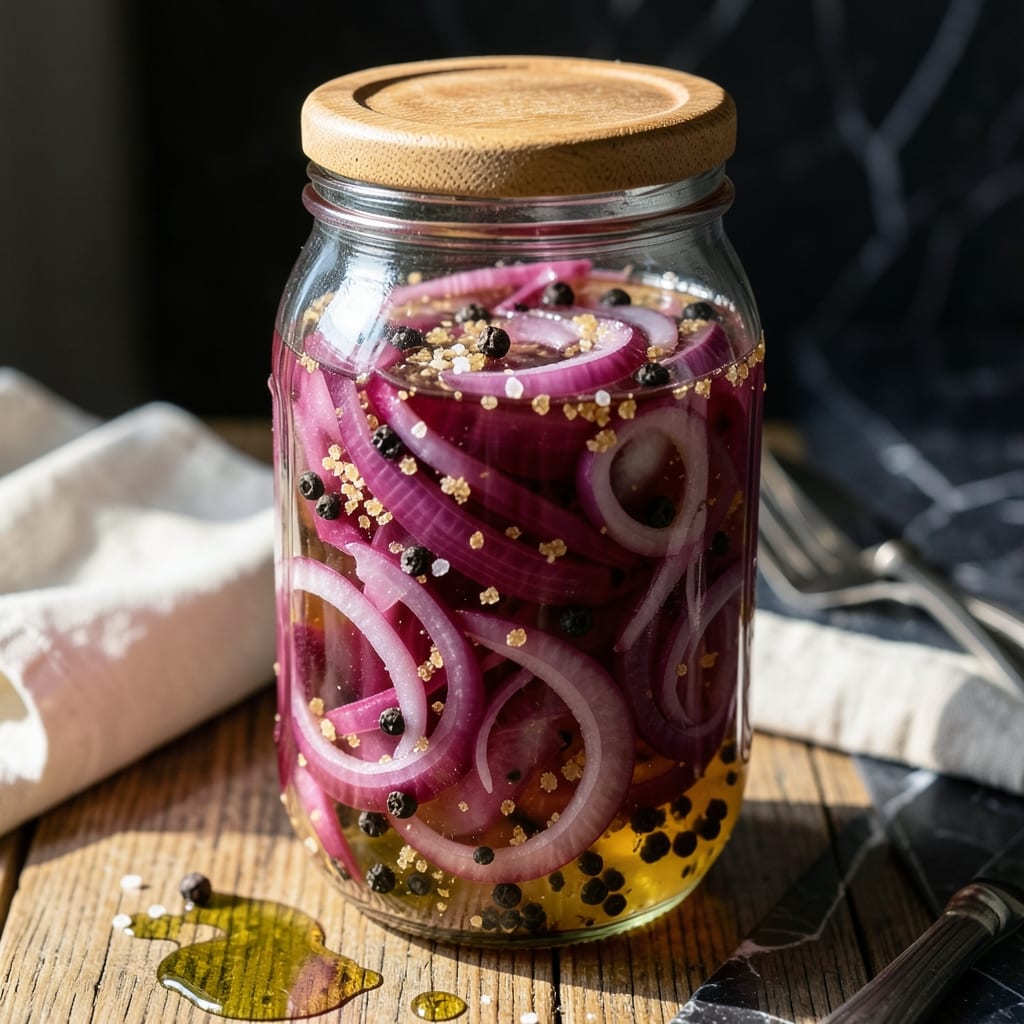
This quick-pickle method transforms raw red onions into tangy, crunchy condiments in just 15 minutes. No canning required—just a simple brine of white vinegar, sugar, and salt.
I developed this recipe after burning one too many dinners as a new graduate. These pickled onions became my secret weapon for elevating everything from tacos to sandwiches with minimal effort.
The result is bright pink onions with a perfect balance of sharpness and sweetness. They keep for weeks in the fridge, ready to add a pop of color and flavor to any dish.
Use them on burgers, in salads, or as a garnish for your favorite Mexican dishes. This condiment delivers on its promise of quick, restaurant-quality results at home.
Ingredients for Pickled Red Onion Recipe White Vinegar
Eight simple ingredients create bright, tangy pickled red onions in minutes.
| Ingredient | Amount | Notes |
|---|---|---|
| Red Onion 🧅 | 1 whole | Medium, thinly sliced |
| White Vinegar 💧 | 1 cup | 5% acidity preferred |
| Granulated Sugar 🍚 | 2 tbsp | Adjust to taste preference |
| Kosher Salt 🧂 | 1 ½ tsp | Diamond Crystal preferred |
| Water 💧 | 1 cup | Filtered or distilled |
| Black Peppercorns 🌶️ | ½ tsp | Optional, for subtle spice |
| Mustard Seeds 🌿 | ½ tsp | Optional, for depth |
| Red Pepper Flakes 🔥 | ¼ tsp | Optional, for heat |
The onions are everything here. Choose firm, deep red onions with no soft spots—Trader Joe’s or Whole Foods usually have the best selection. For vinegar, any white vinegar at 5% acidity works (Heinz is reliable). The sugar balances sharpness, so don’t skip it—organic cane sugar dissolves slightly faster if that matters to you.
No white vinegar? Apple cider vinegar at the same ratio gives a fruitier note. Short on sugar? Maple syrup at two-thirds the amount works (stir well to dissolve). The salt is non-negotiable—Diamond Crystal kosher salt is my go-to for its clean flavor. Adding mustard seeds or peppercorns? Toast them lightly first for extra aroma.
These keep beautifully in a sealed jar in the fridge for 3-4 weeks. The onions soften slightly over time but stay crunchy. For best color, use a clear glass jar (mason jars are perfect). Always use clean, dry utensils to grab onions to prevent contamination.
Why You’ll Love This Recipe
- 5-Minute Magic: I slice the onion, boil the brine, and it’s done before the kettle cools. Honestly, that’s faster than waiting for delivery.
- Tangy Crunch: The white vinegar and sugar give it that sweet-sharp bite that cuts through rich foods like tacos or grilled cheese.
- Jars of Possibility: I keep a batch in the fridge and toss it on salads, sandwiches, or even straight from the jar when I need a quick snack.
- Pennywise Preserve: Red onions and pantry staples stretch into weeks of flavor—no fancy ingredients, just a mason jar standing between me and bland meals.
Step-by-Step Instructions for Pickled Red Onions
Here’s my streamlined method for achieving crisp, tangy pickled onions in record time.
Step 1: Thinly Slice the Red Onion
Using a sharp chef’s knife, cut the red onion in half from root to stem, then peel away the papery skin. Place each half cut-side down on your cutting board and slice thinly against the grain into half-moons. I aim for ⅛-inch thick slices—thin enough to soften quickly but thick enough to maintain that satisfying crunch.
Consistent slicing ensures even pickling, so take your time. As you work, separate the layers slightly with your fingers to help the brine penetrate every piece. You should end up with about 2 cups of sliced onion from the 1 whole Red Onion.
Step 2: Prepare the Pickling Brine
In a small saucepan, combine the 1 cup White Vinegar, 1 cup Water, 2 tbsp Granulated Sugar, and 1.5 tsp Kosher Salt. Place over medium-high heat and stir until the sugar and salt dissolve completely—this should take 2-3 minutes.
You want the brine to be clear with no visible granules. I prefer Diamond Crystal kosher salt here because it dissolves quickly and has a clean flavor. Once fully dissolved, remove from heat and let it cool for 5 minutes before using. This brief cooling prevents shocking the onions with boiling liquid.
Step 3: Combine Onions and Spices
In a clean 16-ounce jar or heatproof bowl, layer the sliced red onion with the 0.5 tsp Black Peppercorns, 0.5 tsp Mustard Seeds, and 0.25 tsp Red Pepper Flakes. The spices can go in as a single layer at the bottom or distributed between onion layers—I like to scatter them throughout for even flavor distribution.
These optional spices add subtle complexity: the peppercorns provide earthy warmth, the mustard seeds offer a mild nutty depth, and the red pepper flakes give a gentle heat. If you prefer milder pickles, you can reduce or omit any of these, but I find this combination perfectly balanced.
Step 4: Pour Brine and Submerge
Carefully pour the warm (not hot) brine over the onions until they’re completely submerged. Gently press down on the onions with a spoon to eliminate air pockets and ensure full coverage. The liquid should rise to the top of the jar—if it doesn’t, you may need to add a splash more water or vinegar to cover.
I like to use the handle end of a wooden spoon to tamp down the onions and release any trapped air. You’ll notice the onions immediately begin to soften slightly and take on a vibrant pink hue as the brine works its magic. This visual change is your first sign that the quick-pickling process has begun.
Seal the jar and let it cool to room temperature, about 20-30 minutes. Then refrigerate for at least 15 minutes before using, though I find the flavor deepens beautifully after 24 hours. These will keep in the refrigerator for up to 2 weeks.
Pro Tips For Making Pickled Red Onion Recipe White Vinegar
- Slice Evenly: Use a mandoline or sharp knife to cut the red onion into consistent 1/8-inch slices—I learned this the hard way after my first batch had some floppy and some crunchy bits.
- Heat the Brine: Warm the vinegar, water, sugar, and salt just until the sugar dissolves, then cool before pouring over onions. Sounds weird, but it works: this prevents cloudy pickles.
- Skip the Rinse: Resist the urge to rinse the onions after slicing—those sharp raw edges actually change the outcome by absorbing the brine faster.
- Wait 30 Minutes: Give it a solid 30 minutes before tasting, even if you’re impatient like me. The flavor deepens noticeably after that first half hour.
Flavor Customization for These Flavors
Sweet and Spicy Kick
Add 1 tbsp honey or maple syrup to the brine for a sweeter profile that balances heat beautifully. I love this with ½ tsp crushed red pepper for a sweet-spicy contrast. The honey also helps soften the vinegar’s sharpness slightly. 🌶️
Citrus Zing
Incorporate 1 strip of orange or lime zest to the jar before adding the brine. The citrus oils infuse the onions with bright, aromatic notes. Remove the zest after 24 hours to prevent bitterness.
Herb Infusion
Toss in 2-3 fresh thyme sprigs or 1 tsp dried oregano for earthy depth. Fresh dill works wonderfully too—about 1 tbsp chopped. These herbs complement Mexican and Mediterranean dishes perfectly.
Garlic Boost
Add 2-3 smashed garlic cloves to the jar for a pungent, aromatic layer. The garlic flavor mellows in the brine but still adds complexity. Remove cloves after 48 hours if you prefer a subtler taste.
Umami Depth
Stir 1 tsp soy sauce or 1 tsp fish sauce into the warm brine before pouring. This adds a savory backbone that pairs exceptionally well with Asian-inspired dishes. I discovered this trick while testing recipes with home cooks.
Smoky Twist
Incorporate ½ tsp smoked paprika or ¼ tsp liquid smoke for a barbecue-inspired flavor. This works especially well for topping burgers or grilled meats. Just a small amount delivers that smoky essence. 💡
Nutrition Facts
Frequently Asked Questions
How long do these need to sit before eating?
You can enjoy them after just 15 minutes in the fridge, but for best flavor, wait 24 hours. The onions develop deeper tang and that signature pink hue with more time.
Can I use a different type of vinegar?
Yes! Apple cider vinegar adds fruitiness, while rice vinegar gives a milder taste. Stick to 5% acidity for consistent results. Avoid balsamic—it’s too strong.
Why are my onions not crunchy?
Over-slicing or using too-thick pieces can soften them. Always slice to ⅛-inch and ensure they’re fully submerged in brine. Old onions may also lose texture.
What’s the best way to store them?
Keep in a sealed glass jar in the fridge for up to 2 weeks. Use clean, dry utensils to avoid contamination. The color fades over time but flavor stays bright.

- Potato Candy Recipe 1933: Vintage Peanut Butter Roll Delight - October 30, 2026
- Potato Chip Cookie Recipe With Pecans: Buttery Crunch Meets Nutty Richness - October 30, 2026
- Potato Patty Recipe No Egg: Crispy Edges Without the Binder - October 30, 2026