
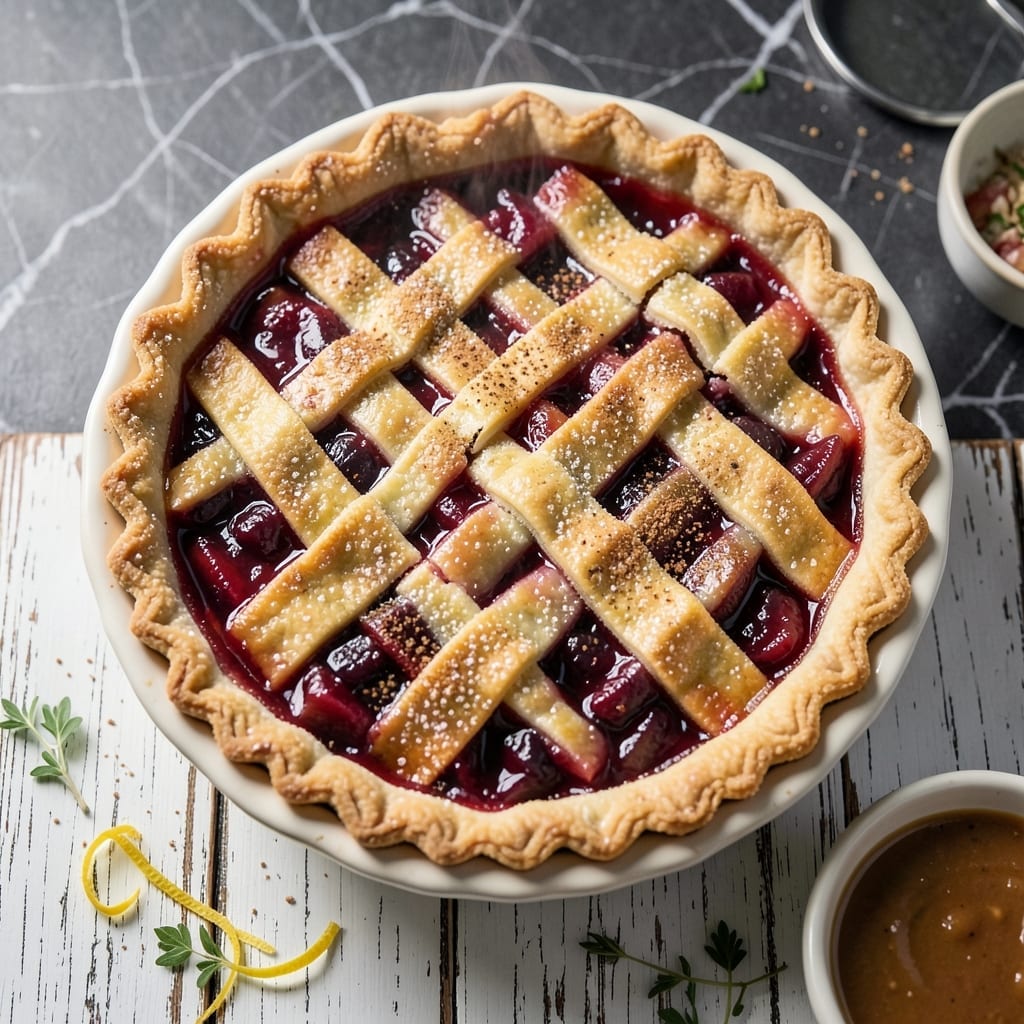
Every baker deserves a flaky pie without the fuss of making filling from scratch. This method transforms store-bought canned filling into a dessert that tastes homemade.
The secret lies in the crust—homemade or store-bought—and a few simple tricks to elevate the filling. Blind baking the bottom crust prevents sogginess, while a lattice top adds visual appeal.
You’ll get a golden, flaky crust encasing sweet, thick filling that holds its shape when sliced. The aroma alone will have everyone gathering in the kitchen.
Perfect for holidays or a weeknight treat. Here’s how to make it effortlessly.
Ingredients for Pie Recipe with Canned Filling
Transform store-bought filling into a bakery-worthy pie with these pantry staples and a flaky crust.
| Ingredient | Amount | Notes |
|---|---|---|
| Store-Bought Pie Crust 🥧 | 2 sheets | Refrigerated or frozen, thawed |
| Canned Pie Filling 🍒 | 2 cans | 21 oz each, any fruit variety |
| All-Purpose Flour 🌾 | 2 tbsp | For thickening filling if needed |
| Granulated Sugar 🍚 | 2 tbsp | Adjust to taste for filling |
| Ground Cinnamon 🌿 | ½ tsp | Enhances fruit flavor |
| Unsalted Butter 🧈 | 1 tbsp | Melted, for brushing crust |
| Large Egg 🥚 | 1 whole | For egg wash on crust |
| Vanilla Extract 🌿 | 1 tsp | Pure extract preferred |
| Lemon Juice 🍋 | 1 tbsp | Freshly squeezed for brightness |
| Cornstarch 🌾 | 1 tbsp | Alternative thickener for filling |
| Salt 🧂 | ¼ tsp | Balances sweetness |
| Heavy Cream 🥛 | 2 tbsp | Optional for richer filling |
The crust is everything here. Pillsbury refrigerated pie crust is a reliable choice—just let it sit at room temperature for 15 minutes before rolling. For homemade, use a standard butter-based recipe (the flakiness comes from cold butter and minimal handling). Blind baking the bottom crust is non-negotiable for preventing sogginess, so don’t skip this step.
Any canned filling works—cherry, apple, or blueberry are classics. If the filling seems thin, thicken it with a cornstarch slurry (1 tbsp cornstarch + 1 tbsp water per can). For extra depth, add a splash of vanilla extract or lemon juice. The egg wash is optional but gives that golden sheen. Brushing with melted butter works too if you’re out of eggs.
Assemble the pie up to a day ahead and refrigerate—bake just before serving. Leftovers keep at room temperature for 2 days or in the fridge for 5 days. For make-ahead, freeze unbaked pies for up to 2 months (thaw before baking).
Why You’ll Love This Recipe
- No-Fuss Assembly: I just roll out the crust, dump in the filling, and let the oven do the work. Honestly, it’s the closest thing to baking on autopilot.
- Cinnamon Sugar Bliss: That buttery crust with the warm, spiced filling and a sprinkle of cinnamon sugar on top? Ridiculously good.
- Potluck Hero: I bring this to gatherings and always come home with an empty dish—no one guesses it started with canned filling.
- Budget-Friendly Win: A store-bought crust and canned filling keep costs low, but it tastes like I spent hours in the kitchen.
Step-by-Step Instructions for Pie With Canned Filling
Achieve a bakery-worthy dessert with minimal effort and maximum flaky crust satisfaction.
Step 1: Prepare the Store-Bought Pie Crust
Remove the 2 sheets Store-Bought Pie Crust from the refrigerator and let them sit at room temperature for 15 minutes to soften slightly. This makes the dough easier to work with and prevents cracking when you unfurl it.
If using frozen crusts, thaw them completely according to package instructions before proceeding. I always unroll the first sheet directly into a 9-inch pie dish, pressing it gently into the bottom and up the sides without stretching the dough. Trim the excess edges, leaving a ½-inch overhang for crimping later.
Step 2: Enhance the Canned Pie Filling
In a large bowl, combine the 2 cans Canned Pie Filling with the 2 tbsp All-Purpose Flour, 2 tbsp Granulated Sugar, 0.5 tsp Ground Cinnamon, 1 tbsp Lemon Juice, 1 tsp Vanilla Extract, and 0.25 tsp Salt. Stir gently but thoroughly—you want the thickening agents fully incorporated.
For a richer texture, whisk in the 2 tbsp Heavy Cream and 1 tbsp Cornstarch until smooth. This step ensures your filling sets properly and doesn’t turn runny when sliced. Taste and adjust sweetness if needed, though most canned fillings are already well-balanced.
Step 3: Assemble the Pie
Pour the enhanced filling into the crust-lined pie dish, spreading it evenly with a spatula. The filling should mound slightly in the center—it will settle during baking. Dot the top with small pieces of the 1 tbsp Unsalted Butter for added richness.
Unroll the second sheet of pie crust and place it over the filling. Trim the excess, leaving another ½-inch overhang, then crimp the edges tightly with your fingers or a fork to seal. Cut 4-5 slits in the top crust to allow steam to escape during baking—this prevents a soggy bottom crust.
Step 4: Add the Egg Wash and Bake
In a small bowl, whisk the 1 whole Large Egg with 1 tablespoon of water to create an egg wash. Brush this mixture evenly over the entire top crust, including the crimped edges. The egg wash promotes browning and gives the crust that coveted glossy finish.
Place the pie on a baking sheet (to catch any drips) and bake in a preheated 425°F oven for 35-40 minutes. Rotate the pie halfway through baking for even browning. You’ll know it’s done when the crust is golden brown and the filling is bubbling through the vents.
Step 5: Cool and Serve
Transfer the pie to a wire rack and let it cool for at least 2 hours before slicing. This cooling period allows the filling to set completely—cutting too soon will result in a runny mess rather than clean slices. The crust should remain flaky and crisp even after cooling.
Serve at room temperature with a scoop of vanilla ice cream or a dollop of whipped cream. Each slice should showcase a perfectly baked, flaky crust encasing a thick, flavorful filling with just the right amount of spice from the cinnamon and brightness from the lemon.
Pro Tips For Making Pie Recipe With Canned Filling
- Chill the Crust: Let the store-bought pie crust sit in the fridge for 15-20 minutes before rolling it out—this prevents shrinking and tearing when it hits the hot filling.
- Thicken the Filling: Stir 1 tablespoon of all-purpose flour into the canned pie filling before adding it to the crust; it soaks up excess liquid and keeps the pie from getting soggy.
- Vent the Top: Cut 4-5 small slits in the top crust or lattice—this lets steam escape so your pie doesn’t burst open in the oven.
- Sprinkle Cinnamon Sugar: Mix 1 tablespoon granulated sugar with ½ teaspoon ground cinnamon and dust it over the top crust before baking for a crisp, spiced finish.
Regional Styles of These Flavors
Southern Comfort
In the South, we love a lattice-top cherry pie with canned filling, often spiked with ½ tsp almond extract for depth. The lattice lets that beautiful filling peek through. I learned this trick from a church bake sale in Georgia—simple but stunning. 💛
Midwest Classic
Midwestern bakers swear by apple pie with canned filling, adding 1 tsp apple pie spice to the mix. A full top crust is standard here, often with a decorative cut-out in the center. Serve warm with vanilla ice cream for that classic diner experience.
New England Tradition
Up north, blueberry pie reigns supreme, often with a crumb topping instead of a second crust. Mix ½ cup brown sugar with ½ cup flour and ¼ cup cold butter for the perfect streusel. This style reminds me of summer picnics by the lake.
West Coast Twist
California bakers love a peach pie with canned filling, enhanced with 1 tbsp orange zest for brightness. A lattice crust is common, but some prefer a rustic galette style. The citrus note makes it taste fresher than you’d expect from canned fruit.
Pennsylvania Dutch
The Amish communities often make shoofly pie with molasses-based canned filling. They use a wet-bottom style with a crumb topping that soaks up the filling. It’s a unique, almost cake-like pie that’s surprisingly easy with canned filling. 🔥
Texas Two-Step
Everything’s bigger in Texas, including the pies. Try a cherry-berry blend with canned fillings mixed together. The crust often gets brushed with melted butter instead of egg wash for extra richness. Perfect for feeding a crowd at Sunday dinner.
Nutrition Facts
Frequently Asked Questions
Do I need to pre-bake the bottom crust?
Yes, blind baking prevents a soggy bottom. Press the crust into your pan, prick with a fork, line with parchment, and fill with pie weights or dried beans. Bake at 375°F for 15 minutes.
Can I use a graham cracker crust instead?
Press 1½ cups graham cracker crumbs mixed with ⅓ cup melted butter and 2 tbsp sugar into your pan. Chill for 30 minutes before filling.
Why does my filling bubble over in the oven?
Overfilling or skipping the steam vents causes this. Leave ½-inch space at the top, and always cut 4-5 slits in the crust. Place a baking sheet under the pie to catch drips.
How do I make the crust extra flaky?
Use ice-cold butter and handle the dough minimally. For store-bought crust, let it warm slightly before rolling, and avoid stretching it when fitting into the pan.

- Pina Colada Dip Recipe Red Lobster: Tropical Creaminess With Toasted Coconut - October 12, 2026
- Pickled Sweet Cherry Peppers Recipe Canning: Tangy Heat for Pantry Staples - October 12, 2026
- Peppercorn Sauce Recipe Vegan: Rich Umami Depth Without Cream - October 12, 2026