
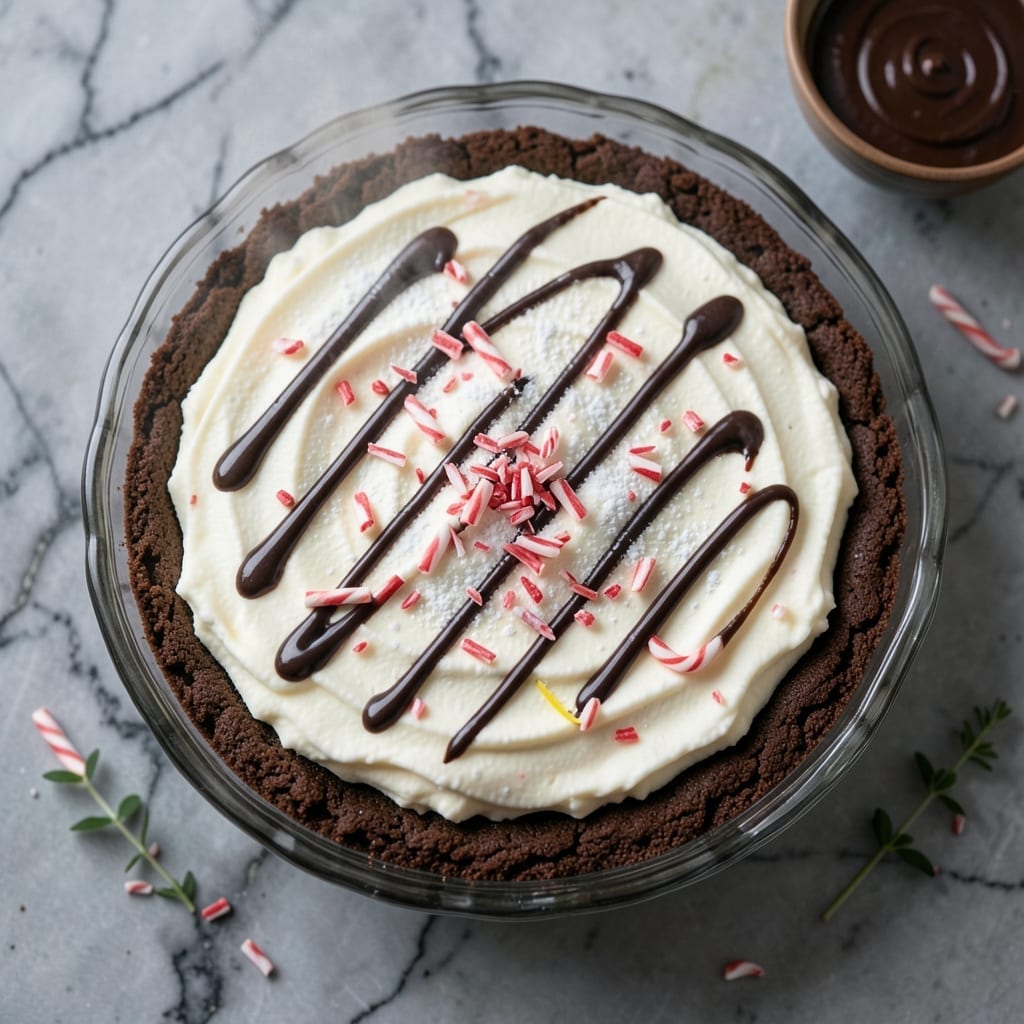
This no-bake dessert delivers cool minty layers nestled in a rich chocolate crust, perfect for warm days or holiday gatherings. I developed this recipe after years of testing peppermint variations in my Atlanta kitchen.
The secret lies in the balance of textures—a crisp chocolate base supports creamy mint filling that’s light yet indulgent. Each layer sets beautifully in the refrigerator, creating clean slices with minimal effort.
You’ll achieve restaurant-quality results with just 15 minutes of active prep time. The combination of chocolate and peppermint offers a refreshing finish to any meal.
Serve chilled for the best texture and flavor development. This creation always disappears first at family dinners.
Ingredients for Peppermint Pie Recipe No Bake
Rich chocolate crust meets creamy peppermint layers with just a handful of ingredients.
| Ingredient | Amount | Notes |
|---|---|---|
| Chocolate Graham Cracker Crumbs 🍫 | 2 cups | Finely crushed, about 18 crackers |
| Unsalted Butter 🧈 | ½ cup | Melted, for crust binding |
| Granulated Sugar 🍚 | ¼ cup | Divided for crust and filling |
| Heavy Whipping Cream 🥛 | 2 cups | Well chilled, divided use |
| Cream Cheese 🧀 | 8 oz | Full-fat, softened to room temperature |
| Powdered Sugar 🍚 | 1 ½ cups | Sifted for smooth texture |
| Peppermint Extract 🌿 | 1 tsp | Pure extract, not oil |
| Green Food Coloring 🎨 | ¼ tsp | Optional for mint layer tint |
| Semi-Sweet Chocolate Chips 🍫 | 1 cup | Melted for ganache layer |
| Crushed Peppermint Candies 🍬 | ½ cup | Plus extra for garnish |
| Vanilla Extract 🌿 | 1 tsp | Pure extract for depth |
| Salt 🧂 | ¼ tsp | Fine sea salt preferred |
The graham cracker crust is non-negotiable here. Honey Maid or Annie’s are my go-tos—both have that perfect buttery crunch. For the cream cheese, Philadelphia full-fat gives the smoothest texture. The peppermint extract from McCormick has just the right intensity (some brands taste like toothpaste). If your grocery store has a bulk section, grab the semi-sweet chocolate chips there—they’re usually fresher.
No graham crackers? Oreo crumbs (about 24 cookies) make an even better chocolate base. Out of cream cheese? Greek yogurt at one-third less volume works in a pinch. The green food coloring is optional, but if you want that classic look, gel coloring from Michaels gives more vibrant results without thinning the filling. And yes, you can skip the candies entirely if you prefer just the mint flavor.
Assemble and refrigerate for at least 4 hours (overnight is ideal). Keeps beautifully for 5 days covered in the fridge. Freeze without the candy topping for up to 2 months—add crushed candies fresh when serving.
Why You’ll Love This Recipe
- No Oven Needed: I just mix the crust with melted butter and sugar, then let it chill—no baking required.
- Minty Chocolate Bliss: The cream cheese and heavy cream base with crushed candy canes is ridiculously good.
- Holiday Crowd Pleaser: I make this for Christmas potlucks and it’s always the first to disappear.
- Make Ahead Magic: Honestly, it tastes even better the next day, so I prep it the night before.
Step-by-Step Instructions for Peppermint Pie with Chocolate Crust
This no-bake beauty comes together in stages—each layer builds on the last for a stunning finish.
Step 1: Press the Chocolate Graham Cracker Crust
Combine the 2 cups Chocolate Graham Cracker Crumbs, 0.25 cup Granulated Sugar, and 0.5 cup Unsalted Butter in a bowl until evenly moistened. The mixture should resemble wet sand and hold together when squeezed.
Press firmly into a 9-inch pie dish, working the crumbs up the sides for an even crust. I use the bottom of a measuring cup to compact it tightly—this prevents crumbly edges later. Chill for 15 minutes to set while you prepare the next layer.
Step 2: Whip the Peppermint Cream Layer
In a stand mixer, beat the 8 oz Cream Cheese until smooth. Gradually add the 1.5 cups Powdered Sugar and 0.25 tsp Salt on low speed, then increase to medium until fluffy. This takes about 2 minutes.
With the mixer running, slowly pour in 1 cup Heavy Whipping Cream, the 1 tsp Peppermint Extract, and 0.25 tsp Green Food Coloring. Whip on high for 1-2 minutes until stiff peaks form. The mixture should hold its shape when the whisk is lifted.
Spread this over the chilled crust in an even layer. The peppermint scent will be strong—that’s perfect.
Step 3: Create the Chocolate Ganache Layer
In a microwave-safe bowl, heat the 1 cup Semi-Sweet Chocolate Chips with the remaining 1 cup Heavy Whipping Cream in 30-second bursts, stirring between each until smooth. Add the 1 tsp Vanilla Extract and stir to combine.
Let the ganache cool for 5 minutes until slightly thickened but still pourable. Pour it gently over the peppermint layer, spreading to the edges. The contrast between the dark chocolate and mint will be striking.
Step 4: Finish with Crushed Peppermint and Chill
Sprinkle the 0.5 cup Crushed Peppermint Candies evenly over the chocolate layer, pressing lightly so they adhere. I like to add a few larger pieces for texture and visual appeal.
Refrigerate the pie for at least 4 hours (overnight is ideal) until firmly set. This waiting period allows the layers to meld together. When ready to serve, slice with a warm knife for clean cuts, wiping it between each slice.
Pro Tips For Making Peppermint Pie Recipe No Bake
- Chill the Crust: Press the graham cracker crumb and butter mixture into the pie dish and refrigerate for at least 20 minutes—this prevents a crumbly mess when slicing. I learned this the hard way after my first pie fell apart on the plate.
- Room Temp Cream Cheese: Let the cream cheese sit out for 30-45 minutes before mixing, or you’ll end up with lumps no matter how hard you beat it. Sounds obvious, but I’ve rushed this step and regretted it every time.
- Whip Cream First: Beat the heavy whipping cream to stiff peaks before folding it into the cream cheese mixture—it blends smoother and keeps the filling light. After overmixing a few batches, I finally figured out this order matters.
- Crush Candy Fine: Pulse the peppermint candies into very small pieces, not just chunks, so they distribute evenly and don’t sink to the bottom. My grandmother swore by this, and she was right: fine bits give every bite that minty crunch.
Common Mistakes When Making peppermint pie recipe no bake
Skipping the Chill
This pie needs at least 4 hours in the fridge to set properly. I once rushed it for a last-minute dinner party and ended up with a soupy mess. David still ate it with a spoon, but the layers never properly formed. 💡
Overworking the Cream
When whipping the peppermint layer, stop at stiff peaks. Overmixing turns it grainy—something I learned the hard way during my first attempts at Nana Mae’s diner. The filling should be smooth, not buttery.
Use a stand mixer on medium-high for exactly 1-2 minutes after adding the cream. Any longer and you risk splitting the mixture.
Weak Crust Base
Press the graham crumbs firmly into the dish using a measuring cup. A loose crust crumbles when sliced. I test this by tapping the side—if it holds, it’s ready for the next layer.
Peppermint Overload
Stick to 1 tsp Peppermint Extract. More than that tastes like toothpaste. I once doubled it thinking it would enhance the flavor, but my kids refused to eat it. Less is truly more here.
Melting the Ganache
Heat the chocolate and cream in 30-second bursts, stirring between each. Microwaving too long causes seizing. I use a glass bowl and check after each interval for smoothness.
Nutrition Facts
Frequently Asked Questions
Can I make this ahead of time?
It actually tastes better after 24 hours in the fridge. The flavors meld together beautifully, and it keeps well for up to 5 days covered.
What if I don’t have a springform pan?
A regular 9-inch pie dish works perfectly. Just press the crust firmly into the bottom and sides, and use a warm knife to slice clean portions.
Can I use a different type of candy?
Yes, but stick to hard candies for the best texture. Candy canes work great, but avoid soft candies as they’ll make the topping soggy.
Why did my ganache layer separate?
This usually happens if the chocolate was too hot when mixed. Heat in 30-second bursts and stir between each to prevent this.

- Pina Colada Dip Recipe Red Lobster: Tropical Creaminess With Toasted Coconut - October 12, 2026
- Pickled Sweet Cherry Peppers Recipe Canning: Tangy Heat for Pantry Staples - October 12, 2026
- Peppercorn Sauce Recipe Vegan: Rich Umami Depth Without Cream - October 12, 2026