
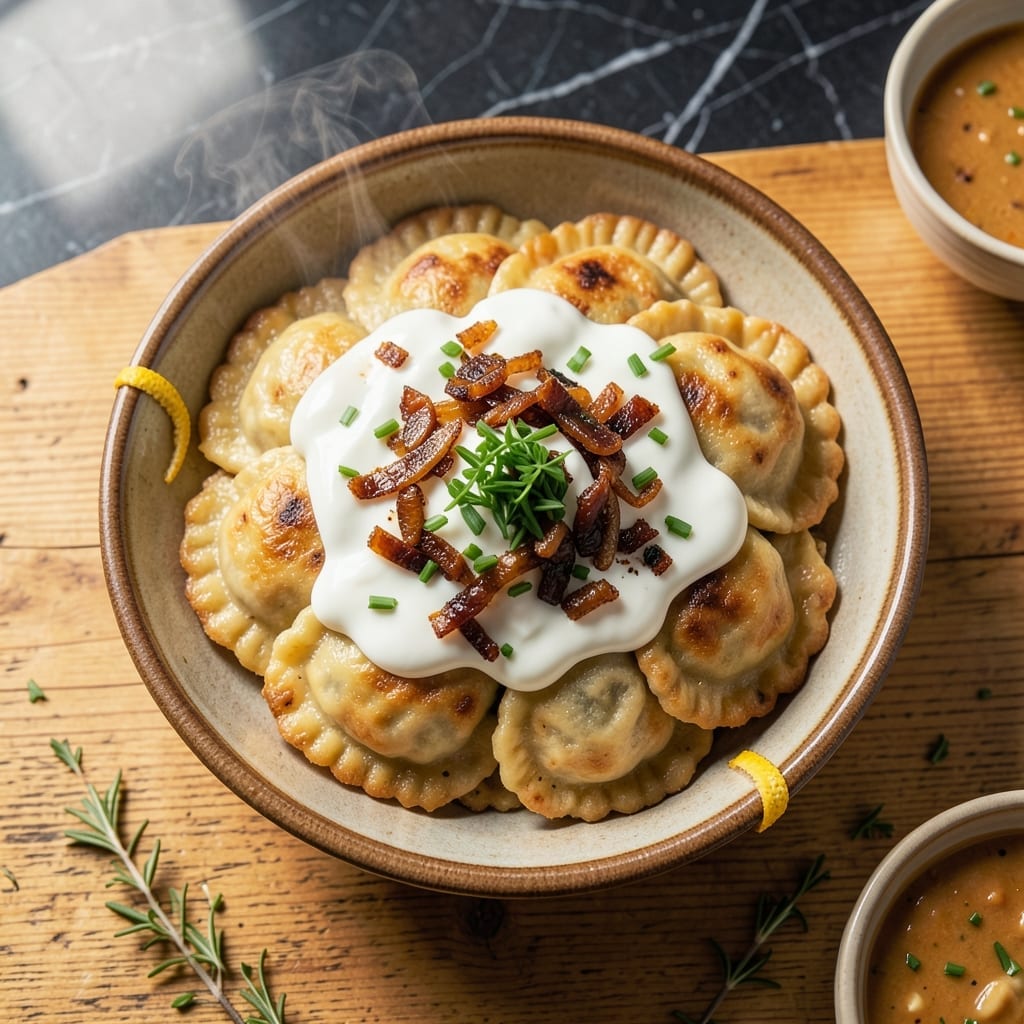
There’s something magical about homemade pierogi that store-bought versions simply can’t match. These pillowy dumplings require patience, but the reward is a texture that’s tender yet sturdy enough to hold its shape.
The dough comes together with just a few simple ingredients, while the filling offers endless possibilities. The real transformation happens when you boil then pan-fry them to golden perfection, creating a delightful contrast of textures.
Serving these with a dollop of tangy sour cream completes the experience, adding a creamy richness that complements the dumplings perfectly. The combination of soft dough, flavorful filling, and cool cream is irresistible.
This recipe walks you through each step with precision, ensuring your pierogi turn out just like the ones you remember from childhood. The process is straightforward, with clear guidance at every stage.
Ingredients for Pierogi Recipe Sour Cream
Simple dough, savory filling, and that tangy sour cream finish make these irresistible.
| Ingredient | Amount | Notes |
|---|---|---|
| All-Purpose Flour 🌾 | 3 cups | Plus extra for dusting dough |
| Warm Water 💧 | ¾ cup | About 110°F for dough |
| Unsalted Butter 🧈 | 4 tbsp | Melted for dough richness |
| Large Egg 🥚 | 1 whole | Room temperature preferred |
| Sour Cream 🥛 | ½ cup | Full-fat for best texture |
| Salt 🧂 | 1 tsp | Fine sea salt for dough |
| Russet Potatoes 🥔 | 2 whole | Medium-sized, peeled and diced |
| Sharp Cheddar Cheese 🧀 | 1 ½ cups | Freshly grated for filling |
| Yellow Onion 🧅 | ½ whole | Finely diced for filling |
| Unsalted Butter 🧈 | 2 tbsp | For pan-frying pierogi |
| Vegetable Oil 🫒 | 2 tbsp | For pan-frying pierogi |
| Fresh Chives 🌿 | 2 tbsp | Chopped for garnish |
The flour is your foundation here. King Arthur all-purpose is my go-to—consistent results every time. For the potatoes, russets give you that fluffy filling texture you’re after (the waxy kind just doesn’t cut it). Grab your cheddar from the deli counter and ask them to grind it fresh—pre-shredded has that anti-caking stuff that makes the filling grainy. Whole Foods has great cheese counters for this.
No russet potatoes? Yukon Golds work in a pinch (they’re creamier, so reduce the butter slightly). Out of chives? Green onions at a 1:1 swap. The sour cream needs to be full-fat—half the amount just won’t give you that luxurious texture. If you’re making these ahead, undercook the potatoes by a minute—they’ll finish in the filling. And yes, you can use Greek yogurt instead of sour cream (though it’s tangier).
Dough keeps wrapped in plastic for 1 day in the fridge, but it’s best used fresh. Cooked pierogi freeze beautifully on a tray first (so they don’t stick), then transfer to bags for up to 3 months. Thaw in boiling water straight from frozen—no need to defrost. Always boil before frying, even from frozen (don’t skip this part).
Why You’ll Love This Recipe
- Dough in Minutes: Honestly, the dough comes together with just flour, warm water, butter, and an egg—no fancy techniques or resting time.
- Rich Creamy Bite: That sour cream in the dough makes them tender, and the filling? Pure comfort in every bite.
- Freezer’s Best Friend: I make a double batch and freeze half for lazy dinners—just boil from frozen when cravings hit.
- Budget Stretch: A pound of flour and a tub of sour cream feeds my family for days without breaking the bank.
Step-by-Step Instructions for Pierogi with Sour Cream Dough
Here’s how to make these dumplings with perfect texture and rich flavor every time.
Step 1: Prepare the Dough
In a large bowl, whisk together the 3 cups All-Purpose Flour and 1 tsp Salt. Create a well in the center and add the 0.75 cup Warm Water, 4 tbsp Unsalted Butter (melted), 1 whole Large Egg, and 0.5 cup Sour Cream.
Mix with a wooden spoon until a shaggy dough forms, then turn it out onto a lightly floured surface. Knead for 5-7 minutes until smooth and elastic. The dough should be soft but not sticky—add a sprinkle of flour if needed.
Wrap the dough in plastic and let it rest at room temperature for 30 minutes. This relaxation period makes rolling easier and prevents the dough from springing back.
Step 2: Make the Filling
While the dough rests, boil the 2 whole Russet Potatoes (peeled and diced) in salted water until tender when pierced with a fork, about 10-12 minutes. Drain well and return to the pot.
Add the 1.5 cups Sharp Cheddar Cheese (freshly grated) and 0.5 whole Yellow Onion (finely diced and sautéed until translucent) to the potatoes. Mash everything together until smooth and season with a pinch of salt. Let the filling cool completely before assembling.
Step 3: Assemble the Pierogi
Roll the rested dough on a floured surface to ⅛-inch thickness. Use a 3-inch round cutter to cut circles. Place 1 teaspoon of the potato-cheddar filling in the center of each circle.
Fold the dough over the filling to create a half-moon shape. Press the edges firmly to seal, then crimp with a fork or your fingers for a decorative edge. Keep the finished pierogi on a floured tray covered with a towel to prevent drying.
Step 4: Cook and Serve
Bring a large pot of salted water to a boil. Drop the pierogi in batches (don’t overcrowd) and cook for 3-4 minutes after they float to the surface. They’re done when they look slightly puffed and the dough is translucent.
Remove with a slotted spoon and transfer to a skillet with the 2 tbsp Unsalted Butter and 2 tbsp Vegetable Oil heated over medium heat. Pan-fry for 2-3 minutes per side until golden brown. Garnish with the 2 tbsp Fresh Chives before serving.
Pro Tips For Making Pierogi Recipe Sour Cream
- Chill the Dough: Let the pierogi dough rest in the fridge for at least 30 minutes after mixing—this relaxes the gluten and makes rolling much easier.
- Use Full-Fat Sour Cream: Skip the low-fat version; full-fat sour cream adds richness to the dough and prevents dry, crumbly pierogi.
- Seal Tightly: Press the edges of each pierogi firmly with your fingers or a fork to avoid burst dumplings during boiling.
- Boil in Batches: Don’t overcrowd the pot—cook pierogi in small batches to ensure even cooking and prevent sticking.
Storing and Reheating This pierogi recipe sour cream
Refrigerator Storage
Let cooked pierogi cool completely before transferring to airtight containers. They’ll keep in the fridge for up to 4 days. I separate layers with parchment to prevent sticking. The flavors actually deepen overnight as the dough absorbs the filling. ❄️
Freezer Storage
Freeze uncooked pierogi on a floured tray first, then transfer to bags. This prevents them from sticking together. They’ll keep frozen for up to 3 months without texture loss. I use quart-size freezer bags for easy portioning.
Thawing Method
No need to thaw before cooking! Drop frozen pierogi directly into boiling water. They’ll take about 1-2 minutes longer to float than fresh ones. This method preserves the dough’s texture better than microwave thawing.
Reheating Stovetop
My preferred method: boil for 2-3 minutes, then pan-fry in 1 tbsp butter until golden. This revives both the tender dough and crispy exterior. Add a splash of water to the pan to create steam.
Microwave Reheating
For quick meals, arrange pierogi in a single layer with a damp paper towel. Microwave on high for 1-2 minutes, then let rest for 30 seconds. They won’t be as crispy but will be perfectly tender. 🔥
Nutrition Facts
Frequently Asked Questions
Can I use Greek yogurt instead of sour cream?
Yes, full-fat Greek yogurt works as a substitute in the dough. It will give a slightly tangier flavor and denser texture. Just ensure it’s at room temperature for smooth mixing.
Why did my pierogi burst while boiling?
This usually happens if the dough is too thin or the filling is overstuffed. Roll dough to ⅛-inch thickness and use 1 teaspoon of filling per dumpling. Seal edges tightly.
How do I prevent sticking when freezing?
Freeze uncooked pierogi on a floured tray first, then transfer to bags. This creates a barrier so they won’t stick together. Use parchment paper between layers for extra protection.
What’s the best way to reheat leftovers?
Boil for 2-3 minutes, then pan-fry in 1 tbsp butter until golden. This restores both the tender texture and crispy exterior perfectly.

- Potato Candy Recipe 1933: Vintage Peanut Butter Roll Delight - October 30, 2026
- Potato Chip Cookie Recipe With Pecans: Buttery Crunch Meets Nutty Richness - October 30, 2026
- Potato Patty Recipe No Egg: Crispy Edges Without the Binder - October 30, 2026