
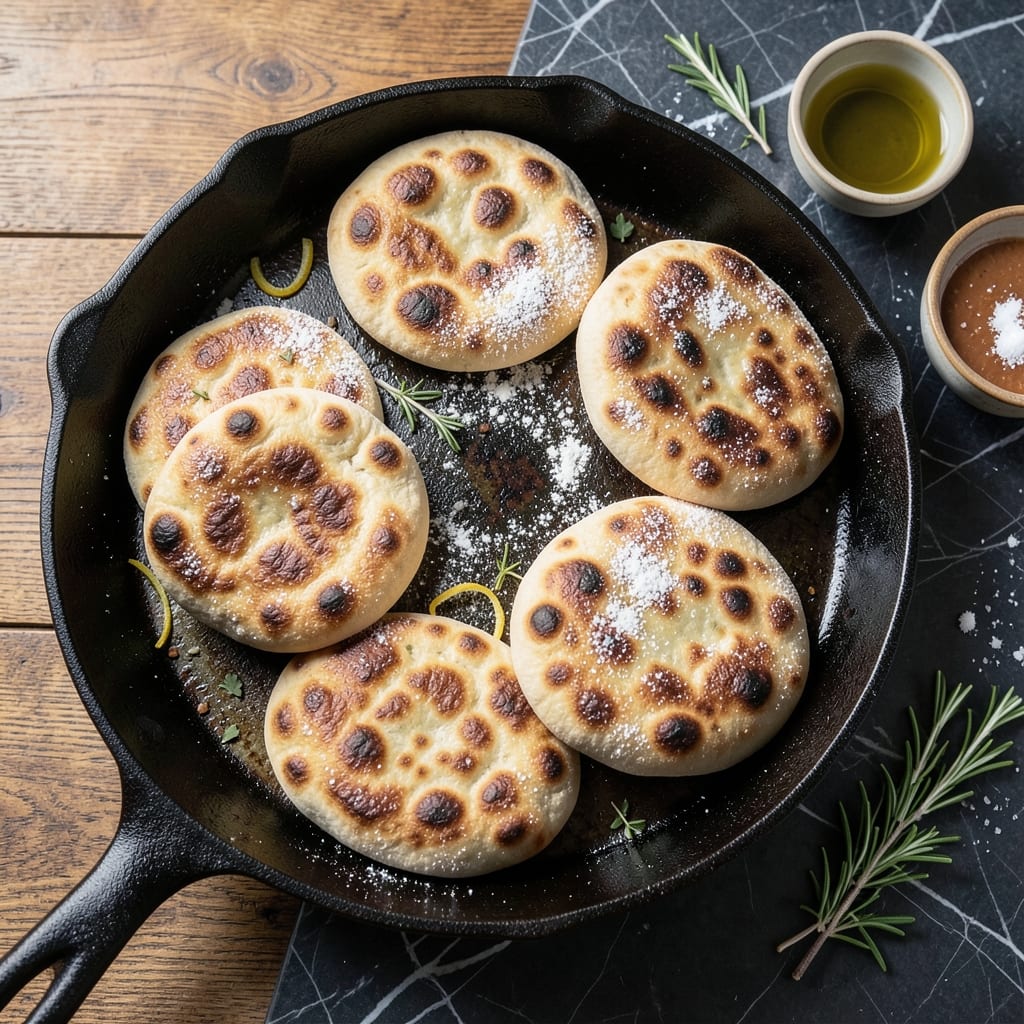
There’s nothing like the aroma of warm, fresh-baked pita bread filling your kitchen. This recipe delivers soft, pillowy flatbread without needing an oven—just a frying pan and a few simple ingredients.
I developed this method after realizing how quickly pita dough cooks on the stovetop, puffing dramatically as it hits the hot surface. The key is rolling the dough thin and using medium-high heat for even cooking.
What you’ll get is golden, slightly charred rounds with a tender interior pocket, perfect for stuffing or tearing apart. The process is straightforward, and the results rival any bakery version.
Serve warm with hummus, dips, or as part of a Mediterranean spread. Here’s how to make it at home.
Ingredients for Pita Bread Recipe Frying Pan
Just flour, yeast, and a few basics create these golden, pocketed flatbreads.
| Ingredient | Amount | Notes |
|---|---|---|
| All-Purpose Flour 🌾 | 3 cups | Plus extra for dusting |
| Active Dry Yeast 🍞 | 2 ¼ tsp | One standard packet |
| Warm Water 💧 | 1 ¼ cups | 110-115°F for activating yeast |
| Granulated Sugar 🍚 | 1 tsp | Feeds the yeast |
| Salt 🧂 | 1 ½ tsp | Fine sea salt preferred |
| Olive Oil 🫒 | 2 tbsp | Extra-virgin for flavor |
| Vegetable Oil 💧 | 2 tbsp | For frying pan cooking |
The flour is the foundation here. King Arthur or Gold Medal all-purpose work beautifully (avoid self-rising). Yeast freshness is critical—check the expiration date. I get mine from Whole Foods bulk section, but grocery store packets are fine too. Warm water should feel like a baby’s bath—too hot kills the yeast, too cold slows activation.
No yeast? This isn’t a great swap, but baking powder at 2 tbsp gives a quick rise (texture won’t be the same). Out of all-purpose flour? Bread flour works but yields a denser pita. The olive oil can be any neutral oil, but extra-virgin adds depth. Sugar can be swapped for maple syrup or agave to keep it vegan—use the same amount.
Dough keeps in the fridge for 24 hours (let it come to room temp first). Baked pitas are best eaten fresh but will keep in an airtight container for 2-3 days. Reheat in a dry skillet to restore softness. Freeze with parchment between layers for up to 1 month.
Why You’ll Love This Recipe
- No Oven Needed: I can make fresh pita in my frying pan—no special equipment, just a stovetop and five ingredients.
- Pillowy and Warm: That first bite of soft, slightly chewy bread with a hint of yeasty sweetness? I make it whenever the craving hits.
- Endless Meal Possibilities: I stuff them with falafel for lunch, tear them for dipping at dinner, or toast them for breakfast the next morning.
- Pennies Per Pita: Honestly, a bag of flour and a packet of yeast make a dozen pitas for less than the cost of one store-bought pack.
Step-by-Step Instructions for Pita Bread Frying Pan
Master the technique for perfectly puffed, soft flatbreads using just a skillet on your stovetop.
Step 1: Activate the Yeast and Mix the Dough
In a large bowl, combine the 1.25 cups Warm Water, 1 tsp Granulated Sugar, and 2.25 tsp Active Dry Yeast. Let it sit for 5-7 minutes until the mixture becomes foamy and bubbly—this confirms the yeast is active and ready to work.
Add the 3 cups All-Purpose Flour, 1.5 tsp Salt, and 2 tbsp Olive Oil to the yeast mixture. Stir with a wooden spoon until a shaggy dough forms. The dough will be slightly sticky but should pull away from the sides of the bowl.
Step 2: Knead Until Smooth and Elastic
Turn the dough out onto a lightly floured surface and knead for 8-10 minutes by hand. Use the heel of your hand to push the dough away, then fold it back over itself repeatedly. The dough is ready when it’s smooth, elastic, and springs back slowly when pressed with a finger.
If the dough feels too sticky during kneading, add a small amount of flour, 1 tablespoon at a time. Avoid adding too much, as extra flour can make the pitas dense instead of light and airy. A properly kneaded dough will feel tacky but not stick to your hands.
Step 3: Let the Dough Rise Until Doubled
Lightly oil a clean bowl with a bit of the Olive Oil, place the dough inside, and cover it with a damp kitchen towel. Let it rise in a warm, draft-free place for 1 to 1.5 hours, or until it has nearly doubled in size.
To test if the dough is ready, gently press two fingers into it. If the indentation remains, the dough has risen sufficiently. If it springs back quickly, give it more time. Proper rising is crucial for achieving that characteristic puff when cooking.
Step 4: Shape and Rest the Dough Balls
Punch down the risen dough to release the air, then divide it into 8 equal portions. Roll each portion into a smooth ball between your palms. Place the balls on a lightly floured surface, cover them with the towel, and let them rest for 15-20 minutes.
This rest period relaxes the gluten, making the dough easier to roll out thinly without shrinking back. The balls should feel soft and pliable, not tight or elastic.
Step 5: Roll, Cook, and Puff in the Skillet
Heat a large skillet over medium-high heat and add 1 tbsp Vegetable Oil. While the skillet heats, roll one dough ball into a thin circle, about ⅛-inch thick and 6-7 inches in diameter. Keep the remaining dough balls covered to prevent drying out.
Place the rolled dough in the hot skillet and cook for 1-2 minutes until the bottom is light golden brown with large bubbles forming on the surface. Flip and cook for an additional 30-60 seconds until the other side is lightly browned and the pita has puffed up like a balloon. If it doesn’t puff immediately, press down gently with a spatula to encourage it.
Transfer the cooked pita to a clean towel and cover to keep warm. Add the remaining 1 tbsp Vegetable Oil to the skillet as needed between batches. Repeat with the remaining dough balls, stacking the finished pitas under the towel to keep them soft and pliable.
Pro Tips For Making Pita Bread Recipe Frying Pan
- Preheat the Pan: Crank your frying pan to medium-high heat for at least 5 minutes before cooking—this guarantees a quick puff and even browning. I learned this the hard way after my first few pitas came out pale and sad.
- Proof the Yeast: Mix your active dry yeast with warm water and sugar first, then wait 5-10 minutes until it’s foamy. Skip this and you’ll risk flat, dense pitas that never rise.
- Roll Evenly Thin: Aim for ¼-inch thickness when rolling out the dough—any thicker and the pitas won’t puff properly in the pan. My grandmother swore by this, and she was right.
- Use a Lid: Cover the pan with a lid for the first 30 seconds of cooking to trap steam and help the pitas balloon. Sounds weird, but it works every time.
Pro Cooking Tips for Perfect Results
Yeast Activation Tricks
I always check my yeast freshness first—if it’s expired, your pitas won’t rise. Use 110-115°F water (test with a thermometer or your wrist). Too hot kills the yeast; too cold slows activation. I use a digital thermometer for precision.
Dough Consistency
Your dough should be slightly tacky but not sticky. If it’s too wet, add flour 1 tbsp at a time. Over-flouring makes dense pitas. Knead until smooth and elastic—this develops the gluten for that perfect puff.
Perfect Rolling
Roll each ball to ⅛-inch thickness and 6-7 inches wide. Use a ruler if needed. Too thick won’t puff; too thin burns. Dust your surface lightly with flour to prevent sticking.
Skillet Temperature
heat your skillet over medium-high heat for 3-4 minutes before cooking. A properly heated pan ensures even cooking and maximum puff. I use a cast-iron skillet for best heat retention. 🔥
Cooking Technique
Cook each pita for 1-2 minutes until golden with bubbles, then flip for 30-60 seconds. If it doesn’t puff, gently press with a spatula. Keep cooked pitas covered with a towel to stay soft.
Oil Management
Use 1 tbsp vegetable oil per batch. Add more as needed between pitas. Too much oil makes them greasy; too little causes sticking. Wipe excess oil with a paper towel if needed.
Nutrition Facts
Frequently Asked Questions
What if my pita doesn’t puff?
If it doesn’t puff, your dough may need more time to rise or your skillet isn’t hot enough. Try pressing gently with a spatula to encourage it. Ensure your yeast is fresh and water is at 110-115°F.
Can I make this without yeast?
For a quick version, use 2 tbsp baking powder instead of yeast, but the texture will be denser. Skip the rising time and cook immediately after mixing. It won’t puff the same way.
How thin should I roll the dough?
Roll each piece to about ⅛-inch thick and 6-7 inches wide. Too thick won’t puff; too thin can burn. Use a ruler if needed for precision.
Can I use a nonstick pan?
A nonstick pan works, but a cast-iron skillet gives better heat retention and puff. Heat it over medium-high for 3-4 minutes first.

- Potato Candy Recipe 1933: Vintage Peanut Butter Roll Delight - October 30, 2026
- Potato Chip Cookie Recipe With Pecans: Buttery Crunch Meets Nutty Richness - October 30, 2026
- Potato Patty Recipe No Egg: Crispy Edges Without the Binder - October 30, 2026