
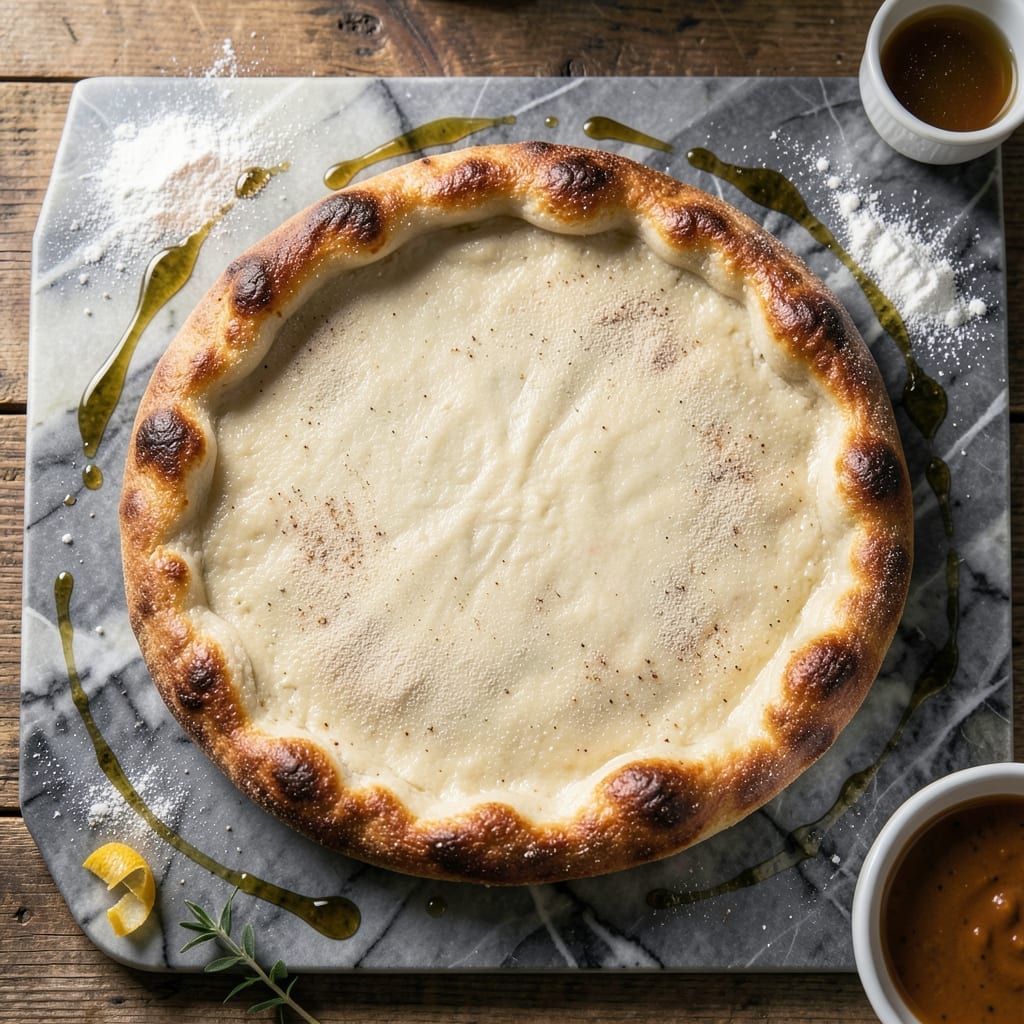
I’ve perfected this pizza crust to deliver fluffy, chewy results in just 60 minutes using rapid rise yeast. The process is streamlined without sacrificing quality.
Rapid rise yeast cuts traditional proofing time dramatically, making fresh crust achievable on busy nights. The dough comes together with basic pantry staples and a few minutes of active prep.
You’ll get a golden, airy base that holds toppings beautifully while maintaining the right amount of chew. This method ensures consistent texture every time.
No special equipment is needed—just a bowl, a rolling pin, and an oven. The crust bakes up crisp on the bottom with a soft interior.
Ingredients for Pizza Crust Recipe with Rapid Rise Yeast
Basic pantry staples, rapid rise yeast, and 60 minutes to fluffy chewy perfection.
| Ingredient | Amount | Notes |
|---|---|---|
| Rapid Rise Yeast 🍞 | 2 ¼ tsp | One packet, active dry |
| Warm Water 💧 | 1 ¼ cup | 110-115°F for activation |
| All-Purpose Flour 🌾 | 4 cups | Plus extra for dusting |
| Olive Oil 🫒 | 2 tbsp | Extra-virgin preferred |
| Granulated Sugar 🧂 | 1 tbsp | Feeds the yeast |
| Kosher Salt 🧂 | 2 tsp | Diamond Crystal preferred |
| Cornmeal 🌽 | ¼ cup | For dusting pan |
| Semolina Flour 🌾 | ¼ cup | Optional, for extra crisp |
| Garlic Powder 🧄 | 1 tsp | Optional, for flavor |
| Dried Oregano 🍃 | 1 tsp | Optional, for depth |
The yeast is doing all the heavy lifting here. Fleet or Red Star rapid rise are my go-tos—check the expiration date, stale yeast kills the whole thing. King Arthur all-purpose flour gives the best texture, but any brand works if it’s fresh. Warm water temp matters: too hot kills yeast, too cool slows it down. I use a thermometer (the instant-read kind) to nail 110-115°F every time.
No rapid rise yeast? Active dry yeast at the same amount works, but add 15-20 minutes to the first rise. Short on all-purpose? Bread flour at a 1:1 swap makes it chewier. Cornmeal can be polenta or fine yellow cornmeal—whatever’s in the pantry. Skip the sugar? Honey or agave at the same amount feeds the yeast just as well. The olive oil? Any neutral oil works in a pinch.
Dough keeps 2-3 days in the fridge (tightly wrapped), or freeze for 1 month. Bring to room temp before shaping. Baked crust? Best day-of, but leftovers reheat well in a dry skillet or 350°F oven for 5-8 minutes.
Why You’ll Love This Recipe
- Ready in 60: I can mix, knead, and have this crust ready before the oven even finishes preheating—rapid rise yeast is my weeknight hero.
- That Yeast Magic: The sugar activates the yeast so fast you’ll smell the warm, bread-y aroma while you’re still reaching for the flour.
- Endless Toppings: Margherita tonight, BBQ chicken tomorrow—this crust holds up to anything I throw on it, even my kid’s “everything but the kitchen sink” version.
- Penny-Pincher’s Dream: Five basic ingredients, most of which I already have, and it costs less than a delivery fee. Honestly, I’ve saved enough to fund a fancy pizza stone.
Step-by-Step Instructions for Pizza Crust With Rapid Rise Yeast
This method delivers a perfectly chewy, crisp-bottomed crust in under an hour.
Step 1: Activate the Rapid Rise Yeast
In a large mixing bowl, combine the 1.25 cup Warm Water with the 1 tbsp Granulated Sugar and 2.25 tsp Rapid Rise Yeast. I always use a thermometer to confirm the water is between 110-115°F—too hot kills the yeast, too cold slows activation.
Let the mixture sit for 5-7 minutes until it becomes foamy and bubbly. This visual confirmation means the yeast is active and ready. If it doesn’t foam, your yeast may be expired—start over with fresh yeast.
Step 2: Mix and Knead the Dough
Add the 2 tbsp Olive Oil, 2 tsp Kosher Salt, 1 tsp Garlic Powder, and 1 tsp Dried Oregano to the yeast mixture. Then gradually incorporate all 4 cups All-Purpose Flour until a shaggy dough forms. I use a wooden spoon at first, then switch to my hands for better control.
Turn the dough onto a lightly floured surface and knead for 8-10 minutes until smooth and elastic. The dough should spring back when poked lightly with your finger. If it’s sticky, add flour 1 tablespoon at a time—but don’t overdo it, or your crust will be tough.
Step 3: Let the Dough Rise
Lightly oil a clean bowl, place the dough inside, and cover with a damp kitchen towel. Let it rise in a warm, draft-free spot for 30-45 minutes or until doubled in size. I preheat my oven to 100°F (then turn it off) and place the bowl inside for consistent warmth.
The rapid rise yeast does most of its work quickly, but don’t rush this step. Look for the dough to have visibly expanded and feel slightly puffy to the touch. Overproofing can lead to a dense crust, so keep an eye on the time.
Step 4: Shape and Prepare for Baking
Punch down the risen dough to release air, then divide it into 4 equal portions for individual pizzas. On a surface dusted with all-purpose flour, roll each portion into a ¼-inch thick circle. For extra crispness, I dust my pizza peel with the 0.25 cup Cornmeal and 0.25 cup Semolina Flour before transferring the shaped dough.
Let the shaped dough rest for 10 minutes while you preheat your oven to 475°F with a pizza stone or inverted baking sheet inside. This final rest relaxes the gluten, making it easier to stretch if needed and preventing the crust from shrinking during baking.
Step 5: Pre-Bake the Crust
Transfer the dough to your preheated stone or baking sheet. Bake for 8-10 minutes until the edges just start to turn light golden brown and the surface looks set but not fully cooked. This pre-baking step ensures a crisp base that won’t get soggy under toppings.
Remove from the oven and add your sauce and toppings immediately. The partially baked crust will finish cooking perfectly when you return it to the oven to melt the cheese and heat the toppings through.
Pro Tips For Making Pizza Crust Recipe With Rapid Rise Yeast
- Check Water Temp: Use a thermometer to hit 110-115°F—any hotter kills the rapid rise yeast, and cooler just slows it down. I learned this the hard way after a few dense, sad crusts.
- Knead Just Enough: Stop kneading once the dough pulls away from the bowl and feels smooth, about 4-5 minutes. Overworking it makes the crust tough, and nobody wants that.
- Skip Cold Sugar: Room temperature sugar dissolves faster in the warm water, so the yeast activates evenly. Sounds minor, but it actually changes the outcome.
- Oil the Bowl: Coat the rising bowl with about 1 teaspoon of olive oil before adding the dough—this prevents sticking and makes punching it down way easier. My grandmother swore by this, and she was right.
Perfect Pairings for This Recipe
Classic Italian Pairings
Serve your crust with a simple Margherita pizza topping: San Marzano tomato sauce, fresh mozzarella, and basil. The simplicity lets the fluffy texture shine through. I always add a drizzle of extra-virgin olive oil after baking for extra richness. 💛
Dipping Sauces
Offer garlic butter or balsamic glaze for dipping. Melt 4 tbsp butter with 2 minced garlic cloves for a quick garlic butter. For balsamic glaze, reduce 1 cup balsamic vinegar with 1 tbsp honey until syrupy.
Salad Sides
A crisp arugula salad with lemon vinaigrette cuts through the richness. Toss 4 cups arugula with 2 tbsp olive oil, 1 tbsp lemon juice, salt, and pepper. The peppery greens balance the chewy crust perfectly.
Wine Pairings
Italian reds like Chianti or Sangiovese complement the yeasty flavors beautifully. For white wine lovers, a crisp Pinot Grigio works well. I prefer reds with pizza—the acidity cuts through the cheese. 🍷
Beer Options
A light Italian lager like Peroni or Moretti is my go-to. The carbonation cleanses your palate between bites. For craft beer fans, a wheat beer with citrus notes pairs surprisingly well.
Nutrition Facts
Frequently Asked Questions
Can I use regular yeast instead of rapid rise?
Yes, but it will take longer. Swap in the same amount of active dry yeast and add 15-20 minutes to the first rise time. Rapid rise is designed to work faster, so expect a slightly different timeline.
Why didn’t my dough rise?
Check your water temperature—it should be between 110-115°F. If it’s too hot, it kills the yeast; too cold, and it won’t activate. Also, ensure your yeast isn’t expired. Fresh yeast is key for a fluffy crust.
How thin should I roll the dough?
Aim for about ¼-inch thick for a perfect balance of chewiness and crispiness. If it’s too thin, the crust may burn before the toppings cook through.
Can I make this dough ahead?
Prepare the dough, let it rise, then refrigerate it for up to 2-3 days. Bring it to room temperature before shaping and baking for best results.

- Potato Candy Recipe 1933: Vintage Peanut Butter Roll Delight - October 30, 2026
- Potato Chip Cookie Recipe With Pecans: Buttery Crunch Meets Nutty Richness - October 30, 2026
- Potato Patty Recipe No Egg: Crispy Edges Without the Binder - October 30, 2026