
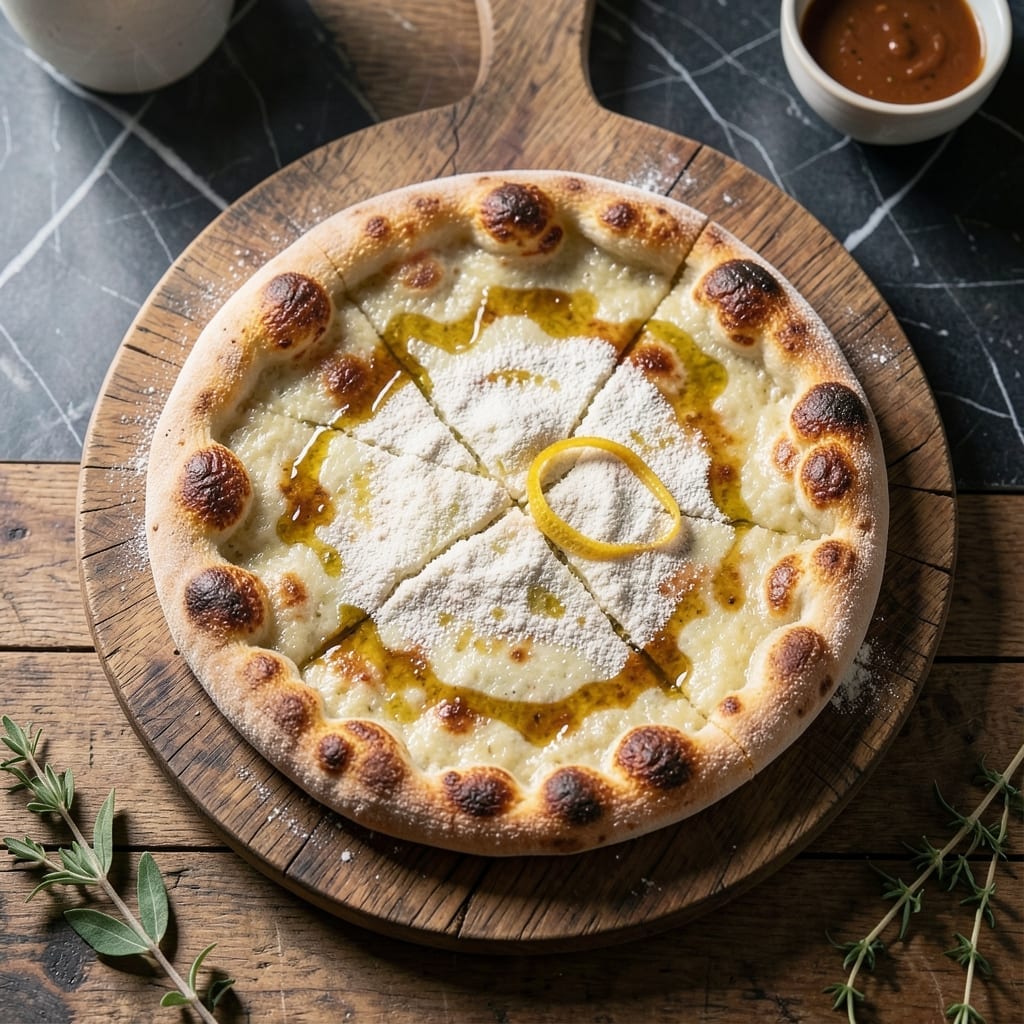
This pizza crust recipe delivers the perfect balance of chewy interior and crisp exterior every time. The yeast-based dough develops rich flavor through proper fermentation, creating a foundation that elevates any topping combination.
I’ve refined this method to ensure consistent results with minimal effort. The dough comes together in 10 minutes of active prep, then rests to develop its signature texture. A hot oven guarantees a golden, blistered crust that holds up to sauces and toppings.
The secret lies in precise yeast activation and controlled rising time. This creates a crust with just the right amount of chew and crispness, whether you prefer thin or thick pies. No special equipment is required.
Use this as a base for classic margherita, loaded veggie, or any pizza variation you love. The results will always be restaurant-quality at home.
Ingredients for Pizza Crust Recipe with Yeast
Ten ingredients for that ideal chewy-crisp pizza base at home.
| Ingredient | Amount | Notes |
|---|---|---|
| Bread Flour 🌾 | 3 ½ cups | High-protein for chewy texture |
| Active Dry Yeast 🍞 | 2 ¼ tsp | One packet, proofed in warm water |
| Granulated Sugar 🍚 | 1 tsp | Feeds yeast for activation |
| Kosher Salt 🧂 | 1 ½ tsp | Diamond Crystal preferred |
| Extra-Virgin Olive Oil 🫒 | 2 tbsp | For dough elasticity and flavor |
| Warm Water 💧 | 1 ¼ cups | 110°F, not hot |
| Semolina Flour 🌾 | ¼ cup | For dusting, prevents sticking |
| Cornmeal 🌽 | 2 tbsp | For crispy bottom crust |
| Honey 🍯 | 1 tsp | Optional for sweeter crust |
| Garlic Powder 🧄 | ½ tsp | Optional for flavor boost |
The flour is non-negotiable here. Bread flour (I use King Arthur) gives you that essential chew—all-purpose works in a pinch but won’t deliver the same texture. Yeast needs to be fresh; check the expiration date. Warm water should feel like bathwater on your wrist (trust me on this). Diamond Crystal kosher salt is my go-to for even distribution.
No bread flour? All-purpose plus 1 tbsp vital wheat gluten per cup gets you close. Out of yeast? Instant yeast at the same amount works fine—just skip the proofing step. Olive oil can be any neutral oil, but the fruity stuff adds depth. Semolina and cornmeal are interchangeable for dusting (or use extra flour if that’s all you’ve got).
Dough rests best in a lightly oiled bowl, covered with a damp towel. Keeps in the fridge for 2 days or freezes for 1 month. Bring to room temp before shaping for best results.
Why You’ll Love This Recipe
- One Bowl Wonder: I mix everything right in the same bowl—no fancy equipment, just bread flour, yeast, and a drizzle of olive oil.
- Chewy Perfection: That first bite with the crisp edge and soft center? Exactly why I keep making this.
- Freezer Friendly: I double the batch, bake one tonight, and freeze the rest for lazy Fridays.
- Penny-Wise Feast: Five simple ingredients and it costs less than delivery—my wallet’s favorite part.
Step-by-Step Instructions for Pizza Crust With Yeast
Here’s the method for achieving that ideal chewy interior with a crisp, golden base.
Step 1: Activate the Yeast and Proof Properly
In a large mixing bowl, combine the 1.25 cups warm water, 1 tsp granulated sugar, and 2.25 tsp active dry yeast. Stir gently and let it sit for 5-7 minutes until the mixture becomes foamy and cloudy. This visual confirmation means your yeast is alive and ready to work its magic.
I always check my water temperature with a thermometer—it should read 110°F. Too hot kills the yeast, too cold slows activation. If your yeast doesn’t bubble after 10 minutes, start over with fresh yeast. This step is non-negotiable for a perfect rise.
Step 2: Develop the Dough with Precise Mixing
Add the 2 tbsp extra-virgin olive oil, 1.5 tsp kosher salt, optional 1 tsp honey, and optional 0.5 tsp garlic powder to the yeast mixture. Then gradually incorporate the 3.5 cups bread flour until a shaggy dough forms. I use a wooden spoon for the first minute, then switch to my hands.
Turn the dough onto a lightly floured surface and knead for 8-10 minutes until smooth and elastic. You’ll know it’s ready when the dough springs back slowly when pressed with your finger. The high-protein bread flour creates that coveted chewy texture we’re after.
Step 3: First Rise for Maximum Flavor Development
Lightly oil a clean bowl, place the dough inside, and cover with a damp towel. Let it rise in a warm, draft-free spot for 1-2 hours or until doubled in size. I like to turn on my oven light for a slightly warm environment—this accelerates the rise without overheating.
Don’t rush this step. The longer rise develops more complex flavors in your crust. If your kitchen is cool, it might take the full 2 hours. Punch down the dough when it’s ready—it should leave a slight indent when pressed with your fingertip.
Step 4: Shape and Second Rise for Perfect Texture
Divide the dough into 4 equal portions for individual pizzas. On a surface dusted with 0.25 cup semolina flour, stretch each portion into a 12-inch round using your hands or a rolling pin. The semolina prevents sticking while adding a subtle nutty flavor.
Transfer each round to a baking sheet sprinkled with 2 tbsp cornmeal. This creates that signature crispy bottom crust. Cover with a towel and let rise for 30-45 minutes until slightly puffed. The cornmeal also gives that authentic pizzeria crunch and prevents sticking during baking.
Step 5: Pre-Bake for Professional Results
Preheat your oven with a pizza stone or inverted baking sheet to 475°F for at least 30 minutes. This high heat mimics a professional pizza oven. Slide your crusts onto the preheated stone and bake for 5-7 minutes until they’re just set but not browned.
This par-baking step ensures your crust won’t get soggy when you add toppings later. Look for the edges to just start turning pale golden—this is your cue they’re ready. Remove from the oven and let cool slightly before adding your favorite toppings and finishing the bake.
Pro Tips For Making Pizza Crust Recipe With Yeast
- Proof the Yeast: Always bloom your active dry yeast in warm water (105-110°F) with a pinch of sugar for 5-10 minutes until foamy—skipping this risks a dense crust that never rises properly.
- Use Bread Flour: I learned this the hard way—all-purpose flour works in a pinch, but bread flour’s higher protein content gives that chewy, elastic texture you actually want in pizza crust.
- Don’t Overwork Dough: Knead just until smooth, about 8-10 minutes by hand—any longer and the gluten gets too tight, making the crust tough instead of light and airy.
- Olive Oil Generously: Coat the dough ball with about 1 tablespoon of extra-virgin olive oil before resting—it keeps the surface from drying out and adds a subtle richness to the crust.
Flavor Customization for This pizza crust recipe with yeast
Herb-Infused Crust
Add 1 tbsp dried Italian seasoning or 2 tbsp fresh rosemary to your dough during mixing. This creates a fragrant base that pairs beautifully with tomato sauce or white pizza variations. I love how the herbs release their aroma during baking.
Spicy Kick
For heat lovers, mix in ½ tsp crushed red pepper flakes or 1 tsp cayenne powder with your flour. The spice distributes evenly throughout the crust, giving each bite a subtle warmth. This works especially well with pepperoni or sausage toppings.
Cheesy Surprise
Incorporate ½ cup grated Parmesan or ¼ cup shredded cheddar into the dough during the final kneading stage. This creates little pockets of melted cheese within the crust itself. The result is a delightful cheesy pull with every slice.
Sweet Option
Replace the 1 tsp granulated sugar with 2 tbsp honey or 1 tbsp brown sugar for a subtly sweet crust. This pairs wonderfully with fruit-based toppings like figs or pears. I find this version particularly popular with kids.
Garlic Lovers
Boost the flavor by adding 1 tsp garlic powder or 2 minced fresh garlic cloves to your dough. The garlic mellows during baking, infusing the crust with a rich, savory note. This works with almost any topping combination. 💡
Whole Wheat Blend
Substitute 1 cup of bread flour with whole wheat flour for a nuttier, heartier crust. The whole wheat adds fiber and a slightly earthy flavor. I recommend letting this dough rise a bit longer—2-3 hours—for best texture development.
Nutrition Facts
Frequently Asked Questions
Why does my dough not rise?
Old yeast or water that’s too hot are common culprits. Test your yeast in warm 110°F water with sugar first—if it doesn’t bubble within 10 minutes, it’s expired. Also ensure your kitchen isn’t too cold for proper fermentation.
Can I make dough ahead of time?
Prepare the dough, let it rise, then refrigerate in an airtight container for up to 2 days. The cold slows fermentation, enhancing flavor. Bring to room temperature before shaping.
How do I get a crispier bottom?
Use a pizza stone preheated to 475°F and dust with cornmeal before baking. The stone distributes heat evenly, while cornmeal creates a barrier that prevents sogginess. Bake directly on the stone for best results.
What if I don’t have bread flour?
Substitute with all-purpose flour plus 1 tbsp vital wheat gluten per cup. This boosts the protein content, mimicking bread flour’s chewy texture. The results will be nearly identical.

- Potato Candy Recipe 1933: Vintage Peanut Butter Roll Delight - October 30, 2026
- Potato Chip Cookie Recipe With Pecans: Buttery Crunch Meets Nutty Richness - October 30, 2026
- Potato Patty Recipe No Egg: Crispy Edges Without the Binder - October 30, 2026