
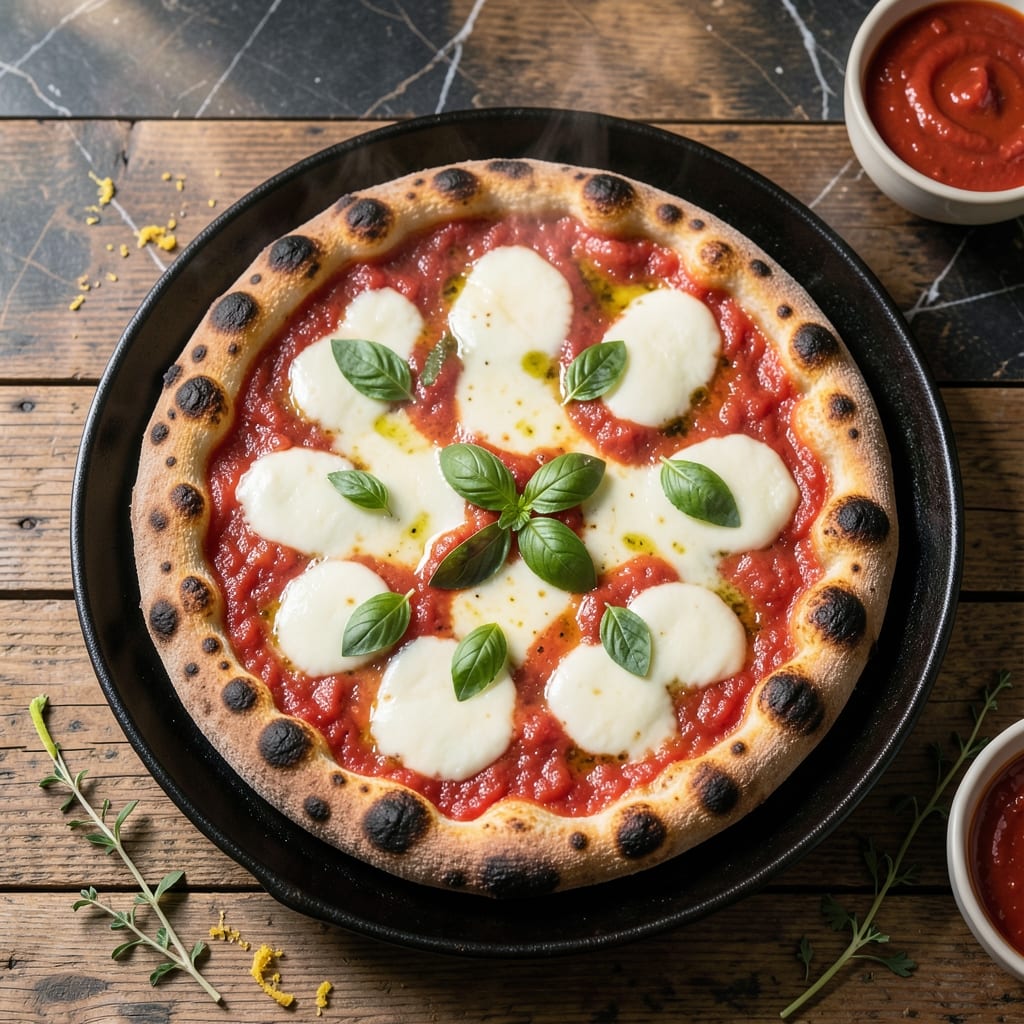
This pan pizza dough delivers a thick, chewy crust that’s perfect for deep-dish lovers. I’ve refined this recipe to ensure a golden, crispy base with a soft, airy interior—no special equipment required.
The key is letting the dough rise twice, which develops flavor and texture. A well-oiled pan prevents sticking while creating that signature crisp edge. The result is a sturdy, flavorful crust that holds up to generous toppings.
Baking at high heat ensures a perfectly browned finish in under 20 minutes. This method guarantees a professional-quality pizza every time, with minimal effort.
Ideal for weeknight dinners or casual gatherings. Here’s how to make it.
Ingredients for Pizza Dough Recipe Pan Pizza
Ten ingredients for that thick, chewy pan pizza crust you crave.
| Ingredient | Amount | Notes |
|---|---|---|
| Bread Flour 🌾 | 3 ½ cups | High-protein for chewy texture |
| Active Dry Yeast 🍞 | 2 ¼ tsp | One packet, proofed in warm water |
| Granulated Sugar 🧂 | 1 tsp | Feeds the yeast for rise |
| Kosher Salt 🧂 | 1 ½ tsp | Diamond Crystal preferred |
| Olive Oil 🫒 | ½ cup | Extra-virgin for pan coating |
| Warm Water 💧 | 1 ¼ cups | 110°F for yeast activation |
| Cornmeal 🌽 | ¼ cup | For dusting pan |
| All-Purpose Flour 🌾 | ½ cup | For surface dusting |
| Honey 🍯 | 1 tbsp | Optional for dough sweetness |
| Garlic Powder 🧄 | 1 tsp | For flavor depth |
The flour is non-negotiable here. Bread flour (12-14% protein) develops the gluten needed for that signature chew—King Arthur or Bob’s Red Mill are reliable brands. Yeast freshness matters; check the expiration date and proof it in 110°F water with sugar until foamy. The olive oil creates both richness and that crisp edge—California Olive Ranch everyday EVOO works perfectly.
No bread flour? All-purpose plus 1 tbsp vital wheat gluten per cup mimics the protein content. Out of cornmeal? Semolina works for pan dusting. Honey can be swapped for sugar at a 1:1 ratio if you prefer a vegan option. The garlic powder adds subtle depth—fresh minced garlic at double the amount works too if you’re feeling fancy.
Dough can rise overnight in the fridge for deeper flavor. Store unbaked dough wrapped tightly for 2 days in the fridge or 1 month frozen. Baked crust is best fresh but reheats decently wrapped in foil at 375°F for 10 minutes.
Why You’ll Love This Recipe
- One Bowl Wonder: I just dump the bread flour, yeast, sugar, salt, and olive oil in a bowl—no fancy steps, no mess.
- Crispy Yet Chewy: That olive oil in the dough gives it the most satisfying crispy edges with a soft, pillowy center.
- Endless Topping Fun: Honestly, I’ve used this dough for everything from classic margherita to loaded veggie—it never lets me down.
- Leftovers? Even Better: Between us, the flavors deepen overnight, so cold pan pizza for breakfast is my little secret.
Step-by-Step Instructions for Pizza Dough Pan Pizza
Master the technique for creating thick, chewy pan pizza with a crisp bottom and airy crumb.
Step 1: Activate the Yeast Mixture
In a large mixing bowl, combine the 2.25 tsp Active Dry Yeast, 1 tsp Granulated Sugar, and 1.25 cups Warm Water. I always verify the water temperature with a thermometer—it should read exactly 110°F to properly activate the yeast without killing it.
The sugar feeds the yeast during this initial stage, creating visible bubbles within 5-7 minutes. Once the surface becomes foamy and the mixture has expanded slightly, add the 1 tbsp Honey and stir to incorporate. This sweetener adds subtle depth while supporting fermentation.
At this point, the yeast is ready to transform your dough. If you don’t see bubbles after 10 minutes, your yeast may be inactive—start over with fresh yeast to ensure a proper rise.
Step 2: Form and Knead the Dough
Add the 3.5 cups Bread Flour, 1.5 tsp Kosher Salt, and 1 tsp Garlic Powder to the yeast mixture. Using a wooden spoon, stir until a shaggy dough forms. The high-protein bread flour creates the chewy texture essential for pan pizza.
Transfer the dough to a lightly floured surface dusted with 0.5 cup All-Purpose Flour. Knead for 8-10 minutes until smooth and elastic. The dough should spring back slowly when pressed—this indicates proper gluten development.
I’ve found that under-kneading results in dense pizza, while overworking the dough makes it tough. Aim for a tacky but not sticky consistency, adding more all-purpose flour 1 tablespoon at a time only if absolutely necessary.
Step 3: First Rise and Preparation
Lightly oil a clean bowl with a small amount of the 0.5 cup Olive Oil and place the dough inside, turning to coat all sides. Cover with a damp towel and let rise in a warm, draft-free area for 1-2 hours or until doubled in volume.
This first rise allows the gluten to relax and flavors to develop. While waiting, prepare your pizza pan by coating it with 2 tablespoons of the Olive Oil and sprinkling evenly with 0.25 cup Cornmeal. The cornmeal prevents sticking while adding a subtle crunch to the crust.
Real talk: if your kitchen is cool, place the bowl near (not on) a warm oven or use a proofing setting to maintain consistent temperature. The dough should look puffy with visible air bubbles beneath the surface.
Step 4: Shape and Second Rise
Once doubled, punch down the dough to release air and transfer it to the prepared pan. Press the dough evenly to the edges, creating a thick, uniform layer. The olive oil in the pan will help the dough stretch without tearing.
Cover loosely and let rise for another 30-45 minutes until puffy. This second rise in the pan ensures the crust develops that characteristic thick, airy structure. You’ll notice the dough beginning to bubble slightly—this is ideal.
During this time, preheat your oven to 475°F to ensure it reaches the proper temperature for baking. The high heat creates that perfect crispness on the bottom while maintaining a soft interior.
Pro Tips For Making Pizza Dough Recipe Pan Pizza
- Proof in Warmth: Let the dough rise in a turned-off oven with the light on—consistent 80-85°F speeds up the process without overproofing. I learned this the hard way after too many dense, flat pan pizzas.
- Oil the Pan Well: Use 3 tablespoons of olive oil to coat the pan thoroughly—enough to crisp the edges but not so much it fries the dough. Sounds excessive, but it’s the difference between sticky and golden-brown.
- Skip Cold Ingredients: Take the yeast out of the fridge 10 minutes early, and use lukewarm water (110°F). Cold slows activation, and I’ve ruined batches by rushing this step.
- Press, Don’t Roll: Stretch the dough with your fingers to fit the pan instead of rolling it. Rolling compresses the air, giving you a tough crust instead of a light, airy one.
Flavor Customization for This Dish
Herb-Infused Crust
Mix 1 tbsp dried Italian seasoning or 2 tbsp fresh rosemary into the dough during kneading. This adds aromatic complexity that pairs beautifully with tomato-based sauces. I love how the herbs bloom during baking, filling the kitchen with incredible fragrance. 🌿
Cheesy Edge Upgrade
Before the second rise, sprinkle ½ cup grated Parmesan or Pecorino Romano around the pan’s edge. As it bakes, the cheese melts into the crust, creating a crispy, flavorful border. Use BelGioioso for the best melt.
Spicy Kick
Add ½ tsp red pepper flakes or 1 tsp cayenne to the dough for subtle heat. The spice develops as the crust bakes, creating a warm undertone. I find this works especially well with pepperoni toppings. 🌶️
Garlic Lover’s Twist
Double the garlic powder to 2 tsp or add 3 minced fresh garlic cloves with the yeast mixture. This creates a pronounced garlic flavor throughout the crust. The aroma while baking is absolutely mouthwatering.
Sweet and Savory
Increase the honey to 2 tbsp for a slightly sweeter crust that complements salty toppings like prosciutto or feta. This variation reminds me of Sicilian-style pizzas I enjoyed in Brooklyn.
Whole Wheat Option
Replace 1 cup bread flour with whole wheat flour for nuttier flavor and extra fiber. The texture will be slightly denser but still delicious. Add 1 extra tbsp olive oil to compensate for the drier flour.
Nutrition Facts
Frequently Asked Questions
Can I use all-purpose flour instead of bread flour?
Yes, but add 1 tbsp vital wheat gluten per cup to match the protein content. Bread flour’s higher protein creates the ideal chewy texture. Without it, your crust may be less elastic.
Why does the dough need two rises?
The first rise develops flavor and gluten structure. The second rise in the pan ensures a thick, airy crust. Skipping this can lead to a dense, flat base.
How do I know when the dough is ready to bake?
After the second rise, it should look puffy with small bubbles. Press it gently—if it springs back slowly, it’s ready. Bake at 475°F for best results.
Can I make this dough ahead of time?
Store wrapped dough in the fridge for up to 2 days or freeze for 1 month. Thaw overnight in the fridge before using.

- Potato Candy Recipe 1933: Vintage Peanut Butter Roll Delight - October 30, 2026
- Potato Chip Cookie Recipe With Pecans: Buttery Crunch Meets Nutty Richness - October 30, 2026
- Potato Patty Recipe No Egg: Crispy Edges Without the Binder - October 30, 2026