
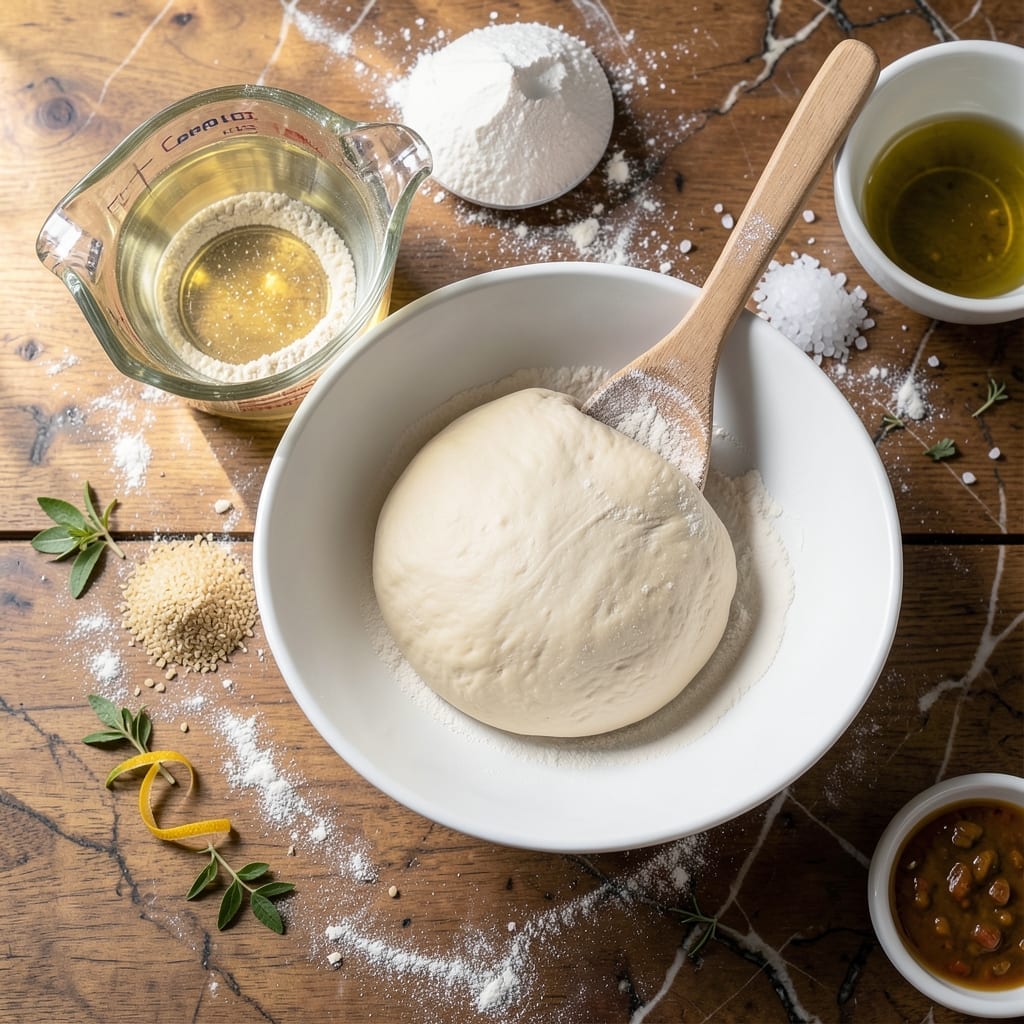
I learned the value of a foolproof pizza dough working in my grandmother’s diner on Peachtree Street. This method delivers a chewy crust with a golden exterior, every time.
David, my official taste-tester, confirms this recipe works across different home ovens. The key is precise measurements and proper resting time for the dough to develop flavor and texture.
The process involves simple ingredients but requires attention to detail. You’ll create a dough that stretches easily and bakes into a crisp yet tender base for your favorite toppings.
This foundation transforms homemade pizza from good to restaurant-quality. The technique has been tested and perfected through years of professional and home kitchen use.
Ingredients for Pizza Dough Recipe Step by Step
Eight simple pantry staples create this restaurant-quality foundation for any pizza night.
| Ingredient | Amount | Notes |
|---|---|---|
| Bread Flour 🌾 | 3 ½ cups | High-protein for chewy texture |
| Active Dry Yeast 🍞 | 2 ¼ tsp | One packet, proofed in warm water |
| Granulated Sugar 🍚 | 1 tsp | Feeds the yeast for activation |
| Kosher Salt 🧂 | 1 ½ tsp | Diamond Crystal preferred for even distribution |
| Extra-Virgin Olive Oil 🫒 | 2 tbsp | For richness and pliability |
| Warm Water 💧 | 1 ¼ cups | 110-115°F for yeast activation |
| Semolina Flour 🌾 | ¼ cup | For dusting, prevents sticking |
| All-Purpose Flour 🌾 | ½ cup | For dusting work surface |
The flour makes all the difference here. King Arthur Bread Flour is my go-to for that perfect chewy bite (the higher protein content develops more gluten). Yeast freshness matters—check the expiration date and store it in the freezer if you won’t use it within a month. Diamond Crystal kosher salt dissolves evenly, but any fine kosher salt works (just don’t use table salt).
No bread flour? All-purpose flour works in a pinch, but you’ll need to add an extra 1 tablespoon of vital wheat gluten per cup to mimic the protein content. Short on olive oil? Melted butter or vegetable oil can substitute, but the flavor won’t be as authentic. The semolina is optional (cornmeal works too), but it adds that classic Italian pizzeria crust.
The dough can rest in the fridge for up to 48 hours for deeper flavor development. Store yeast in an airtight container in the freezer for 6-12 months. Flour and salt keep indefinitely in a cool, dark pantry. Always bring ingredients to room temperature before mixing for even activation.
Why You’ll Love This Recipe
- No-Knead Magic: Honestly, the dough comes together in one bowl—just mix, rest, and the yeast does all the work.
- Crisp Yet Chewy: That olive oil in the dough creates the most satisfying crust with a golden bite.
- Endless Toppings: I’ve used this base for everything from classic margherita to breakfast pizza with eggs.
- Budget Stretcher: A few cents worth of flour and yeast yields enough dough for two large pizzas—my wallet loves it.
Step-by-Step Instructions for Pizza Dough
This foolproof method delivers a chewy, flavorful crust with a perfect rise every time.
Step 1: Activate the Yeast with Warm Water and Sugar
In a large mixing bowl, whisk together the 2.25 tsp Active Dry Yeast, 1 tsp Granulated Sugar, and 1.25 cups Warm Water at 110-115°F. The sugar jumpstarts the yeast, and the warmth wakes it up without killing it.
Let this mixture sit undisturbed for 5-7 minutes until it becomes frothy and opaque. If it doesn’t bubble, your yeast may be inactive—start over with fresh yeast. This frothy head confirms the yeast is alive and ready to work.
Step 2: Incorporate Flour and Salt to Form the Dough
Add the 3.5 cups Bread Flour and 1.5 tsp Kosher Salt to the yeast mixture. Using a wooden spoon or dough whisk, stir until a shaggy dough forms. The high-protein bread flour ensures a chewy texture, while the salt balances the flavor.
Drizzle in the 2 tbsp Extra-Virgin Olive Oil and continue mixing until the dough comes together. The oil adds richness and pliability, making the dough easier to stretch later. At this point, the dough will be sticky but should pull away from the bowl slightly.
Step 3: Knead the Dough Until Smooth and Elastic
Turn the dough out onto a surface dusted with 0.5 cup All-Purpose Flour. Knead for 8-10 minutes by hand, pushing the dough away with the heel of your palm and folding it back over itself. The dough will start out rough and sticky but will gradually become smooth and elastic.
You’ll know it’s ready when it springs back slowly when poked with a finger and feels silky to the touch. If it sticks, dust with a bit more all-purpose flour, but avoid adding too much—this can make the crust tough.
Step 4: Let the Dough Rise Until Doubled in Size
Lightly coat the inside of a clean bowl with a bit of the extra-virgin olive oil and place the dough inside. Cover the bowl with a damp kitchen towel or plastic wrap and let it rise in a warm, draft-free spot for 1-2 hours, or until doubled in volume.
The ideal temperature for rising is 75-80°F. If your kitchen is cooler, place the bowl near a warm oven or on top of the refrigerator. The dough is ready when it has puffed up significantly and a finger pressed gently into the top leaves a slight indent that slowly fills back in.
Step 5: Shape and Prepare the Dough for Baking
Turn the risen dough out onto a surface dusted with 0.25 cup Semolina Flour. The semolina adds a subtle texture and prevents sticking, making it easier to handle. Divide the dough into 4 equal portions for individual pizzas or use it whole for a large pie.
Gently press and stretch the dough into your desired shape, taking care not to overwork it. Let it rest for 5-10 minutes before adding toppings—this relaxes the gluten and prevents the dough from shrinking back. Your crust is now ready for sauce, cheese, and any toppings you love.
Pro Tips For Making Pizza Dough Recipe Step By Step
- Proof the Yeast: Always bloom your active dry yeast in warm water (110°F) with a pinch of sugar first—I learned this the hard way after wasting flour on dough that never rose.
- Use Bread Flour: Skip all-purpose flour; bread flour’s higher protein content gives that chewy, elastic texture that makes pizza dough actually worth the effort.
- Don’t Rush the Rise: Let the dough double in size, even if it takes 2 hours. I used to cut it short and ended up with dense, sad crusts every time.
- Oil the Bowl: Coat your rising bowl with about 1 tablespoon of extra-virgin olive oil to prevent sticking and add subtle richness to the dough—sounds small, but it actually changes the outcome.
Troubleshooting pizza dough recipe step by step
Dough Won’t Rise
If your dough isn’t rising after 2 hours, check your yeast first. The water might have been too hot (over 120°F) and killed it. I always use a thermometer to confirm the 110-115°F range. Also, ensure your kitchen isn’t too cold—below 70°F slows yeast activity significantly. 🌡️
Dense or Tough Crust
Over-kneading is the usual culprit. Stick to 8-10 minutes max—any longer develops too much gluten, making the crust dense. Also, avoid adding excess flour during kneading. The dough should be slightly sticky but manageable. David confirms this is the most common mistake in our test kitchens.
Dough Sticks to Surface
Use 0.25 cup Semolina Flour for dusting instead of all-purpose. Its coarse texture creates a better barrier. If you’re out of semolina, cornmeal works in a pinch. Always dust your hands too when shaping to prevent sticking and tearing.
Dough Tears When Stretching
This happens when the gluten is too tight. After shaping, let the dough rest for 5-10 minutes before adding toppings. This relaxation time makes all the difference. Also, stretch from the center outward, not from the edges, to maintain even thickness.
Crust Burns Before Cooking
Your oven might be running hot. Invest in an oven thermometer to verify the actual temperature. For home ovens, I recommend baking at 475°F rather than 500°F to prevent burning. Also, use a pizza stone or inverted baking sheet for even heat distribution. 🔥
Flat or Limp Dough
Under-proofing is likely the issue. Let the dough rise until truly doubled—this usually takes 1-2 hours at 75-80°F. If it’s not puffy with bubbles under the surface, give it more time. Cold dough also stretches poorly, so ensure it’s at room temperature before shaping.
Nutrition Facts
Frequently Asked Questions
What’s the ideal water temperature for yeast?
Use water at 110-115°F to activate yeast without killing it. Any hotter and you’ll destroy the yeast; too cool and it won’t activate properly.
Can I use all-purpose flour instead of bread flour?
Yes, but add 1 tablespoon vital wheat gluten per cup to match bread flour’s protein content. The texture won’t be quite as chewy, but it’ll still work well.
How do I know when the dough is properly kneaded?
It’s ready when it’s smooth, elastic, and springs back slowly when poked. This usually takes 8-10 minutes of kneading by hand.
Can I refrigerate the dough overnight?
Let it rise in the fridge for up to 48 hours for deeper flavor. Bring it to room temperature before shaping for best results.

- Potato Candy Recipe 1933: Vintage Peanut Butter Roll Delight - October 30, 2026
- Potato Chip Cookie Recipe With Pecans: Buttery Crunch Meets Nutty Richness - October 30, 2026
- Potato Patty Recipe No Egg: Crispy Edges Without the Binder - October 30, 2026