
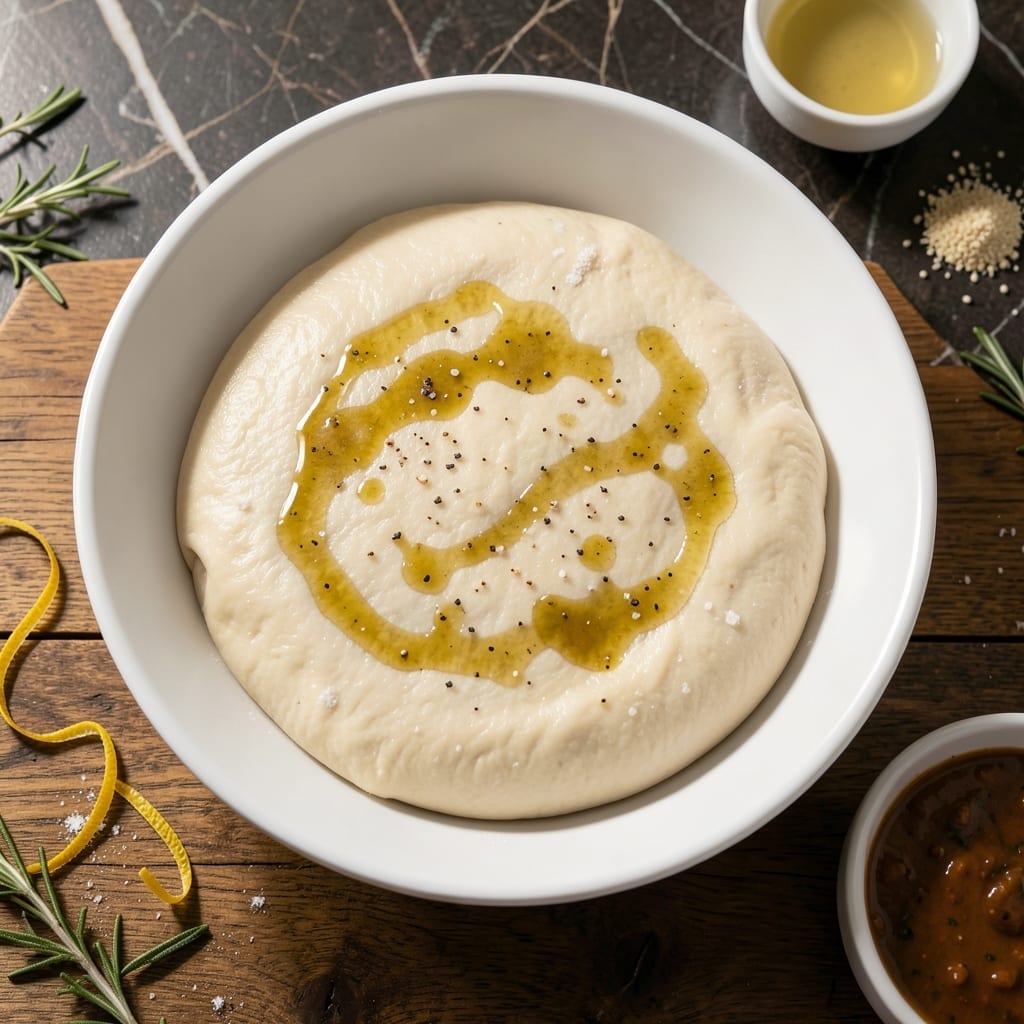
There’s nothing like the satisfaction of pulling a perfectly baked pizza from your home oven. I developed this small-batch recipe for those who want artisan-quality crust without making a mountain of dough.
The process is surprisingly simple. With just a handful of ingredients and about an hour of time, you can create dough that bakes up crispy on the outside with a tender, chewy interior. David, my official taste-tester, gives this his highest rating.
This recipe makes enough for two 12-inch pizzas, perfect for a cozy dinner. The dough ball comes together quickly and rises fast, making it ideal for spontaneous pizza nights.
You’ll love how this base transforms with your favorite toppings. It’s the foundation for restaurant-quality pizza at home.
Ingredients for Pizza Dough Recipe Small Batch
Nine simple ingredients for artisan pizza dough that rivals any pizzeria.
| Ingredient | Amount | Notes |
|---|---|---|
| Bread Flour 🌾 | 3 ½ cups | High-protein for chewy texture |
| Instant Yeast 🍞 | 2 ¼ tsp | Or active dry yeast |
| Fine Sea Salt 🧂 | 1 ½ tsp | Diamond Crystal preferred |
| Granulated Sugar 🍚 | 1 tsp | Feeds the yeast |
| Extra-Virgin Olive Oil 🫒 | 2 tbsp | For dough elasticity |
| Warm Water 💧 | 1 ¼ cups | 105-110°F ideal |
| Cornmeal 🌽 | ¼ cup | For dusting peel |
| Semolina Flour 🌾 | ¼ cup | Optional for extra crisp |
| Honey 🍯 | 1 tsp | Optional for sweetness |
The flour is non-negotiable here. King Arthur Bread Flour is my go-to—consistent protein content (12-13%) gives that perfect chew. Bob’s Red Mill works too if that’s what your store carries. Instant yeast (like SAF Red) saves time, but active dry works with a 5-minute proof in the warm water. Don’t skip the sugar—it’s not for sweetness, it’s yeast food.
No bread flour? All-purpose plus 1 tbsp vital wheat gluten per cup gets close. Swap honey for sugar if you prefer. The olive oil can be any neutral oil in a pinch (avocado oil works), but extra-virgin adds flavor. Cornmeal is for dusting—polenta works at a 1:1 ratio. For a New York-style crust, add 1 tbsp diastatic malt powder (find it at King Arthur’s website).
Dough keeps 2-3 days in the fridge (actually improves flavor) or 3 months frozen. Bring chilled dough to room temp before shaping. For same-day use, the countertop rise is fastest. Pro tip: portion extra dough into balls and freeze on a tray before bagging—grab and thaw as needed.
Why You’ll Love This Recipe
- No-Fuss Mixing: I just dump, stir, and let the instant yeast work its magic—no proofing headaches.
- Buttery Crisp: The olive oil gives it that golden, flaky edge I crave in every bite.
- Endless Toppings: Honestly, it’s my blank canvas for whatever’s in the fridge or pantry.
- Budget Stretch: Five basic ingredients, and I get two pizzas for the price of one takeout.
Step-by-Step Instructions for Pizza Dough Small Batch
Here’s my tested method for achieving a crisp, chewy crust with minimal effort.
Step 1: Activate the Yeast and Mix Wet Ingredients
In a large mixing bowl, combine the 1.25 cups Warm Water with the 1 tsp Granulated Sugar and 1 tsp Honey. The water should be between 105-110°F—any hotter and you’ll kill the yeast, any cooler and it won’t activate properly.
Sprinkle the 2.25 tsp Instant Yeast over the surface and let it sit for 5-7 minutes until it becomes foamy. This tells you the yeast is alive and ready to work. Stir in the 2 tbsp Extra-Virgin Olive Oil until fully incorporated.
Step 2: Combine Dry Ingredients and Form the Dough
In a separate bowl, whisk together the 3.5 cups Bread Flour and 1.5 tsp Fine Sea Salt. I use bread flour for its higher protein content, which gives that perfect chewy texture. Create a well in the center and pour in the yeast mixture.
Using a wooden spoon or dough whisk, mix until a shaggy dough forms. It will look rough at first, but resist the urge to add more flour. The dough should be slightly sticky—that’s how you know the hydration is right for a crisp yet tender crust.
Step 3: Knead and Develop the Gluten
Turn the dough out onto a lightly floured surface and knead for 8-10 minutes by hand. Push the dough away with the heel of your hand, fold it back over, and repeat. You’re developing the gluten network, which gives the dough its elasticity.
The dough is ready when it’s smooth, supple, and springs back slowly when pressed with a finger. If it’s too sticky, add a sprinkle of bread flour, but go sparingly—too much flour makes for a dense crust. The surface should be slightly tacky but not wet.
Step 4: First Rise and Shape the Dough
Place the dough in a lightly oiled bowl, cover with a damp towel, and let it rise in a warm place for 45-60 minutes. It should double in size. I like to turn on my oven light for a gentle warmth that speeds up the process without overheating.
Once risen, punch down the dough and divide it into 4 equal portions for individual pizzas. Shape each into a ball, then let them rest for 15-20 minutes before stretching. This relaxation period makes the dough much easier to shape without springing back.
Step 5: Prepare for Baking with Cornmeal and Semolina
Lightly dust your work surface and pizza peel with the 0.25 cup Cornmeal and 0.25 cup Semolina Flour. The cornmeal adds a subtle crunch and prevents sticking, while the semolina gives an extra crispness to the crust.
Stretch each dough ball into a 12-inch round by pressing from the center outward, leaving a slightly thicker rim for the crust. Transfer to the prepared peel and add your toppings. The dough should be thin enough to cook through but thick enough to hold up to sauces and cheese.
Pro Tips For Making Pizza Dough Recipe Small Batch
- Warm Your Water: Use water around 110°F—hot enough to activate the instant yeast but not so hot it kills it. I learned this the hard way after a few batches that never rose.
- Measure Flour Right: Spoon the bread flour into your measuring cup and level it off—scooping directly from the bag packs it down and makes the dough too dense.
- Skip the Rush: Let the dough rest for at least 1 hour, or until doubled in size. Resist the urge to speed it up with extra yeast; it’ll taste better with time.
- Use Good Olive Oil: Splurge on quality extra-virgin olive oil here—about 2 tablespoons. It adds depth to the crust that cheaper oils just can’t match.
Storing and Reheating Leftovers
Refrigerator Storage
After kneading, place dough balls in lightly oiled airtight containers and refrigerate. This slows fermentation, developing more complex flavors. The dough keeps for up to 3 days—I actually prefer it on day two. Let it sit at room temp for 30 minutes before shaping. ❄️
Freezing for Later
Portion dough into balls and freeze on a tray first to prevent sticking. Once solid, transfer to freezer bags, squeezing out excess air. It’ll keep for 3 months. Thaw overnight in the fridge, then bring to room temperature before using.
Countertop Rise
For same-day use, let the dough rise at room temperature for 1-2 hours until doubled. I often place it near a sunny window or on top of the fridge where it’s slightly warmer. Cover with a damp towel to prevent drying.
Reheating Baked Dough
If you’ve pre-baked crusts, warm them at 375°F for 5-7 minutes before adding toppings. This restores crispness. For fully baked pizzas, reheat at 400°F for 8-10 minutes on a pizza stone. 🔥
Room Temperature Tip
Cold dough is harder to stretch. Always let refrigerated or thawed dough sit at room temperature for 30-60 minutes before shaping. This relaxes the gluten, making it easier to work with and less likely to spring back.
Storage Pro Tip
Label your containers with the date. I use Central Market’s freezer-safe bags and a Sharpie. David can confirm—nothing worse than mystery dough in the freezer. This system keeps our pizza nights organized.
Nutrition Facts
Frequently Asked Questions
Can I use all-purpose flour instead of bread flour?
Yes, but add 1 tbsp vital wheat gluten per cup of flour to boost protein. This mimics bread flour’s chewiness. Without it, your crust may be less elastic and more prone to tearing.
Why does my dough spring back when stretching?
It needs more rest time. Let it sit at room temperature for 30-60 minutes after refrigeration. This relaxes the gluten strands, making it easier to shape.
How thin should I roll the dough?
Aim for 1/4-inch thickness for a classic crust. Use your hands to stretch from the center outward, leaving a slightly thicker rim. A rolling pin can help achieve even thickness.
Can I make this dough ahead and refrigerate?
Store in an airtight container for up to 3 days. The flavor actually improves. Let it warm at room temp for 30 minutes before shaping.

- Potato Candy Recipe 1933: Vintage Peanut Butter Roll Delight - October 30, 2026
- Potato Chip Cookie Recipe With Pecans: Buttery Crunch Meets Nutty Richness - October 30, 2026
- Potato Patty Recipe No Egg: Crispy Edges Without the Binder - October 30, 2026