
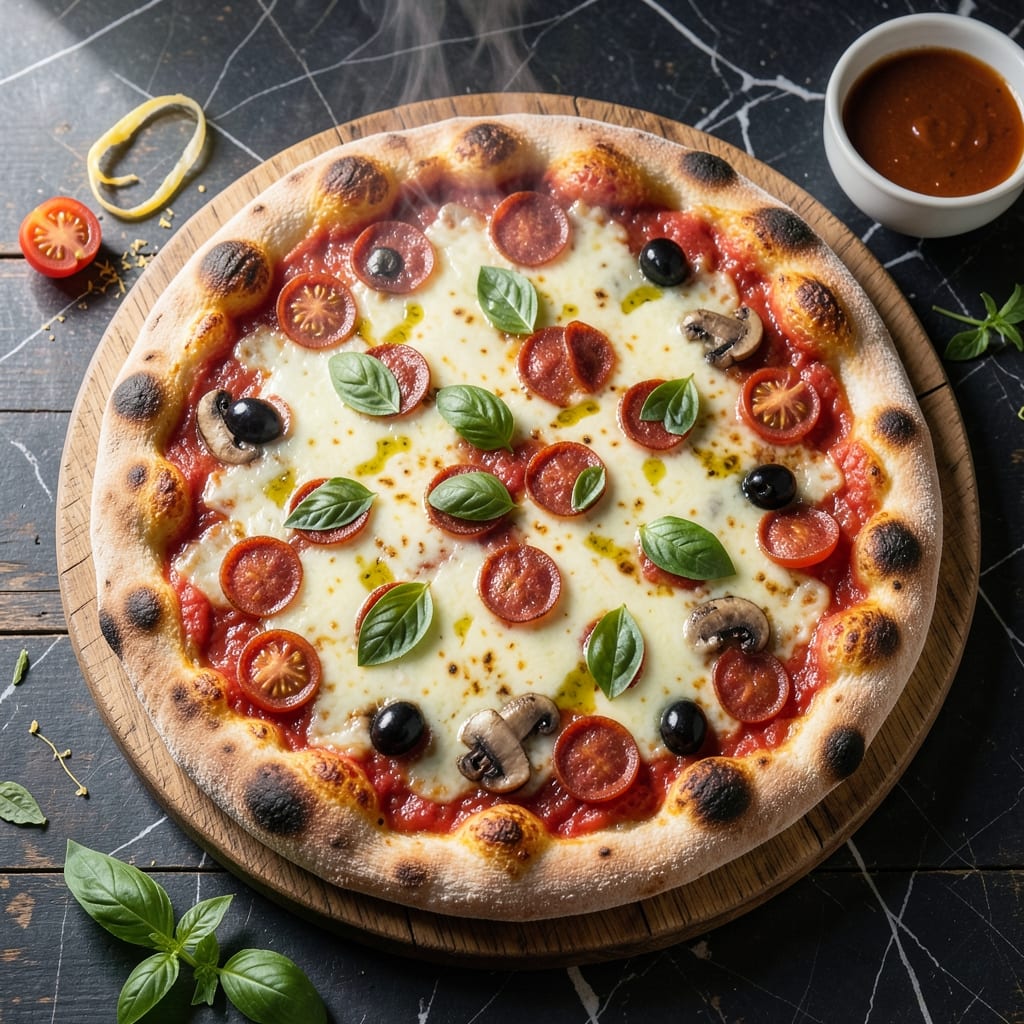
Making authentic Neapolitan pizza at home is simpler than you think with this proven method. The key lies in a high-hydration dough that develops complex flavor in just 90 minutes, without sacrificing traditional texture.
This approach uses basic pantry ingredients and a standard oven to achieve a crust that’s soft and airy inside with a slightly charred exterior. The sauce comes together in minutes, while the baking technique ensures even cooking without special equipment.
You’ll end up with a pizza that rivals your favorite pizzeria—thin, chewy crust, perfectly melted cheese, and toppings that shine. The entire process respects tradition while adapting to home kitchens.
Follow these precise steps for consistent, professional results every time.
Ingredients for Pizza Recipe from Scratch
Pantry raid time. Flour, yeast, tomatoes, cheese—nothing exotic here.
| Ingredient | Amount | Notes |
|---|---|---|
| Bread Flour 🌾 | 3 ½ cups | High-protein for chewy texture |
| Active Dry Yeast 🍞 | ¼ oz | Or 1 packet, proofed |
| Kosher Salt 🧂 | 2 tsp | Diamond Crystal preferred |
| Sugar 🍚 | 1 tsp | Feeds the yeast |
| Warm Water 💧 | 1 ½ cups | 110-115°F for activation |
| Extra-Virgin Olive Oil 🫒 | 2 tbsp | Plus extra for bowl |
| San Marzano Canned Tomatoes 🍅 | 1 can | 28 oz, crushed by hand |
| Fresh Basil Leaves 🌿 | ½ cup | Torn, not chopped |
| Garlic Cloves 🧄 | 3 cloves | Minced for sauce |
| Fresh Mozzarella Cheese 🧀 | 8 oz | Low-moisture, shredded |
| Parmesan Cheese 🧀 | ½ cup | Freshly grated from block |
| Dried Oregano 🍃 | 1 tsp | Rubbed between palms |
| Red Pepper Flakes 🌶️ | ½ tsp | Adjust to spice preference |
| Semolina Flour 🌾 | ¼ cup | For dusting peel |
The flour is non-negotiable. King Arthur Bread Flour (12.7% protein) gives that elastic chew—all-purpose just won’t cut it. Yeast from a jar stays fresher than packets. For tomatoes, San Marzano DOP (imported from Italy) is the gold standard, but any whole peeled tomato in a can works. I grab mine from Trader Joe’s (cheap) or Eataly (fancy). The mozzarella? Whole Foods has great fresh balls in the cheese case.
No bread flour? All-purpose plus 1 tbsp vital wheat gluten per cup gets you close. Fresh mozzarella too wet? Pat it dry with paper towels or switch to low-moisture block. Out of San Marzanos? Any canned tomato works—just drain the excess liquid. Skip the pre-shredded cheese (coated in anti-caking agents). For the sauce, a pinch of sugar balances acidity if your tomatoes taste sharp.
Dough rises best in a warm spot—70-75°F (I use my turned-off oven with the light on). Sauce keeps 5 days in the fridge, dough balls freeze for 3 months. Leftovers? Reheat slices in a dry skillet for crisp crust. Always let dough come to room temp before shaping.
Why You’ll Love This Recipe
- Minimal Ingredients: I love that it only needs bread flour, yeast, salt, sugar, and warm water—no fancy pantry items.
- That Yeast Magic: The active dry yeast gives it that perfect chewy texture with just the right amount of rise.
- Weeknight Hero: Honestly, it’s my go-to for last-minute dinners when I need something satisfying fast.
- Budget Friendly: Feeds my whole family for less than takeout, and leftovers taste just as good the next day.
Step-by-Step Instructions for Pizza From Scratch
Here’s my method for achieving that perfect Neapolitan-style crust and flavorful toppings in under two hours.
Step 1: Activate the Yeast and Mix the Dough
In a small bowl, combine the 0.25 oz active dry yeast, 1 tsp sugar, and 1.5 cups warm water at 110-115°F. Let it sit for 5-10 minutes until the mixture becomes foamy and cloudy—that’s your confirmation the yeast is alive and active.
In a large mixing bowl, combine the 3.5 cups bread flour and 2 tsp kosher salt. Make a well in the center and pour in the yeast mixture along with the 2 tbsp extra-virgin olive oil. Using a wooden spoon, stir until a shaggy dough forms. I find bread flour’s higher protein content gives that authentic chewy texture you’re after.
Step 2: Knead and Let the Dough Rise
Turn the dough out onto a lightly floured surface and knead for 8-10 minutes until smooth and elastic. You’ll know it’s ready when it springs back slowly when poked and has a slight sheen. This develops the gluten that creates that characteristic chew.
Lightly oil a clean bowl with additional extra-virgin olive oil, place the dough inside, and cover with a damp towel. Let it rise in a warm place for 1 hour or until doubled in size. I like to turn my oven on to its lowest setting for 2 minutes, then turn it off and place the bowl inside—creates the perfect proofing environment.
Step 3: Prepare the Sauce and Toppings
While the dough rises, crush the 1 can San Marzano canned tomatoes by hand in a bowl. Stir in the minced 3 cloves garlic cloves, 1 tsp dried oregano (rubbed between your palms to release the oils), and 0.5 tsp red pepper flakes. Season with a pinch of the kosher salt.
Shred the 8 oz fresh mozzarella cheese and tear the 0.5 cup fresh basil leaves by hand. Grate the 0.5 cup Parmesan cheese from a block—pre-shredded won’t melt as smoothly. Having all your toppings prepped before stretching the dough makes the assembly process much smoother.
Step 4: Shape the Dough and Assemble the Pizza
Punch down the risen dough and divide it into 4 equal portions for individual pizzas. On a surface dusted with 0.25 cup semolina flour (which adds texture and prevents sticking), stretch each portion into a 12-inch round. Work from the center outward, using your fingertips to press the dough gently.
Spread a thin layer of sauce over each crust, leaving a ½-inch border. Top with the shredded fresh mozzarella, then sprinkle with Parmesan. Distribute the torn fresh basil leaves evenly. Don’t overload the toppings—this ensures even cooking and that perfect crust-to-topping ratio.
Step 5: Bake to Perfection
Preheat your oven to its highest temperature (ideally 500-550°F) with a pizza stone or inverted baking sheet inside. Slide your assembled pizza onto the hot surface and bake for 10-12 minutes until the crust is golden brown with some charred spots and the cheese is bubbly.
Remove from the oven and let rest for 2 minutes before slicing. This brief rest allows the cheese to set slightly so it doesn’t all slide off when you cut into it. Serve immediately while hot and crispy—there’s nothing quite like that first bite of homemade pizza.
Pro Tips For Making Pizza Recipe From Scratch
- Proof the Yeast: Always activate your yeast in warm water with a pinch of sugar first—if it doesn’t bubble within 5 minutes, your dough won’t rise and you’ll waste flour. I learned this the hard way after tossing out three flat, sad crusts.
- Use Bread Flour: Skip all-purpose flour if you can; bread flour’s higher protein content gives that chewy, stretchy texture you actually want in pizza dough. The difference is noticeable, especially in thin crusts.
- Don’t Over-Knead: Mix just until the dough comes together, then let the gluten develop during the rise. Overworking it makes the crust tough—my first few pizzas were basically edible cardboard.
- Rest the Dough: Give it at least 1 hour (or overnight in the fridge) to rise properly. Rushing this step means a dense, flavorless base, and nobody wants that.
Essential Equipment for Perfect Results
Pizza Stone or Steel
A pizza stone or baking steel is non-negotiable for that crisp, charred crust. I use a 16-inch cordierite stone from Old Stone Oven—it retains heat like a pro. Preheat it for at least 1 hour at 550°F to mimic a wood-fired oven. 🔥
Infrared Thermometer
Knowing your stone’s surface temp is key. A Thermopen ONE reads in 1 second and ensures you’re baking at the right heat. Aim for 550-600°F on the stone’s surface—not just the oven air temp.
Pizza Peel
A wooden peel works for launching, but I prefer perforated aluminum for its light weight and easy cleaning. Dust it generously with semolina flour to prevent sticking. The 12-inch peel from Epicurean is my go-to for home use.
Dough Scraper
A bench scraper makes dividing and handling sticky dough a breeze. I use the Ateco 5-inch model—perfect for cutting 4 equal portions and cleaning my work surface. The sharp edge also helps release dough from the counter. ✨
Mixing Bowls
You’ll need a large stainless steel bowl for dough rising. I love Winco’s 5-quart—it’s sturdy and has a flat bottom for easy kneading. For the sauce, a medium glass bowl works perfectly for crushing tomatoes by hand.
Cheese Grater
Freshly grated Parmesan melts better than pre-shredded. I swear by the Microplane 360—it creates fine, even shreds and catches every last bit. For mozzarella, a box grater gives you the ideal texture for even melting.
Nutrition Facts
Frequently Asked Questions
Can I use all-purpose flour instead of bread flour?
Yes, but add 1 tbsp vital wheat gluten per cup to boost protein. Bread flour’s higher protein creates that signature chew. Without it, your crust may be less elastic.
Why does my dough not rise properly?
Check your yeast’s expiration date first. Water temperature should be 110-115°F. Also ensure your rising spot is warm enough (70-75°F). Cold environments slow yeast activity significantly.
How do I prevent a soggy crust?
Pre-bake your shaped dough for 2-3 minutes before adding toppings. Use semolina flour on the peel to absorb excess moisture. Avoid overloading with wet ingredients like fresh tomatoes.
Can I make the dough ahead of time?
Refrigerate dough balls in airtight containers for up to 3 days. For longer storage, freeze for up to 3 months. Let dough come to room temp before shaping.

- Potato Candy Recipe 1933: Vintage Peanut Butter Roll Delight - October 30, 2026
- Potato Chip Cookie Recipe With Pecans: Buttery Crunch Meets Nutty Richness - October 30, 2026
- Potato Patty Recipe No Egg: Crispy Edges Without the Binder - October 30, 2026