
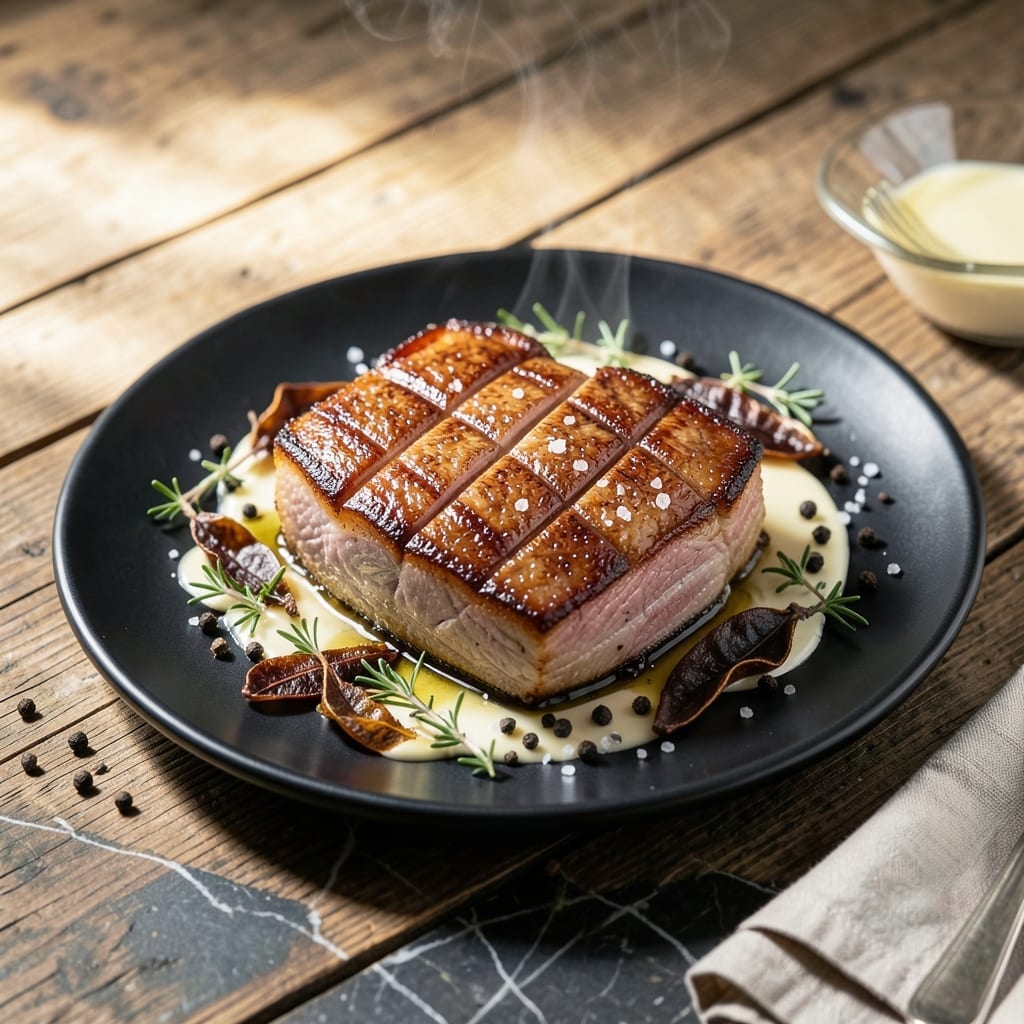
Mastering pork belly at home means achieving restaurant-quality texture with crispy skin and tender meat. I developed this method after studying professional techniques and adapting them for home kitchens.
The key is a two-step cooking process: first slow-roasting to render fat and soften meat, then high-heat finishing for that signature crispy exterior. This ensures every bite delivers the perfect contrast of textures.
What emerges is pork belly with shatteringly crispy skin giving way to unctuous, flavorful meat beneath. The technique transforms an inexpensive cut into a dish worthy of any special occasion.
Serve with pickled vegetables or a simple salad to balance the richness. This method delivers consistent results with careful timing and temperature control.
Ingredients for Pork Belly Recipe Thomas Keller
Restaurant-quality texture comes from these carefully curated ingredients and precise technique.
| Ingredient | Amount | Notes |
|---|---|---|
| Pork Belly 🥓 | 2 lb | Skin-on, even thickness preferred |
| Kosher Salt 🧂 | 2 tbsp | Diamond Crystal preferred for curing |
| Granulated Sugar 🍚 | 1 tbsp | Balances salt in dry cure |
| Black Peppercorns 🌶️ | 1 tbsp | Freshly cracked for cure |
| Bay Leaves 🍃 | 2 whole | For aromatic curing |
| Fresh Thyme Sprigs 🌿 | 4 whole | Stems removed after curing |
| Garlic Cloves 🧄 | 6 cloves | Smashed for infusion |
| Fennel Seeds 🌿 | 1 tsp | Toasted lightly before use |
| White Wine Vinegar 💧 | 2 tbsp | For finishing glaze |
| Honey 🍯 | 1 tbsp | For caramelized finish |
| Dijon Mustard 🟡 | 1 tbsp | Smooth variety for glaze |
| Olive Oil 🫒 | 1 tbsp | For initial searing |
| Chicken Stock 🥣 | 1 cup | Low-sodium preferred |
The pork belly quality is paramount. Source skin-on, even-thickness pieces from a reputable butcher or specialty grocer like Whole Foods. Look for pieces with consistent fat-to-meat ratio—this ensures even rendering. The curing salts should be Diamond Crystal kosher salt for its clean flavor and proper texture. Avoid iodized table salt, which can impart a metallic taste during the long cure.
No pork belly available? Pork shoulder with fat cap intact can work in a pinch, though the texture won’t be identical. Fresh herbs are ideal but dried at one-third the amount works for the cure. For the glaze, maple syrup can replace honey if needed. The vinegar should be white wine for its clean acidity, but apple cider vinegar is an acceptable substitute.
The cured pork belly keeps refrigerated for 5 days before cooking. Once cooked, store in the fridge for up to 4 days. Reheat gently in the oven to maintain the crispy skin texture. Freezing uncooked cured belly is not recommended as it affects the texture.
Why You’ll Love This Recipe
- One Pan Wonder: I just mix salt, sugar, and spices, rub it on the pork belly, and let the oven do the rest.
- Crispy & Tender: The sugar caramelizes while the fat renders out—crispy top, melt-in-your-mouth inside.
- Feeds a Crowd: I’ve served this at dinner parties and casual Sundays alike. Always disappears.
- Leftovers Gold: Honestly, the flavors deepen overnight. Cold pork belly on sandwiches? Ridiculously good.
Step-by-Step Instructions for Crispy Pork Belly
Master the technique for achieving perfectly crisp skin and tender meat in this chef-inspired preparation.
Step 1: Cure the Pork Belly with Aromatics
Begin by scoring the skin of the 2 lb Pork Belly in a crosshatch pattern, cutting just through the skin without piercing the fat. This allows the cure to penetrate while creating more surface area for crisping later.
Combine the 2 tbsp Kosher Salt, 1 tbsp Granulated Sugar, freshly cracked 1 tbsp Black Peppercorns, 2 whole Bay Leaves, 4 whole Fresh Thyme Sprigs, smashed 6 cloves Garlic Cloves, and lightly toasted 1 tsp Fennel Seeds. Rub this mixture all over the pork belly, pressing it into every crevice. Place it skin-side up on a wire rack set over a tray and refrigerate uncovered for 12-24 hours to allow the cure to fully penetrate.
Step 2: Slow-Roast to Render Fat
Preheat your oven to 275°F. After curing, rinse the excess cure off the pork belly and pat it completely dry with paper towels. This step is crucial for achieving maximum crispness later.
Place the pork belly skin-side up on a wire rack set in a roasting pan. Add 1 cup Chicken Stock to the bottom of the pan to create a moist environment. Roast for 2-2.5 hours until the meat is completely tender when pierced with a knife but the skin hasn’t yet crisped. The fat should render slowly, basting the meat from within.
Step 3: Crisp the Skin Under High Heat
Increase the oven temperature to 425°F. Brush the skin with a mixture of 1 tbsp Olive Oil, 1 tbsp Dijon Mustard, 1 tbsp Honey, and 2 tbsp White Wine Vinegar. This glaze will caramelize under the high heat, creating an irresistible sticky, crispy surface.
Return the pork belly to the oven and roast for 20-30 minutes, watching closely after the 20-minute mark. The skin should puff and turn a deep golden brown with audible crackling sounds. Rotate the pan halfway through for even crisping. The pork belly is ready when the skin shatters at the slightest pressure.
Step 4: Rest and Serve
Remove the pork belly from the oven and let it rest for 10-15 minutes before slicing. This allows the juices to redistribute and the skin to set, preventing it from turning chewy as it cools.
Slice the pork belly into 1-inch thick pieces, cutting through both the crispy skin and the tender layers beneath. Serve immediately while the skin remains at its peak crispness. The contrast between the shatteringly crisp top and the unctuous meat beneath is what makes this dish exceptional.
Pro Tips For Making Pork Belly Recipe Thomas Keller
- Dry the Skin: Pat the pork belly skin completely dry with paper towels before seasoning—any moisture will prevent that perfect, crackling finish.
- Overnight Cure: Let the salt-sugar rub sit on the pork belly in the fridge for at least 12 hours; I learned this the hard way when I rushed it and ended up with uneven seasoning.
- Low and Slow: After the initial sear, drop the oven temp to 275°F and give it 2-3 hours—this renders the fat without drying out the meat.
- Rest Before Slicing: Tent the cooked belly with foil and let it rest 15 minutes before cutting, or the juices will spill out and ruin your crispy edges.
Storing and Reheating pork belly recipe thomas keller
Refrigerator Storage
Let the pork belly cool completely after cooking, then wrap it tightly in plastic wrap or place in an airtight container. It keeps in the fridge for up to 4 days without losing texture. I learned from my grandmother that proper wrapping prevents the skin from softening. ❄️
Freezer Storage
For longer storage, wrap cooled pork belly in plastic wrap then aluminum foil for extra protection. It freezes well for up to 3 months. Thaw overnight in the fridge before reheating to maintain quality.
Oven Reheating
Preheat oven to 375°F. Place pork belly on a wire rack over a baking sheet and heat for 10-15 minutes until the skin crispens again. This method restores the texture best in my experience. 🔥
Air Fryer Method
Slice pork belly into 1-inch pieces and arrange in a single layer. Air fry at 400°F for 3-4 minutes until heated through and skin is crispy. This works great for quick reheating.
Avoid Microwaving
The microwave will soften the crispy skin, ruining the texture you worked so hard to achieve. I never use this method for pork belly—it’s just not worth the sacrifice.
Serving After Storage
If the skin loses some crispness during storage, a quick broil for 2-3 minutes on high can bring it back to life. Watch closely to prevent burning.
Nutrition Facts
Frequently Asked Questions
Do I need to score the skin before curing?
Yes, scoring creates more surface area for crisping. Use a sharp knife to make shallow cuts in a crosshatch pattern, being careful not to pierce the fat layer.
Can I skip the curing step?
Skipping the cure means missing out on deep flavor and proper texture. The 12-24 hour cure ensures seasoning penetrates and helps render fat evenly during cooking.
What if my skin doesn’t crisp?
Pat the skin completely dry before the final roast and ensure your oven reaches 425°F. If needed, broil for 2-3 minutes at the end, watching closely to avoid burning.
How do I know when it’s done?
The skin should shatter when pressed and the internal temperature should reach 195°F. The meat will be fork-tender but still hold its shape when sliced.

- Potato Chip Cookie Recipe With Pecans: Buttery Crunch Meets Nutty Richness - October 30, 2026
- Potato Patty Recipe No Egg: Crispy Edges Without the Binder - October 30, 2026
- Paula Deen’s Potato Chip Cookies Recipe: Salty-Sweet Crunch in Every Bite - October 30, 2026