
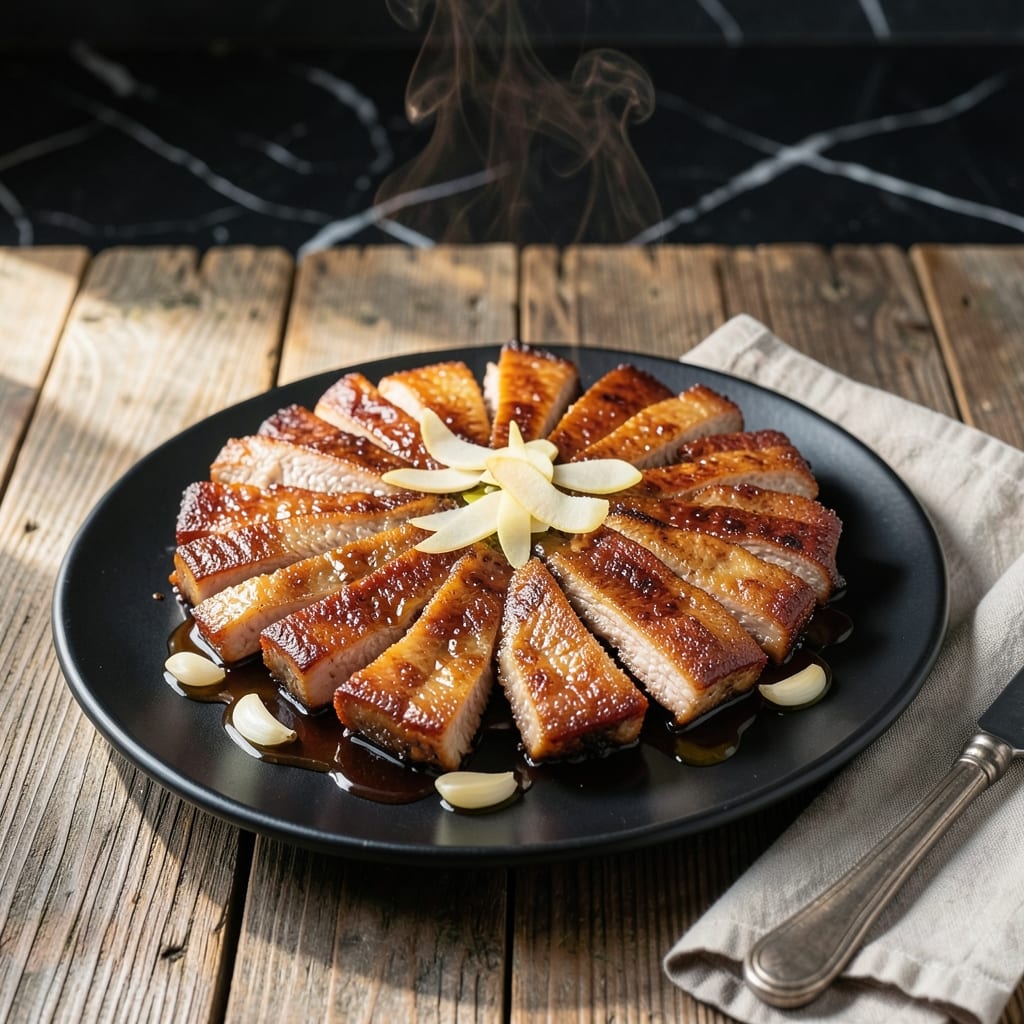
I learned the hard way that pork belly needs patience to reach that melt-in-your-mouth tenderness. My grandmother never rushed good food, and this slow cooker method proves her right every time.
This hands-off approach lets the fat render slowly while the meat becomes fork-tender. The secret is a long, gentle cook followed by a quick broil to crisp the edges and set the glaze.
What emerges is pork so tender it nearly falls apart, coated in a sticky-sweet glaze that caramelizes beautifully. It’s the kind of dish that makes weeknight cooking feel special without the fuss.
Perfect for serving over rice or noodles to soak up every drop of that rich sauce. Here’s how to make it effortlessly.
Ingredients for Pork Belly Strips Recipe Slow Cooker
Pantry staples plus pork belly make this slow cooker masterpiece effortless.
| Ingredient | Amount | Notes |
|---|---|---|
| Pork Belly 🥓 | 2 lb | Skin-on, cut into strips |
| Soy Sauce 🫒 | ½ cup | Low-sodium preferred |
| Brown Sugar 🍚 | ½ cup | Packed for glaze |
| Honey 🍯 | ¼ cup | For sticky glaze |
| Garlic Cloves 🧄 | 6 cloves | Minced for depth |
| Fresh Ginger 🌿 | 1 tbsp | Grated or minced |
| Rice Vinegar 💧 | 2 tbsp | Balances sweetness |
| Sesame Oil 🫒 | 1 tbsp | Toasted for aroma |
| Green Onions 🧅 | 4 whole | Thinly sliced for garnish |
| Sesame Seeds 🌾 | 1 tbsp | Toasted for crunch |
| Black Pepper 🌶️ | 1 tsp | Freshly ground preferred |
| Red Pepper Flakes 🔥 | ½ tsp | Adjust for heat |
| Chicken Broth 💧 | ½ cup | Low-sodium for balance |
The pork belly is the star here. Ask your butcher for skin-on strips—it crisps up beautifully after the slow cook. Most Asian markets carry it frozen if your regular grocery store doesn’t. Look for pieces with even fat marbling (that’s where the flavor lives). I’ve had luck at Costco too, where they sell it in larger slabs—just slice it yourself into 1-inch strips.
No honey? Maple syrup or agave works just as well in the glaze. Swap soy sauce for tamari for gluten-free. Out of rice vinegar? Apple cider vinegar at half the amount gets you close. The chicken broth can be swapped for water in a pinch, but you’ll miss some depth. Fresh ginger is ideal, but ground ginger at one-quarter the amount works if that’s all you’ve got.
Leftovers keep in the fridge for 4-5 days—the flavors actually deepen overnight. Freeze portions for up to 3 months (great for quick meals later). Reheat gently to keep the pork tender, and always crisp the skin under the broiler before serving.
Why You’ll Love This Recipe
- Set and Forget: It’s literally just tossing pork belly, soy sauce, and brown sugar into the slow cooker and walking away.
- Sweet-Savory Magic: That sticky glaze from honey and garlic clings to every strip—crave-worthy every time.
- Feeds the Freezer: I make a double batch and freeze half for those nights I can’t even.
- Budget Hero: Pork belly is cheaper than you think, and a little goes a long way with these bold flavors.
Step-by-Step Instructions for Pork Belly Strips Slow Cooker
Trust me, this method delivers the most tender pork belly with minimal effort on your part.
Step 1: Sear and Season the Pork Belly
Pat the 2 lb Pork Belly strips dry with paper towels. Heat a large skillet over medium-high heat and sear the strips for 2-3 minutes per side until golden brown. This step locks in juices and adds depth to the final dish.
Transfer the seared pork belly to your slow cooker. While still hot, add the 0.5 cup Soy Sauce, 0.5 cup Brown Sugar, 0.25 cup Honey, 6 cloves Garlic Cloves, 1 tbsp Fresh Ginger, 2 tbsp Rice Vinegar, 1 tbsp Sesame Oil, 1 tsp Black Pepper, and 0.5 tsp Red Pepper Flakes. Stir gently to coat the pork evenly.
Here’s the thing—don’t skip the searing. It creates a fond in the pan that translates to incredible flavor in your slow cooker.
Step 2: Add Liquid and Begin Slow Cooking
Pour the 0.5 cup Chicken Broth into the slow cooker. This adds moisture to prevent the pork from drying out during the long cooking process. Cover the slow cooker with its lid.
Set the slow cooker to low heat and cook for 6-7 hours. You’ll know it’s ready when the pork belly is fork-tender and nearly falls apart with minimal pressure. Resist the urge to peek—every time you lift the lid, you add 20-30 minutes to the cooking time.
Real talk: The aroma filling your kitchen during this step is pure torture, but it’s worth the wait.
Step 3: Reduce the Sauce to Glaze Perfection
Carefully transfer the pork belly strips to a serving platter. Pour the cooking liquid from the slow cooker into a saucepan and place it over medium-high heat.
Bring the liquid to a boil, then reduce heat to medium and simmer for 8-10 minutes until it thickens into a glossy glaze that coats the back of a spoon. This concentration intensifies all the flavors and creates that signature sticky coating.
I know it seems weird, but taste the glaze before pouring it over the pork. Adjust the seasoning if needed, though the combination of soy, sugar, and spices usually hits the mark perfectly.
Step 4: Glaze and Garnish for Serving
Pour the reduced glaze over the pork belly strips, ensuring each piece is thoroughly coated. The glaze should cling to the pork, creating a beautiful, appetizing sheen.
Garnish with the 4 whole Green Onions (thinly sliced) and 1 tbsp Sesame Seeds. These final touches add freshness, color, and a delightful crunch that contrasts with the tender pork.
This is the moment that matters: Serve the pork belly strips immediately while still warm. The contrast of textures and the depth of flavors will make this dish unforgettable. The pork should be so tender it nearly melts in your mouth, with each bite delivering the perfect balance of sweet, savory, and umami.
Pro Tips For Making Pork Belly Strips Recipe Slow Cooker
- Score the Skin: Cut shallow slits into the pork belly skin before slow cooking to help the fat render out and the flavors penetrate deeper—this prevents chewy strips.
- Brown the Belly First: Sear the pork belly strips in a hot pan for 2-3 minutes per side before slow cooking. I learned this the hard way—it adds a caramelized depth that’s missing otherwise.
- Reduce the Sauce: After cooking, transfer the liquid to a stove pot and simmer for 5-7 minutes to thicken it into a glossy glaze. Sounds like extra work, but it clings to the meat instead of pooling at the bottom.
- Skip the Overcrowding: Arrange the strips in a single layer in the slow cooker, not stacked. After burning a batch that steamed instead of caramelized, I finally figured out that space matters.
Storing and Reheating Leftovers
Refrigerator Storage
Let this dish cool completely before storing—I usually wait 2 hours at room temp. Transfer to airtight containers with the glaze. It’ll keep in the fridge for 4-5 days, and honestly, the flavors taste even better the next day. ❄️
Freezer Storage
For longer storage, portion the pork and glaze into freezer-safe bags or containers. Leave 1 inch of headspace to prevent freezer burn. It’ll stay delicious for up to 3 months—perfect for those busy weeknights.
Stovetop Reheating
My preferred method: reheat in a skillet over medium-low heat with a splash of water or broth. Cover and warm for 5-7 minutes, stirring occasionally. This keeps the pork tender while reviving the glaze.
Oven Reheating
Preheat the oven to 325°F and place the pork in a baking dish with a bit of liquid. Cover with foil and heat for 15-20 minutes. Uncover and broil for 2-3 minutes to crisp the edges before serving.
Microwave Reheating
For a quick fix, microwave individual portions covered with a damp paper towel. Use 50% power in 1-minute intervals, stirring between each. Add a splash of water if the glaze thickens too much. 💡
Nutrition Facts
Frequently Asked Questions
Do I need to sear the pork belly first?
Yes, searing for 2-3 minutes per side creates a flavorful fond that deepens the taste. It also helps render some fat before slow cooking.
Can I use a different sweetener?
Maple syrup or agave work well in place of honey. Adjust to taste, as sweetness levels may vary slightly.
How do I prevent the pork from drying out?
Add 0.5 cup Chicken Broth to the slow cooker and avoid lifting the lid during cooking. This keeps moisture locked in.
Can I cook this on high heat?
Not recommended. Low heat for 6-7 hours ensures tender, melt-in-your-mouth results without toughness.

- Potato Chip Cookie Recipe With Pecans: Buttery Crunch Meets Nutty Richness - October 30, 2026
- Potato Patty Recipe No Egg: Crispy Edges Without the Binder - October 30, 2026
- Paula Deen’s Potato Chip Cookies Recipe: Salty-Sweet Crunch in Every Bite - October 30, 2026