
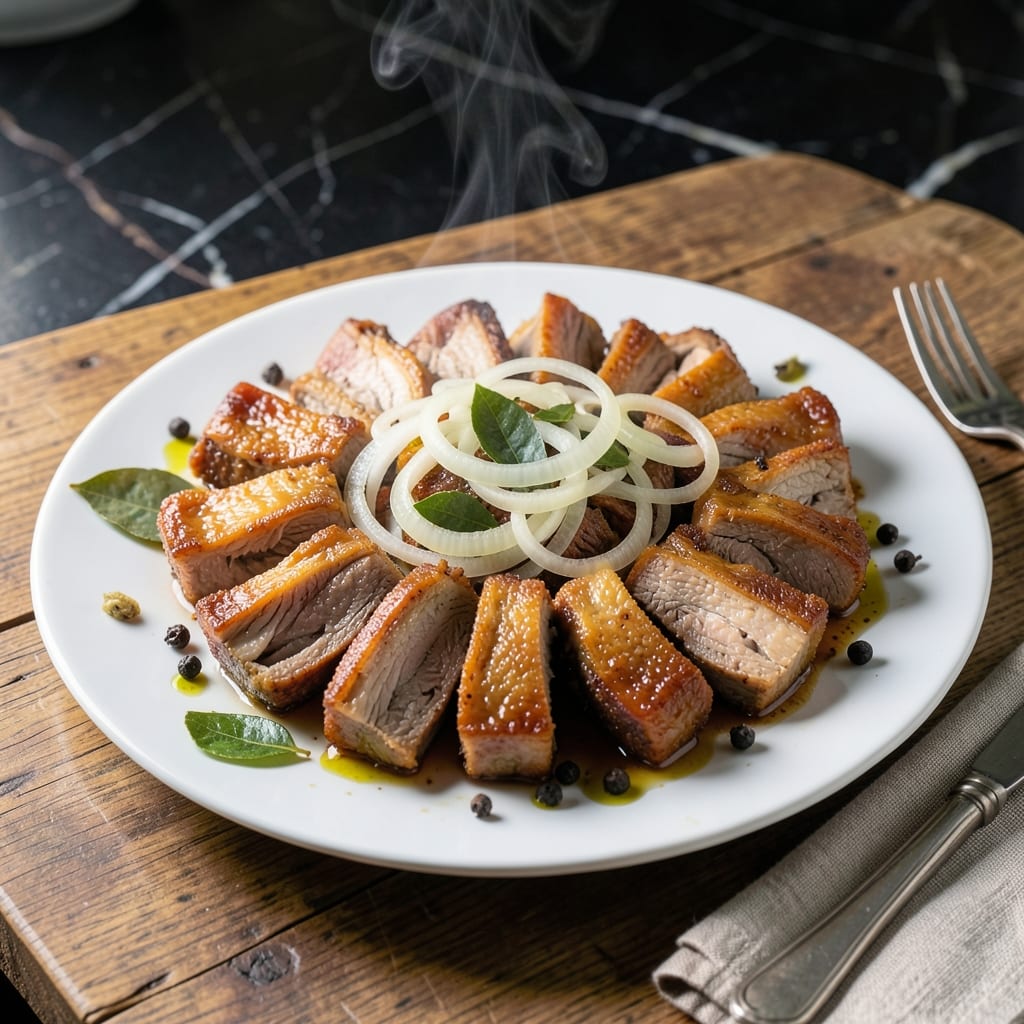
My grandmother never wrote down her recipes, but I remember her frying pork ears to crispy perfection for family gatherings. This dish brings that same texture to your kitchen.
After burning my first three batches, I learned the secret is low and slow frying. The ears transform from chewy to irresistibly crispy with a golden finish.
You’ll get that perfect balance of crunch and chew that makes this Filipino street food so addictive. Serve with spicy vinegar for the full experience.
No fancy equipment needed—just patience and a watchful eye. Here’s how to nail it every time.
Ingredients for Pork Ears Recipe Filipino Style
Pantry basics plus pork ears transform into that addictive crunch and chew texture.
| Ingredient | Amount | Notes |
|---|---|---|
| Pork Ears 🐷 | 2 lb | Cleaned and split lengthwise |
| White Vinegar 💧 | 1 cup | For initial boiling |
| Water 💧 | 4 cups | For parboiling ears |
| Salt 🧂 | 1 tbsp | Kosher or sea salt |
| Bay Leaves 🍃 | 3 whole | Dried, for boiling |
| Black Peppercorns 🌶️ | 1 tsp | Whole, for boiling |
| Vegetable Oil 🫒 | 4 cups | For deep frying |
| Garlic Cloves 🧄 | 6 cloves | Smashed for frying oil |
| Cane Vinegar 💧 | ½ cup | For serving dip |
| Red Chili Peppers 🌶️ | 3 whole | Thai bird's eye preferred |
| Soy Sauce 🥢 | 2 tbsp | For serving dip |
| Sugar 🍚 | 1 tsp | For balancing dip |
| Ground Black Pepper 🌶️ | ½ tsp | Freshly ground preferred |
The pork ears are everything here. Ask your butcher for pre-cleaned ones to save time, or buy frozen from Asian markets—just thaw them completely first. Look for ears with good color (pale pink, not gray) and no strong odor. The vinegar in the boiling water helps remove any lingering impurities and starts tenderizing the cartilage. Don’t skip the bay leaves—they add a subtle depth that balances the richness.
No pork ears? Pork rinds or chicken skin can give you similar crispiness, but the texture won’t be the same. For the vinegar dip, rice vinegar works in a pinch (milder flavor), or add a splash of calamansi juice if you can find it. The chili peppers can be adjusted—use serrano for less heat or habanero for more. If you’re out of soy sauce, fish sauce at half the amount adds umami without overpowering.
Fry in batches and keep warm in a 200°F oven while you finish. Leftovers? They’ll lose crispiness but still taste great—reheat in a 400°F oven for 5-10 minutes. The dip keeps for 1 week in the fridge. Honestly, these are best eaten fresh, straight out of the oil (worth the extra minute).
Why You’ll Love This Recipe
- One Pot Wonder: I just toss the pork ears with vinegar, salt, and bay leaves in a single pot and let it simmer—no fancy steps, no mess.
- Tangy Crunch: The vinegar cuts through the richness, giving that perfect balance of sour and savory with every bite.
- Feeds a Crowd: Honestly, it’s my go-to for family gatherings since it stretches easily and tastes even better the next day.
- Budget Stretch: Pork ears are cheap, and this recipe turns them into something crave-worthy without breaking the bank.
Step-by-Step Instructions for Pork Ears Filipino Style
Achieving that perfect crispy-chewy texture requires patience and attention to detail at each stage.
Step 1: Parboil the Pork Ears
Begin by combining the 4 cups Water, 1 cup White Vinegar, 1 tbsp Salt, 3 whole Bay Leaves, and 1 tsp Black Peppercorns in a large pot. Bring this mixture to a rolling boil over high heat.
Once boiling, carefully add the 2 lb Pork Ears and reduce the heat to maintain a gentle simmer. Cook for 45-60 minutes until the ears become tender when pierced with a fork. This step removes impurities and prepares them for crisping.
Drain the ears completely and pat them dry with paper towels. Any remaining moisture will cause the oil to splatter during frying.
Step 2: Deep-Fry for Maximum Crispiness
In a deep, heavy pot, heat the 4 cups Vegetable Oil to 350°F. While the oil heats, add the 6 cloves Garlic Cloves to the oil—they’ll infuse flavor as the oil comes to temperature.
Fry the pork ears in batches to avoid crowding, cooking for 8-10 minutes or until they turn deep golden brown and develop a crispy exterior. The ears should float and sizzle steadily. Use a slotted spoon to transfer them to a paper towel-lined plate.
Increase the heat to 375°F and fry for an additional 2-3 minutes for extra crispiness. Drain on fresh paper towels.
Step 3: Prepare the Vinegar Dip
While the ears are hot, combine the 0.5 cup Cane Vinegar, 2 tbsp Soy Sauce, 1 tsp Sugar, and 0.5 tsp Ground Black Pepper in a small bowl. Stir until the sugar dissolves completely.
Finely chop the 3 whole Red Chili Peppers and add them to the dip. The vinegar should be tangy with a slight sweetness and a kick of heat from the chilies. Adjust the sugar if you prefer a sweeter balance.
Let the dip sit for 5-10 minutes to allow the flavors to meld together before serving.
Step 4: Serve and Enjoy
Arrange the crispy pork ears on a serving platter with the vinegar dip in a small bowl on the side. The ears should be crunchy on the outside and chewy on the inside, with a rich, savory depth from the parboiling and frying process.
Encourage everyone to dip each piece generously into the vinegar mixture. The acidity cuts through the richness of the fried pork, creating a perfect balance of flavors that defines this Filipino street food classic.
Pro Tips For Making Pork Ears Recipe Filipino Style
- Parboil First: I learned this the hard way—boiling the pork ears in salted water with bay leaves for 10-15 minutes before simmering in vinegar removes impurities and helps the flavors penetrate deeper.
- Use More Vinegar: Sounds weird, but it works: use a 1:1 ratio of white vinegar to water for that tangy Filipino adobo taste. Less vinegar makes the ears taste flat.
- Don’t Rush the Simmer: After boiling, let the ears simmer in the vinegar mixture for at least 45 minutes—any less and they’ll stay chewy instead of tender.
- Skim the Scum: My grandmother swore by this, and she was right: skim off the foam that rises during the initial boil to keep the broth clean and the flavor pure.
Troubleshooting Perfect Results
Oil Temperature Issues
If your pork ears are greasy instead of crispy, your oil temperature is likely too low. I use a candy thermometer to maintain 350-375°F—any cooler and they’ll absorb oil instead of crisping. Try frying in smaller batches to keep the temperature steady. 🌡️
Uneven Cooking
When parts of the ears stay chewy while others burn, it means uneven heat distribution. Use a heavy pot like enamel-coated cast iron and avoid overcrowding. I learned this the hard way after ruining two batches in a thin aluminum pot.
Soggy After Frying
If your crispy ears turn soft too quickly, they weren’t dried properly after parboiling. Pat them very dry with paper towels and let them air-dry for 10 minutes before frying. I rest mine on a wire rack to ensure complete dryness.
Bitter Vinegar Dip
If your serving dip tastes harsh, balance it with more sugar or a splash of water. The cane vinegar can be intense—start with ½ tsp sugar and adjust. I sometimes add a pinch of salt to round out the flavors.
Oil Splattering
Excess moisture causes dangerous oil splatters. Always dry the ears thoroughly and use a splatter screen. I keep a lid nearby to quickly cover the pot if needed. Safety first—this dish isn’t worth a trip to the emergency room.
Insufficient Crisp
For that extra crunch, double-fry the ears: first at 325°F for 6 minutes, then at 375°F for 2-3 minutes. This method, borrowed from Korean fried chicken, creates a shatteringly crisp exterior. 💡
Nutrition Facts
Frequently Asked Questions
Can I use frozen pork ears?
Yes, but thaw them completely in the fridge for 12-24 hours first. Pat them extra dry to prevent oil splatter. Frozen ears may need 5-10 extra minutes of parboiling to tenderize.
Why add vinegar to the boiling water?
The vinegar helps remove impurities and softens the cartilage. It also neutralizes any strong odors. This step ensures cleaner flavor and better texture after frying.
How do I keep them crispy longer?
Drain on a wire rack instead of paper towels to prevent steam buildup. Store in a single layer in a 200°F oven until serving. Avoid covering, or they’ll lose their crunch.
Can I bake instead of frying?
Baking won’t achieve the same crispiness, but for a healthier option, try 400°F for 30-40 minutes. Toss with a little oil and flip halfway. The texture will be chewier, not as crisp.

- Potato Chip Cookie Recipe With Pecans: Buttery Crunch Meets Nutty Richness - October 30, 2026
- Potato Patty Recipe No Egg: Crispy Edges Without the Binder - October 30, 2026
- Paula Deen’s Potato Chip Cookies Recipe: Salty-Sweet Crunch in Every Bite - October 30, 2026