
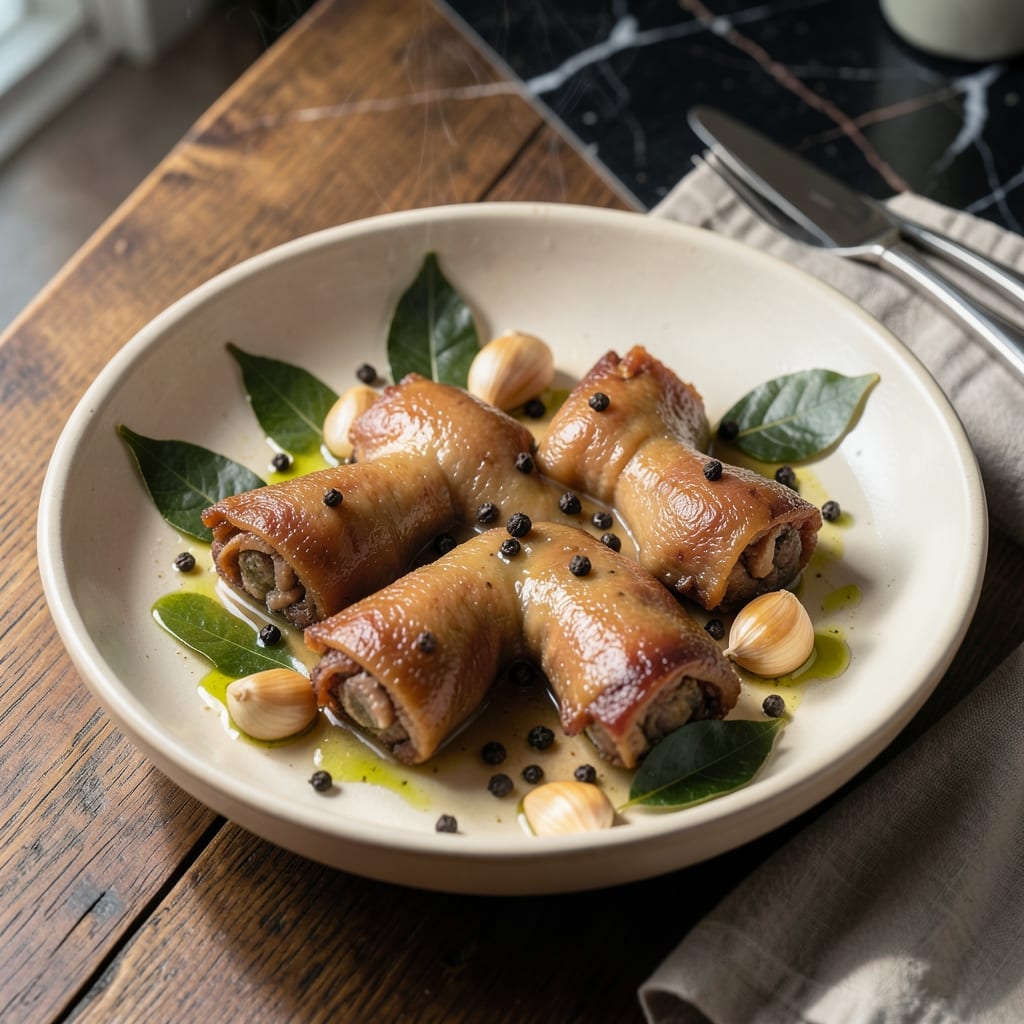
This traditional Filipino pork feet recipe transforms humble ingredients into a rich, gelatinous masterpiece through slow simmering. The process requires patience but rewards with tender meat and a velvety sauce that clings to every bite.
I developed this method after studying authentic Filipino cooking techniques. The key lies in the initial blanching step, which removes impurities and ensures a clean, flavorful broth. Simmering for hours extracts maximum collagen, creating that signature sticky texture.
What emerges is a dish that’s both comforting and celebratory, with pork so tender it nearly falls apart. The sauce reduces to a glossy sheen that’s perfect for soaking up with steamed rice. Every element comes together in perfect harmony.
Serve this at gatherings or as a special weekend meal. The results speak for themselves.
Ingredients for Pork Feet Recipe Filipino Style
Transform humble pork feet into a rich gelatinous masterpiece with these traditional ingredients.
| Ingredient | Amount | Notes |
|---|---|---|
| Pork Feet 🐷 | 2 lb | Split and thoroughly cleaned |
| Water 💧 | 8 cups | For blanching and simmering |
| White Vinegar 🍶 | ½ cup | For blanching step |
| Bay Leaves 🍃 | 3 whole | Dried, for broth aroma |
| Black Peppercorns 🌶️ | 1 tbsp | Whole, for broth depth |
| Garlic Cloves 🧄 | 8 cloves | Peeled and smashed |
| Yellow Onion 🧅 | 1 whole | Quartered, skin on |
| Salt 🧂 | 2 tbsp | Kosher or sea salt |
| Soy Sauce 🫙 | ½ cup | Filipino or regular variety |
| Star Anise Pods ⭐ | 3 whole | For authentic flavor |
| Green Onions 🧅 | 4 pieces | Chopped, for garnish |
| Calamansi or Lime 🍋 | 2 whole | Cut into wedges for serving |
The pork feet are non-negotiable here. Source fresh, high-quality trotter from a trusted butcher or Asian grocery store—look for meaty pieces with clean skin. Blanching with vinegar is essential for removing impurities and ensuring a clean broth. The bay leaves and peppercorns should be whole and fresh; stale spices will produce a dull, lifeless stock.
No pork feet? There’s no perfect substitute for the collagen-rich texture, but pork hock or pork belly can work in a pinch. For the vinegar, apple cider vinegar is a fine alternative. If star anise is unavailable, a pinch of Chinese five-spice powder can mimic the flavor. Always taste your broth as it simmers—adjust salt and soy sauce gradually.
The cooked pork feet can be refrigerated in their broth for up to 3 days or frozen for 3 months. The gelatinous sauce will thicken when chilled but returns to its velvety consistency upon reheating. Serve immediately with steamed rice for the best texture and flavor experience.
Why You’ll Love This Recipe
- Minimal Effort: I just boil, simmer, and let the vinegar and peppercorns do their magic—no fancy steps.
- Rich Collagen Flavor: That slow-cooked pork foot turns so tender, the broth is like liquid gold from the bay leaves.
- Feeds a Crowd: Honestly, it’s my go-to for big family gatherings—everyone leaves happy and full.
- Budget Stretcher: I get pounds of flavor for pennies, and leftovers taste even better the next day.
Step-by-Step Instructions for Pork Feet Filipino Style
Master the slow-simmering process to achieve tender, gelatinous pork feet with rich, aromatic broth.
Step 1: Blanch the Pork Feet
Place the 2 lb Pork Feet in a large stockpot and cover with the 8 cups Water. Add the 0.5 cup White Vinegar—this helps eliminate impurities and any strong odors from the meat. Bring to a rolling boil over high heat.
Boil for 10-15 minutes until you see scum rising to the surface. Skim off any foam or impurities with a fine-mesh strainer. This blanching step is crucial for a clean, clear broth later. Drain and rinse the pork feet thoroughly under cold water to remove any remaining residue.
Step 2: Simmer with Aromatics
Return the cleaned pork feet to the pot and add fresh 8 cups Water. Add the 1 whole Yellow Onion, 8 cloves Garlic Cloves, 3 whole Bay Leaves, 1 tbsp Black Peppercorns, and 3 whole Star Anise Pods.
Bring to a boil, then reduce heat to low to maintain a gentle simmer. Partially cover the pot and cook for 2-3 hours, occasionally skimming any foam that forms. The pork feet should become tender and the broth deeply aromatic.
Step 3: Season and Enhance the Broth
Once the pork feet are tender, stir in the 2 tbsp Salt and 0.5 cup Soy Sauce. The soy sauce adds a rich, savory depth characteristic of Filipino-style dishes. Continue simmering for another 30-45 minutes to allow the flavors to meld fully.
Taste the broth and adjust seasoning if needed, though the saltiness will intensify slightly as the liquid reduces. The pork feet should be falling off the bone, and the broth should have a deep, umami-rich flavor with hints of star anise and garlic.
Step 4: Serve with Fresh Garnishes
Ladle the pork feet and broth into deep bowls. Garnish each serving with the 4 pieces Green Onions, finely chopped, for a fresh, oniony contrast. Serve with 2 whole Calamansi or Lime wedges on the side for a bright, citrusy finish.
The dish is best enjoyed hot, with the gelatinous texture of the pork feet soaking up the flavorful broth. Encourage guests to squeeze the calamansi or lime over their bowl to balance the richness with a touch of acidity.
Pro Tips For Making Pork Feet Recipe Filipino Style
- Boil Twice First: Parboil the pork feet for 10 minutes, drain, then boil again with fresh water and vinegar—this removes impurities and keeps the broth clean. I learned this the hard way after my first batch had a funky aftertaste.
- Score the Skin: Make shallow cuts on the pork feet before cooking so the flavors penetrate deeper and the skin softens faster. Sounds tedious, but it actually changes the outcome.
- Skip the Rush: Resist the urge to crank the heat—simmer the feet low and slow for at least 2 hours, or the meat stays tough. My grandmother swore by this, and she was right.
- Vinegar Last: Add the white vinegar in the last 30 minutes of cooking to balance the richness without making the broth too sour. I was skeptical until I tried it.
Common Mistakes When Making This Recipe
Skipping the Blanch
Never skip blanching the 2 lb Pork Feet with 0.5 cup White Vinegar—this removes impurities that would cloud your broth. I learned this the hard way when my first attempt resulted in a murky, bitter liquid. The vinegar helps break down blood and other contaminants. 💡
Rushing the Simmer
This dish demands patience. Simmering for less than 2-3 hours won’t extract enough collagen for that signature gelatinous texture. I tried cutting corners once and ended up with tough, rubbery meat instead of melt-in-your-mouth perfection.
Overcrowding the Pot
Use a large enough pot so the pork feet have room to cook evenly. Crowding leads to uneven cooking and a weak broth. I recommend at least an 8-quart stockpot for this quantity. The pieces should be mostly submerged in the 8 cups Water.
Ignoring the Scum
Frequently skim the foam and impurities that rise to the surface, especially in the first hour. Neglecting this step results in a greasy, off-flavored broth. A fine-mesh strainer works best for this task.
Over-salting Early
Wait to add the 2 tbsp Salt and 0.5 cup Soy Sauce until the pork is tender. Adding salt too early draws moisture out of the meat and can make the broth unpleasantly salty as it reduces. Taste and adjust gradually.
Skipping the Star Anise
Those 3 whole Star Anise Pods are non-negotiable for authentic Filipino flavor. I’ve tried substitutes, but nothing captures that warm, licorice-like depth. If you must, a pinch of Chinese five-spice powder can work in a pinch. 🌟
Nutrition Facts
Frequently Asked Questions
Can I use pork hock instead of feet?
Yes, pork hock works as a substitute, though the texture will differ slightly. It won’t be as gelatinous but still offers rich flavor. Cook for the same 2-3 hours until tender.
Why is my broth cloudy?
Cloudiness usually means impurities weren’t fully removed. Always blanch first with 0.5 cup White Vinegar and skim foam during simmering. A clean broth is key for authentic results.
How do I store leftovers?
Store in an airtight container with broth for up to 3 days in the fridge or 3 months frozen. Reheat gently to restore the gelatinous texture.

- Potato Candy Recipe 1933: Vintage Peanut Butter Roll Delight - October 30, 2026
- Potato Chip Cookie Recipe With Pecans: Buttery Crunch Meets Nutty Richness - October 30, 2026
- Potato Patty Recipe No Egg: Crispy Edges Without the Binder - October 30, 2026