
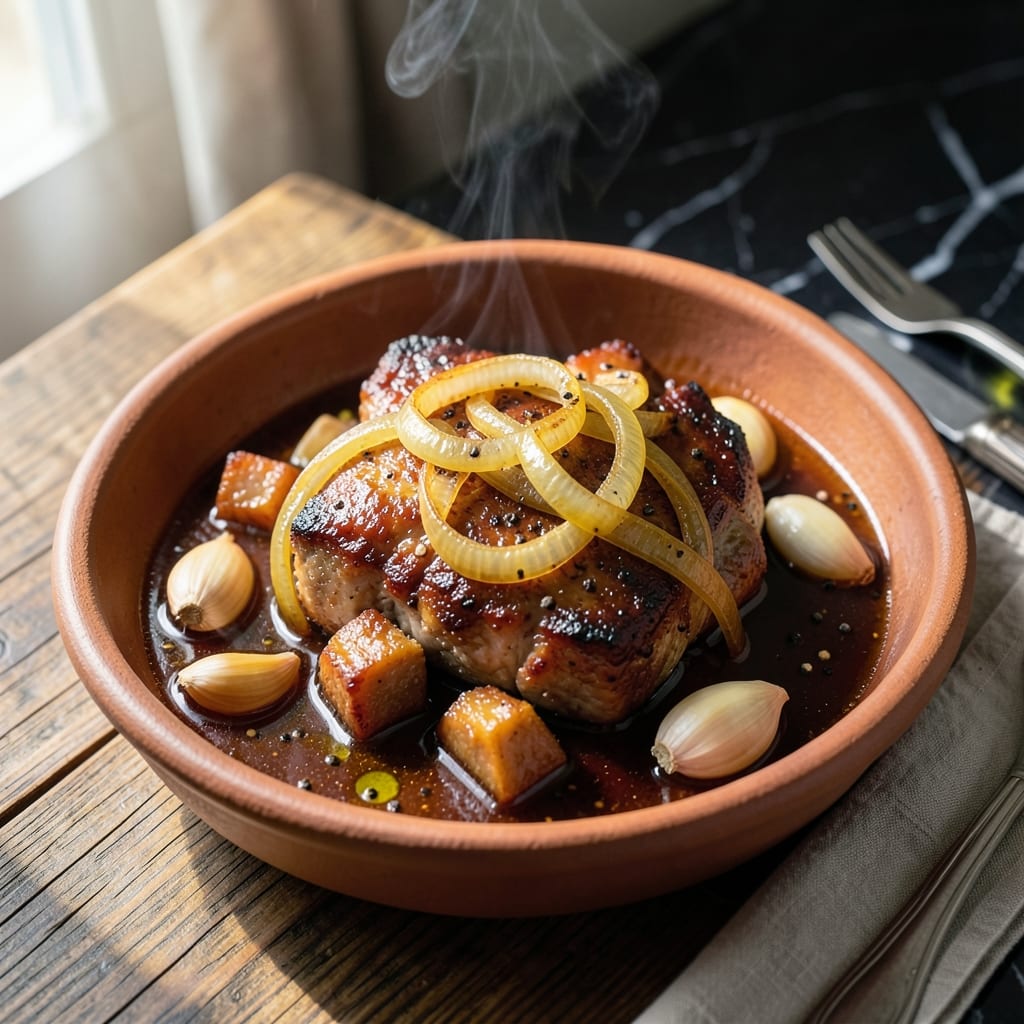
This Bisaya classic transforms humble pork belly into a tender, flavorful masterpiece through slow braising. The pineapple-infused soy sauce creates a perfect balance of sweet and savory that defines this regional specialty.
Traditional techniques ensure the meat becomes fall-apart tender while absorbing every layer of flavor. The key lies in the patient cooking process, allowing the pork to soak up the rich, caramelized sauce.
What emerges is a dish with deep, complex flavors—sweet from the pineapple, salty from the soy, and rich from the pork. The sauce reduces to a glossy consistency that clings beautifully to each piece.
Serve this with steamed rice to soak up every drop of the incredible sauce. The result is worth every minute of the slow cooking time.
Ingredients for Pork Humba Bisaya Recipe Ingredients
These carefully selected ingredients create a rich, slow-braised Bisaya pork dish with perfect sweet-savory balance.
| Ingredient | Amount | Notes |
|---|---|---|
| Pork Belly 🥓 | 2 lb | Cut into 2-inch chunks, skin-on |
| Soy Sauce 🫒 | ¾ cup | Regular or light variety |
| Pineapple Juice 🍍 | 1 ½ cups | Fresh or canned, unsweetened |
| Brown Sugar 🧈 | ½ cup | Light or dark, packed |
| White Vinegar 🧪 | ¼ cup | For balancing sweetness |
| Garlic Cloves 🧄 | 8 cloves | Peeled and minced |
| Yellow Onion 🧅 | 1 whole | Large, thinly sliced |
| Bay Leaves 🌿 | 3 pieces | Dried, whole leaves |
| Black Peppercorns 🌶️ | 1 tsp | Whole, for braising |
| Star Anise Pods ⭐ | 2 pieces | Whole, for aromatic depth |
| Dried Thyme 🌿 | 1 tsp | Or fresh thyme sprigs |
| Water 💧 | 1 cup | For braising liquid |
| Vegetable Oil 🫒 | 2 tbsp | For searing pork |
The pork belly is non-negotiable here. Look for skin-on cuts with good fat marbling at Filipino or Asian markets—they often have pre-cut chunks perfect for braising. The soy sauce should be a quality brand like Silver Swan or Datu Puti; avoid low-sodium for this dish. Fresh pineapple juice (from the whole fruit) adds brightness, but canned unsweetened works in a pinch.
No pork belly? Pork shoulder at 1:1 ratio is the closest substitute, though the texture differs. Out of pineapple juice? Orange juice with 1 tbsp vinegar mimics the tang. For soy sauce alternatives, coconut aminos work at equal volume. The star anise is key—skip it and the dish loses its signature depth. Ground pepper can replace whole if needed.
Braise pork in the sauce for 2-3 hours until fall-apart tender. The dish keeps 4-5 days refrigerated and tastes even better the next day. Freeze portions for up to 3 months. Always skim excess fat before storing to maintain sauce quality.
Why You’ll Love This Recipe
- One Pot Wonder: I just dump everything in and let the pork belly soak up that soy-pineapple magic while I do something else.
- Sweet & Tangy Fix: The brown sugar and vinegar balance so well I catch myself sneaking bites straight from the pot.
- Feeds the Crew: Between us, this stretches for three meals with leftovers tasting even better the next day.
- Pantry Friendly: Honestly, I always have soy sauce, pineapple juice, and sugar on hand—no special shopping required.
Step-by-Step Instructions for Slow-Braised Pork in Pineapple-Infused Soy Sauce
Master this traditional Bisayan technique for melt-in-your-mouth pork with balanced sweet and savory notes.
Step 1: Sear the Pork Belly to Develop Flavor
Heat the 2 tbsp vegetable oil in a heavy pot over medium-high heat until shimmering. Add the 2 lb pork belly chunks, skin-side down, and sear undisturbed for 5-6 minutes until the skin develops a deep golden-brown crust.
Flip each piece and sear for another 3-4 minutes until all sides are evenly browned. This step renders fat and creates a flavorful fond that will deepen the braising liquid. Work in batches if needed to avoid crowding the pot.
Remove the pork and set aside. The skin should be crisp at the edges while the meat remains raw inside—this contrast ensures proper texture development during the long braise.
Step 2: Build the Aromatic Base for the Braising Liquid
In the same pot, reduce heat to medium and add the 1 whole yellow onion and 8 cloves garlic cloves. Sauté for 2-3 minutes until the onions soften and become translucent, stirring frequently to prevent burning.
Add the 0.5 cup brown sugar and cook for 1 minute, stirring constantly, until it begins to caramelize slightly. This creates a rich, molasses-like depth that balances the dish’s tangy elements.
Immediately pour in the 0.75 cup soy sauce, 1.5 cups pineapple juice, 0.25 cup white vinegar, and 1 cup water. Stir to dissolve the caramelized sugar and deglaze the pot, scraping up all browned bits from the bottom.
Step 3: Add Spices and Begin the Braising Process
Return the seared pork to the pot along with any accumulated juices. Add the 3 pieces bay leaves, 1 tsp black peppercorns, 2 pieces star anise pods, and 1 tsp dried thyme. Stir to combine, ensuring the pork is mostly submerged in the liquid.
Bring the mixture to a boil over high heat, then reduce to a gentle simmer. Cover the pot and cook for 1.5 hours, maintaining a steady but gentle bubble. You’ll notice the pork beginning to soften as the aromatic spices infuse the liquid.
The braising liquid should maintain a consistent level—if it reduces too quickly, add a splash of water. The pork will become fork-tender while absorbing the complex flavors of the pineapple, soy, and spices.
Step 4: Reduce and Concentrate the Sauce
After 1.5 hours, remove the lid and increase heat to medium. Simmer uncovered for another 30-45 minutes, occasionally spooning the sauce over the pork, until the liquid reduces by about half and thickens slightly.
The sauce should coat the back of a spoon with a glossy sheen, and the pork should be fall-apart tender when pierced with a fork. The star anise and bay leaves will have released their full aromatic potential into the sauce.
Taste and adjust seasoning if needed, though the balance of sweet, salty, and tangy should already be well-developed. The pork skin will have softened into the sauce, creating a luxurious, velvety texture.
Step 5: Rest and Serve the Pork Humba
Discard the bay leaves and star anise pods from the sauce. Transfer the pork to a serving dish and spoon the thickened sauce generously over the top. Let it rest for 10 minutes to allow the flavors to meld.
The sauce should cling to each piece of pork, with visible flecks of caramelized onions and the deep mahogany color from the soy and brown sugar. Serve with steamed rice to soak up every bit of the rich, pineapple-infused sauce.
The pork should be fork-tender with a slight stickiness from the reduced sauce, and the sauce itself should have a perfect balance of sweetness from the pineapple and brown sugar, saltiness from the soy, and a subtle tang from the vinegar.
Pro Tips For Making Pork Humba Bisaya Recipe Ingredients
- Sear the Belly First: Brown the pork belly cubes in batches over medium-high heat until golden—this builds a deep flavor base that soy sauce and pineapple juice can’t replicate on their own.
- Balance the Sweetness: Taste as you go and adjust the brown sugar carefully; too much can overpower the tang of vinegar and pineapple, and I learned this the hard way after a cloyingly sweet batch.
- Simmer, Don’t Boil: Keep the heat low once the liquid is in—boiling toughens the pork, while a gentle simmer lets the belly absorb the sauce and stay tender.
- Use Fresh Pineapple Juice: Bottled juice works, but fresh pineapple juice adds a brighter, more complex acidity that actually changes the outcome.
Essential Equipment for This Dish
Heavy Braising Pot
Invest in a 5-6 quart Dutch oven like my Le Creuset—it distributes heat evenly and retains moisture perfectly for the 2-3 hour braise. The heavy lid seals in all those pineapple and soy aromatics. 🔥
Wooden Spoon
A sturdy wooden spoon is essential for stirring the caramelizing sugar and deglazing the pot without scratching. I keep mine from Portland farmers markets—it’s developed a beautiful patina over years of use.
Tongs for Pork
Use 12-inch locking tongs to flip pork belly chunks during searing. The long handles keep your hands safe from splatters, and the locking mechanism makes storage in my small kitchen easier.
Fine Mesh Strainer
A fine mesh strainer helps skim excess fat from the sauce before serving. I found mine at New Seasons Market—it’s perfect for catching those tiny peppercorns while keeping the rich sauce.
Instant Read Thermometer
While not traditional, my ThermoWorks Thermapen ensures the pork reaches 195°F for perfect tenderness. It’s especially helpful when I’m adjusting cooking times for smaller batches. 🌡️
Ceramic Serving Bowl
Serve in a wide, shallow ceramic bowl to showcase the glossy sauce. I use one from a local Pacific Northwest potter—it keeps the humba warm while we scoop up every last bit with rice.
Nutrition Facts
Frequently Asked Questions
Can I use pork shoulder instead of belly?
Yes, pork shoulder works at a 1:1 ratio. The texture will be slightly different but still tender after 2-3 hours of braising.
Why is pineapple juice important here?
It adds natural sweetness and acidity, balancing the soy sauce’s saltiness. Fresh or canned unsweetened both work equally well.
How do I adjust the sweetness?
Taste before serving. If too sweet, add a splash of vinegar. If not sweet enough, stir in a bit more brown sugar while reducing.
Can I make this ahead of time?
The flavors deepen after 1-2 days in the fridge. Reheat gently and skim any solidified fat before serving.

- Potato Patty Recipe No Egg: Crispy Edges Without the Binder - October 30, 2026
- Paula Deen’s Potato Chip Cookies Recipe: Salty-Sweet Crunch in Every Bite - October 30, 2026
- Potato Gnocchi Recipe Ideas: Pillowy Soft Dumplings With Rustic Charm - October 30, 2026