
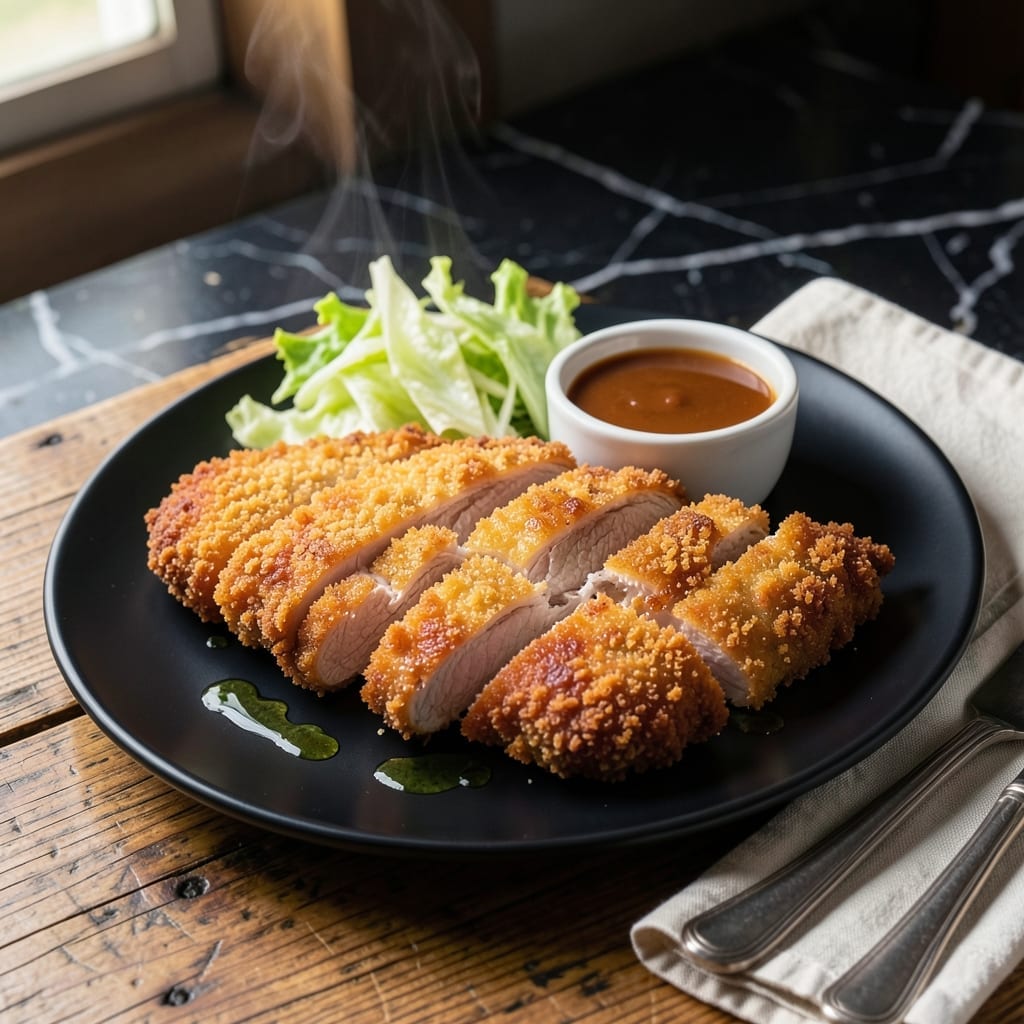
This oven-baked version delivers the same crispy panko crust as traditional pork katsu without the mess of frying. I developed this method for my restaurant when we needed a more efficient way to serve this Japanese classic to large crowds.
The key is using a wire rack on a baking sheet, allowing hot air to circulate around each cutlet. This ensures even browning and that signature crunch that makes pork katsu so satisfying. The oven temperature of 400°F creates the perfect environment for the panko to turn golden.
You’ll achieve tender pork inside with a shatteringly crispy exterior, ready to serve with tonkatsu sauce and shredded cabbage. The technique works every time, whether you’re cooking for two or twenty.
This method proves that sometimes the best results come from rethinking tradition rather than abandoning it. The proof is in every perfectly golden cutlet.
Ingredients for Pork Katsu Recipe Oven
Pork loin, panko, and a few pantry staples create that signature crispy crust without frying.
| Ingredient | Amount | Notes |
|---|---|---|
| Pork Loin Cutlets 🥩 | 1 ½ lb | 1/2-inch thick, pounded even |
| All-Purpose Flour 🌾 | ½ cup | For initial dredging coat |
| Large Eggs 🥚 | 2 whole | Beaten for binding |
| Panko Breadcrumbs 🍞 | 2 cups | Japanese-style for maximum crunch |
| Neutral Cooking Oil 🫒 | 2 tbsp | For light coating before baking |
| Kosher Salt 🧂 | 1 ½ tsp | Divided for seasoning pork and breading |
| Ground Black Pepper 🌶️ | ½ tsp | Freshly ground preferred |
| Garlic Powder 🧄 | 1 tsp | For breading flavor boost |
| Onion Powder 🧅 | 1 tsp | Balances the garlic flavor |
| Green Cabbage 🥬 | 4 cups | Thinly shredded for serving |
| Tonkatsu Sauce 🍯 | ½ cup | Store-bought or homemade |
| Vegetable Oil 🫒 | 1 tbsp | For greasing wire rack |
The pork loin cutlets are non-negotiable for tenderness and even cooking. Ask your butcher for 1/2-inch cutlets or buy a loin and slice it yourself—this thickness prevents drying out. Whole Foods and Costco carry pre-cut options that work well. For the panko, Kikkoman or Progresso brands give that authentic Japanese texture. Avoid fine breadcrumbs; they won’t deliver the same crunch.
Need to swap the pork? Chicken cutlets work at the same thickness (adjust cooking time to 18-20 minutes). No panko? Crush cornflakes or melba toast—not ideal but serviceable. The tonkatsu sauce can be replaced with Worcestershire plus ketchup (1:1 ratio). For gluten-free, use gluten-free panko and rice flour for dredging.
Pork keeps raw in the fridge for 2-3 days, or freeze for 3 months. Baked katsu is best served immediately but reheats decently in a 400°F oven for 8-10 minutes. Shredded cabbage wilts fast—prep it last and store in cold water until serving.
Why You’ll Love This Recipe
- Hands-Off Cooking: I just coat, bake, and walk away—no splattering oil or constant flipping like stovetop versions.
- Crispy Perfection: That panko crust gets golden and crunches like a dream, while the pork stays juicy inside.
- Feeds the Gang: I’ve served this at family dinners and packed it for lunches—always disappears fast.
- Budget Stretcher: Pork loin cutlets are affordable, and a little goes a long way with filling panko breading.
Step-by-Step Instructions for Pork Katsu Oven
Here’s the method to achieve that signature crunch without deep frying.
Step 1: Prep and Season the Pork Cutlets
Pat the 1.5 lb Pork Loin Cutlets completely dry with paper towels. This removes moisture that would prevent the breading from adhering properly. Season both sides generously with 1 tsp Kosher Salt and 0.5 tsp Ground Black Pepper.
I pound the cutlets to an even ½-inch thickness using a meat mallet. This ensures they cook evenly in the oven and stay tender. Consistent thickness also means consistent breading coverage, which is crucial for that perfect crispy texture we’re after.
Step 2: Create the Breading Station
Set up three shallow dishes. Place the 0.5 cup All-Purpose Flour in the first, beat the 2 whole Large Eggs in the second, and mix the 2 cups Panko Breadcrumbs with 0.5 tsp Kosher Salt, 1 tsp Garlic Powder, and 1 tsp Onion Powder in the third.
The seasoning in the breadcrumbs is what gives this dish its distinctive flavor. I use my fingers to press the panko mixture into the cutlets firmly—this creates those beautiful craggy peaks that get extra crispy in the oven.
Step 3: Bread and Chill the Cutlets
Dredge each cutlet in the flour, shaking off excess, then dip in the beaten eggs, allowing any excess to drip off. Finally, press into the panko mixture, turning and pressing to ensure complete coverage. The flour creates a base for the egg to cling to, while the egg acts as the glue for the panko.
Place the breaded cutlets on a wire rack set over a baking sheet. I chill them in the refrigerator for 15 minutes—this helps the breading set and prevents it from falling off during baking. Real talk: this step makes all the difference in maintaining that crispy coating.
Step 4: Bake to Golden Perfection
Preheat your oven to 400°F. Lightly brush the chilled cutlets with the 2 tbsp Neutral Cooking Oil—this replaces the frying oil and helps them crisp up beautifully. Use a pastry brush for even coverage without disturbing the breading.
Bake on the wire rack for 15 minutes, then carefully flip and bake for another 10-12 minutes until golden brown and crispy. The rack allows hot air to circulate underneath, crisping all sides evenly. You’ll know they’re done when the internal temperature reaches 145°F and the coating is uniformly golden.
Step 5: Rest and Serve with Cabbage and Sauce
Let the cutlets rest for 5 minutes before slicing. This allows the juices to redistribute and the breading to set further. Meanwhile, toss the 4 cups Green Cabbage with a little of the 0.5 cup Tonkatsu Sauce for a quick slaw.
Slice the pork against the grain into ½-inch strips and serve immediately with the remaining tonkatsu sauce and cabbage slaw. The contrast of the crispy pork with the cool, crunchy cabbage is what makes this dish so satisfying. The sauce should be served on the side for dipping to maintain that perfect crunch.
Pro Tips For Making Pork Katsu Recipe Oven
- Preheat the Pan: I learned this the hard way—heat your oven-safe pan with oil for 3-4 minutes before adding the breaded cutlets to guarantee an immediate sizzle for that golden crust.
- Pound the Pork: Use a meat mallet to flatten the cutlets to 1/4-inch thickness—this ensures even cooking and prevents chewy, undercooked centers.
- Skip the Overcrowding: Give each piece at least an inch of space in the pan, or the breading will steam instead of crisp. Sounds weird, but it works.
- Rest Before Serving: Let the pork rest 5 minutes after baking—this keeps the juices locked in instead of pooling on your plate (your future self will thank you).
Creative Variations of These Flavors
Spicy Sriracha Twist
Mix 1 tbsp sriracha into the beaten eggs before breading. This adds a subtle but noticeable kick that pairs beautifully with the tonkatsu sauce. I also sprinkle ½ tsp cayenne into the panko mixture for extra heat. The spice cuts through the richness of the pork perfectly. 🌶️
Honey Mustard Glaze
After baking, brush the cutlets with a mixture of 2 tbsp honey and 1 tbsp Dijon mustard. Return to the oven for 2-3 minutes to set the glaze. The sweet and tangy flavor complements the crispy panko wonderfully.
Cheesy Parmesan Crust
Add ¼ cup grated Parmesan to the panko mixture. The cheese melts into the breading, creating an extra layer of flavor and a slightly richer crunch. I use Parmigiano-Reggiano for the best results. This variation is a hit with kids and adults alike. 💛
Herb-Infused Version
Stir 1 tbsp dried thyme and 1 tbsp dried rosemary into the panko. The herbs add an aromatic depth that works surprisingly well with the traditional tonkatsu sauce. Fresh herbs can be used too—just finely chop 2 tbsp of each.
Double-Crunch Coating
For an extra crispy texture, double-dip the cutlets in the egg and panko mixtures. This creates a thicker, craggier crust that stays crispy longer. I recommend chilling the breaded cutlets for 20 minutes between coats to help them set properly.
Asian Fusion Style
Replace the tonkatsu sauce with a mixture of 3 tbsp soy sauce, 1 tbsp rice vinegar, and 1 tbsp honey. Serve with shredded cabbage and sliced green onions. This gives the dish a lighter, more tangy flavor profile. 💫
Nutrition Facts
Frequently Asked Questions
Can I use pork chops instead of loin cutlets?
Yes, but choose boneless chops and pound to ½-inch thickness. They may dry out faster, so reduce baking time by 2-3 minutes per side. Loin cutlets are ideal for their tenderness and even cooking.
Why did my breading fall off during baking?
This usually happens if the cutlets weren’t chilled after breading. The 15-minute rest in the fridge helps the coating set. Also, ensure you pat the pork completely dry before breading.
Do I need to flip the cutlets halfway through?
Flipping ensures even browning and crispiness on both sides. Use a spatula to gently turn them after 15 minutes of baking. The wire rack helps air circulate for uniform cooking.
Can I make this gluten-free?
Yes! Use gluten-free panko and substitute all-purpose flour with a gluten-free alternative like rice flour. Check that all seasonings (like onion/garlic powder) are certified gluten-free.

- Potato Chip Cookie Recipe With Pecans: Buttery Crunch Meets Nutty Richness - October 30, 2026
- Potato Patty Recipe No Egg: Crispy Edges Without the Binder - October 30, 2026
- Paula Deen’s Potato Chip Cookies Recipe: Salty-Sweet Crunch in Every Bite - October 30, 2026