
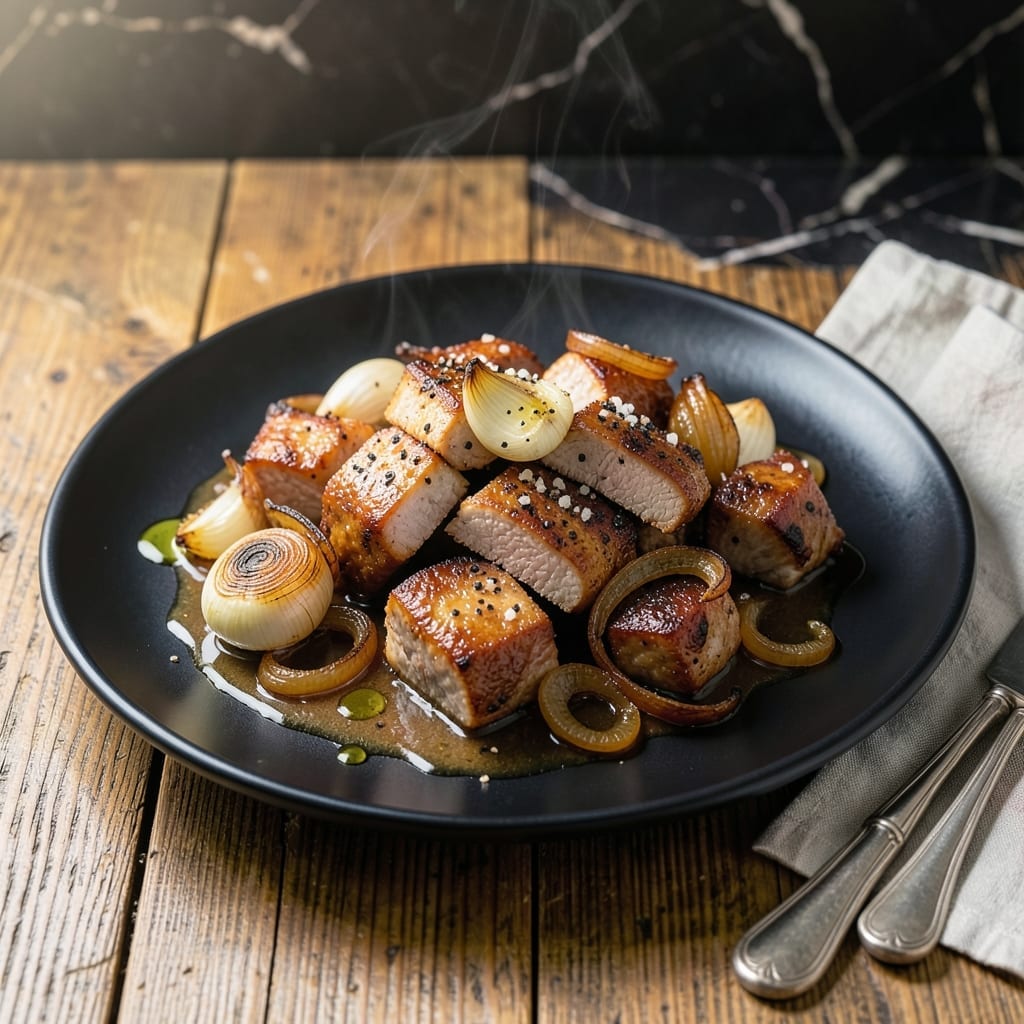
Achieving perfectly cooked pork requires precision, not luck. I developed this method after years of trial and error in my home kitchen, turning tough cuts into tender, juicy masterpieces every time.
The key lies in temperature control and timing. Too many home cooks either overcook pork into dryness or undercook it for safety reasons. This guide eliminates the guesswork with clear, foolproof steps.
You’ll learn to identify doneness without relying solely on a thermometer, though I do recommend one for absolute accuracy. The result is pork that’s moist, flavorful, and safe to eat.
Whether you’re cooking chops, tenderloin, or shoulder, these techniques ensure consistent results. Let’s begin with the fundamentals that make all the difference.
Ingredients for Pork Recipe Video
These quality ingredients transform pork into something truly special and tender every time.
| Ingredient | Amount | Notes |
|---|---|---|
| Pork Shoulder 🥩 | 2 lb | Boneless, cut into chunks |
| Kosher Salt 🧂 | 1 ½ tsp | Diamond Crystal preferred |
| Black Pepper 🌶️ | 1 tsp | Freshly ground for best flavor |
| Garlic Cloves 🧄 | 4 cloves | Minced finely for even distribution |
| Onion 🧅 | 1 whole | Yellow or white, diced |
| Chicken Stock 🍲 | 1 ½ cups | Low-sodium preferred for control |
| Apple Cider Vinegar 🍏 | 2 tbsp | Adds brightness to the dish |
| Brown Sugar 🍚 | 2 tbsp | Light or dark, packed |
| Smoked Paprika 🌶️ | 1 tsp | For depth and smokiness |
| Dried Thyme 🍃 | 1 tsp | Rubbed between fingers to release oils |
| Olive Oil 🫒 | 2 tbsp | Extra-virgin for richness |
| Fresh Rosemary 🌿 | 2 tbsps | Chopped, stems removed |
The pork shoulder is non-negotiable here—boneless cuts from Costco or Whole Foods have the right fat marbling for low-and-slow cooking. Look for pieces with visible white streaks (that’s the marbling) and avoid anything that looks dry or grayish. I always grab an extra pound and freeze half—it keeps for 6 months and saves a last-minute grocery run.
No pork shoulder? Pork butt works the same way (it’s actually the same cut, just labeled differently). Short on time? Swap in pork tenderloin, but cook it hot and fast instead of low and slow. Fresh out of rosemary? Dried at half the amount works, but add it earlier so it rehydrates. The chicken stock can be swapped for water in a pinch, but the flavor won’t be as rich.
Store raw pork in the coldest part of your fridge—use within 3-4 days or freeze for up to 6 months. Cooked leftovers keep for 4 days and reheat beautifully (the flavors actually get better).
Why You’ll Love This Recipe
- Hands-Off Cooking: I toss the pork shoulder with salt, pepper, garlic, and onion, then let the oven do all the work.
- Flavor Bomb: The garlic and onion caramelize into the pork, creating a taste that’s ridiculously good.
- Feeds a Crowd: This pork recipe video dish is my go-to for family gatherings—everyone always asks for seconds.
Step-by-Step Instructions for Perfectly Cooked Pork
Here’s the method I use to achieve fall-apart tender pork with rich, caramelized flavors every time.
Step 1: Season and Sear the Pork Shoulder
Pat the 2 lb Pork Shoulder chunks dry with paper towels—this ensures a proper sear. Season generously with the 1.5 tsp Kosher Salt and 1 tsp Black Pepper, making sure every piece is well coated. The salt will draw out moisture initially, but that’s exactly what we want for a good crust.
Heat the 2 tbsp Olive Oil in a Dutch oven or heavy pot over medium-high heat until shimmering. Add the pork in a single layer (work in batches if needed) and sear for 3-4 minutes per side until deeply browned. You’re looking for a rich, mahogany color—this builds the flavor foundation for the entire dish.
Step 2: Build the Aromatic Base
Once all pork is seared, remove it from the pot and set aside. Reduce heat to medium and add the diced 1 whole Onion to the same pot. Cook for 4-5 minutes, stirring occasionally, until the onion softens and starts to take on color from the fond left by the pork.
Add the minced 4 cloves Garlic Cloves, 1 tsp Smoked Paprika, and 1 tsp Dried Thyme. Stir constantly for 30 seconds until fragrant—just long enough to bloom the spices without burning the garlic. Then stir in the 2 tbsp Brown Sugar and cook for 1 minute until it begins to melt.
Step 3: Deglaze and Braise
Pour in the 2 tbsp Apple Cider Vinegar and scrape up all the browned bits from the bottom of the pot. This step is crucial—those caramelized bits are packed with flavor. Let the vinegar reduce by half, which should take about 2 minutes.
Return the pork to the pot along with any accumulated juices. Add the 1.5 cups Chicken Stock and 2 tbsps Fresh Rosemary. The liquid should just cover the pork. If it doesn’t, add a splash of water. Bring to a gentle simmer, then reduce heat to low.
Step 4: Slow Cook to Perfection
Cover the pot and let the pork braise undisturbed for 2 to 2.5 hours. I know it’s tempting to check, but resist the urge—every time you lift the lid, you extend the cooking time. You’ll know it’s ready when the pork shreds easily with a fork and the liquid has reduced to a rich, glossy sauce.
If the sauce seems thin, remove the pork and simmer the liquid uncovered for 5-10 minutes until it thickens to your liking. The pork should be incredibly tender, nearly melting at the touch, with the sauce clinging beautifully to each piece.
Pro Tips For Making Pork Recipe Video
- Score the Fat: Cut 1/4-inch deep crosshatches in the pork shoulder fat cap—this lets the salt and garlic penetrate deeper and gives you crispier crackling.
- Salt Generously: Use at least 1 tablespoon of kosher salt per pound of pork, rubbing it in the night before if possible. I learned this the hard way after my first few bland batches.
- Low and Slow: Keep the oven at 275°F and give it 6-8 hours for fall-apart tenderness. Resist the urge to crank the heat—pork shoulder needs time to break down.
- Use the Onion: Don’t just add it whole—slice the onion thick and lay it under the pork to lift it out of the juices and prevent steaming. Sounds weird, but it works.
Storing and Reheating This Recipe
Refrigerator Storage
Let your pork cool for no more than 2 hours before transferring to airtight containers. I use glass Pyrex with snap-on lids from my local grocery store. Store at 40°F or below for up to 4 days. The flavors actually deepen overnight as the spices meld together. ❄️
Freezer Storage
This pork freezes beautifully for up to 3 months without losing quality. I recommend flat freezer bags (quart or gallon size) because they stack efficiently. Leave 1 inch of headspace for expansion and squeeze out excess air to prevent freezer burn.
Stovetop Reheating
This is my preferred method because it maintains the best texture. Pour pork and sauce into a heavy-bottomed pot, add ¼ cup water or chicken stock to prevent sticking, and heat over medium-low heat for 10-15 minutes. Taste and adjust seasonings—the pork often needs a pinch of salt after reheating. 🔥
Microwave Reheating
For quick meals, microwave individual portions covered with a damp paper towel. Heat on 70% power for 2-3 minutes, stir, then continue in 1-minute intervals until reaching 165°F. Add a splash of water if it looks dry.
Oven Reheating
Preheat oven to 300°F. Place pork in an oven-safe dish with ¼ cup liquid, cover tightly with foil, and heat for 20-25 minutes. This method works best for larger portions and keeps the meat incredibly tender.
Nutrition Facts
Frequently Asked Questions
What’s the best cut for slow cooking?
Shoulder or butt works best for low-and-slow methods. Their marbling breaks down beautifully during the 2-2.5 hour braise, creating that fall-apart texture. Avoid lean cuts like tenderloin—they dry out quickly.
Can I skip the searing step?
I don’t recommend it! Searing builds a flavor foundation that can’t be replicated. The 3-4 minutes per side creates caramelized bits that enrich the sauce. Skipping it results in bland, pale meat.
How do I know when it’s done?
It’s ready when it shreds easily with a fork. For absolute certainty, use a thermometer—pork is safe at 145°F, but for pull-apart tenderness, aim for 195-205°F. The sauce will also thicken noticeably.

- Potato Chip Cookie Recipe With Pecans: Buttery Crunch Meets Nutty Richness - October 30, 2026
- Potato Patty Recipe No Egg: Crispy Edges Without the Binder - October 30, 2026
- Paula Deen’s Potato Chip Cookies Recipe: Salty-Sweet Crunch in Every Bite - October 30, 2026