
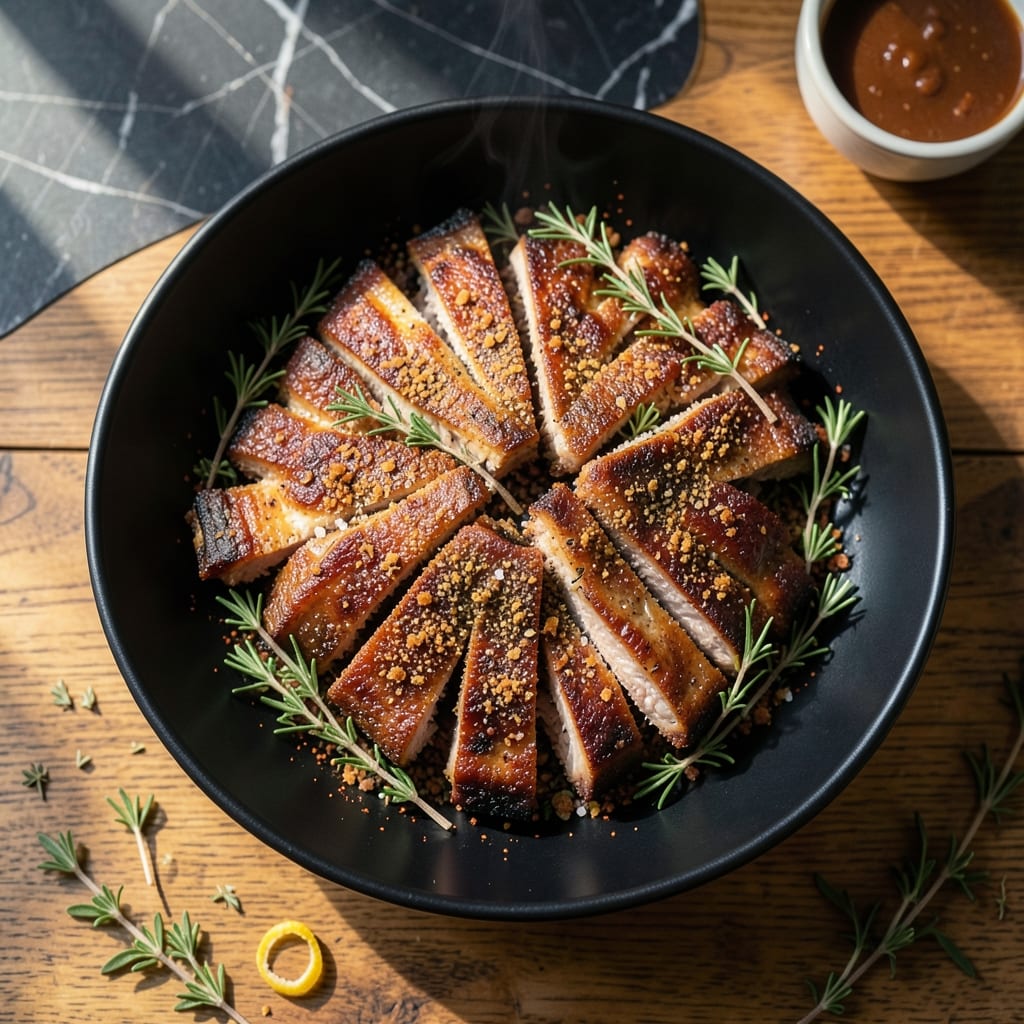
This oven-baked method delivers tender pork ribs without the need for a smoker or grill. The secret lies in a slow, low-temperature bake that allows the connective tissue to break down naturally.
I developed this technique to achieve fall-off-the-bone results with minimal hands-on time. A dry rub of herbs and spices creates a flavorful crust while the meat becomes tender and juicy.
What emerges from the oven is ribs with a subtle herb aroma and meat so tender it nearly pulls apart with a fork. The lack of BBQ sauce lets the natural pork flavor shine through.
This approach works with any rib cut and pairs well with simple sides like roasted vegetables or mashed potatoes.
Ingredients for Pork Ribs Recipe Not Bbq
Simple dry rub ingredients transform these ribs into a tender, herb-infused masterpiece.
| Ingredient | Amount | Notes |
|---|---|---|
| Pork Baby Back Ribs 🥩 | 3 lb | Rack, membrane removed |
| Kosher Salt 🧂 | 1 tbsp | Diamond Crystal preferred |
| Black Pepper 🌶️ | 1 tbsp | Freshly ground |
| Garlic Powder 🧄 | 1 tbsp | Not garlic salt |
| Onion Powder 🧅 | 1 tbsp | Freshly ground ideal |
| Dried Thyme 🌿 | 1 tbsp | Rubbed between fingers |
| Dried Rosemary 🌿 | 1 tbsp | Crushed to release oils |
| Paprika 🌶️ | 1 tsp | Sweet or smoked variety |
| Brown Sugar 🧈 | 2 tbsp | Light or dark |
| Olive Oil 🫒 | 2 tbsp | For rubbing dry mix |
| Apple Cider Vinegar 🍏 | ¼ cup | For tenderness |
| Chicken Broth 💧 | ½ cup | Low-sodium preferred |
The ribs are the star here. Baby back ribs are most tender, but spare ribs work too—just add 30 minutes to cook time. Look for racks with even marbling at Costco or your butcher. The membrane must be removed (there’s a thin white film on the bone side) or it’ll block the rub. A butter knife under the edge, then a paper towel for grip, and pull—done in seconds.
No apple cider vinegar? White vinegar or lemon juice at the same amount works fine. Swap brown sugar for honey or maple syrup if needed. Short on fresh herbs? Double the dried—they’re more concentrated. The broth keeps the oven moist; water works but lacks depth. For extra crust, broil 2-3 minutes at the end, but watch closely to avoid burning.
Rub the ribs up to 24 hours ahead for deeper flavor. Store uncooked ribs in the fridge, wrapped tightly, for 3-4 days. Leftovers keep 4 days refrigerated or freeze for 3 months. Reheat gently in foil with a splash of broth to maintain moisture.
Why You’ll Love This Recipe
- Five-Ingredient Magic: I love that I only need ribs, salt, pepper, garlic powder, and onion powder—no fancy sauces or marinades.
- Oven-Baked Simplicity: Just season, wrap in foil, and let the oven do the work. No grill, no smoke, no stress.
- Weeknight Hero: Honestly, it’s my go-to for busy evenings when I want something hearty without the fuss.
- Leftovers Win: The ribs taste even better the next day, and they reheat beautifully for quick lunches.
Step-by-Step Instructions for Oven-Baked Herb-Infused Pork Ribs
This method guarantees fall-off-the-bone tenderness without a smoker or grill.
Step 1: Prepare and Season the Ribs
Pat the 3 lb Pork Baby Back Ribs completely dry with paper towels to ensure the seasoning adheres properly. In a small bowl, combine 1 tbsp Kosher Salt, 1 tbsp Black Pepper, 1 tbsp Garlic Powder, 1 tbsp Onion Powder, 1 tbsp Dried Thyme, 1 tbsp Dried Rosemary, 1 tsp Paprika, and 2 tbsp Brown Sugar.
Rub the ribs all over with 2 tbsp Olive Oil, then apply the dry mix generously, pressing it into the meat. The herbs should be crushed between your fingers to release their oils. Let the ribs sit at room temperature for 30 minutes to allow the flavors to penetrate.
Step 2: Preheat and Prepare the Oven
Preheat your oven to 325°F. While the oven heats, arrange the ribs meat-side up on a wire rack set over a rimmed baking sheet. This setup allows air to circulate around the ribs, promoting even cooking and preventing them from steaming in their juices.
Pour 0.25 cup Apple Cider Vinegar and 0.5 cup Chicken Broth into the bottom of the baking sheet. The liquid will create steam, keeping the ribs moist during the long cook time while adding subtle depth to the flavor.
Step 3: Slow-Bake to Perfection
Place the ribs in the preheated oven and bake for 2.5 hours. Resist the urge to check on them too often—every time you open the oven, you lose heat and extend the cooking time. The low and slow method breaks down the connective tissue, ensuring the meat becomes tender.
At the 2-hour mark, baste the ribs with the pan juices. This step enhances moisture and builds layers of flavor. The ribs are done when the meat pulls back from the bones by about ¼ inch and a toothpick slides in effortlessly.
Step 4: Rest and Serve
Remove the ribs from the oven and let them rest for 10 minutes before slicing. This allows the juices to redistribute, ensuring every bite is flavorful and moist. The internal temperature should read 195-203°F for ideal tenderness.
Slice between the bones and serve immediately. The meat should be so tender that it nearly falls off the bone, with a rich, herb-infused crust. The pan juices can be spooned over the ribs for extra flavor.
Pro Tips For Making Pork Ribs Recipe Not Bbq
- Rub Overnight: I learned this the hard way—coat the ribs with salt, pepper, garlic, and onion powder the night before. The flavors penetrate deep, and the salt has time to work its magic on the meat.
- Low and Slow: After burning a batch at high heat, I now keep the oven at 275°F for 2.5-3 hours. The ribs come out fall-off-the-bone tender every time.
- Skip the Sauce: Sounds weird, but it works: resist the urge to add sauce. The dry rub alone gives a perfect crust without masking the pork flavor.
- Rest Before Serving: Give the ribs 10 minutes under foil after cooking. I used to cut right in, and the juices would run all over the plate—now they stay in the meat where they belong.
Make-Ahead Tips for Leftovers
Dry Rub Advance Prep
Mix your dry rub up to 2 days ahead and store in an airtight container. I always make extra to have on hand for spontaneous cooking. The flavors meld together over time, enhancing the depth of your seasoning blend. 💡
Rib Prep Timeline
Remove the membrane and apply the dry rub to your 3 lb ribs up to 24 hours before cooking. Wrap tightly in plastic and refrigerate. This gives the seasoning maximum time to penetrate the meat.
Partial Cook Method
For busy days, bake the ribs for 2 hours at 325°F, then cool and refrigerate. Finish cooking the next day by adding 30-45 minutes to the total time. The results are just as tender.
Freezing Uncooked Ribs
Rubbed ribs freeze beautifully for up to 3 months. Wrap each rack in plastic, then foil, and label with the date. Thaw overnight in the fridge before cooking—no need to re-rub. ❄️
Make-Ahead Pan Sauce
Prepare the 0.5 cup Chicken Broth and 0.25 cup Apple Cider Vinegar mixture ahead and store in the fridge. Cold liquid works fine—just pour it into the pan when ready to bake.
Reheating Strategy
Cooked ribs reheat well wrapped in foil with 2 tbsp broth at 300°F for 20-25 minutes. The steam revives the meat’s moisture perfectly.
Nutrition Facts
Frequently Asked Questions
Can I use spare ribs instead of baby back?
Use spare ribs but add 30-45 minutes to the cooking time. They’re meatier with more connective tissue, so the extra time ensures they become just as tender.
Why do we remove the membrane?
Leaving it on creates a barrier that prevents seasoning from penetrating the meat. It also toughens during cooking. Use a butter knife to lift, then pull it off with a paper towel for grip.
What if my ribs aren’t tender after baking?
If they’re not pulling back from the bones, return them to the oven. Check every 15-20 minutes until they reach 195-203°F internally. Low oven temps may require extra time.
Can I make this in a slow cooker?
Yes! Brown the ribs first, then cook on low for 6-8 hours with the same liquid. The texture will be slightly different but equally flavorful.

- Potato Chip Cookie Recipe With Pecans: Buttery Crunch Meets Nutty Richness - October 30, 2026
- Potato Patty Recipe No Egg: Crispy Edges Without the Binder - October 30, 2026
- Paula Deen’s Potato Chip Cookies Recipe: Salty-Sweet Crunch in Every Bite - October 30, 2026