
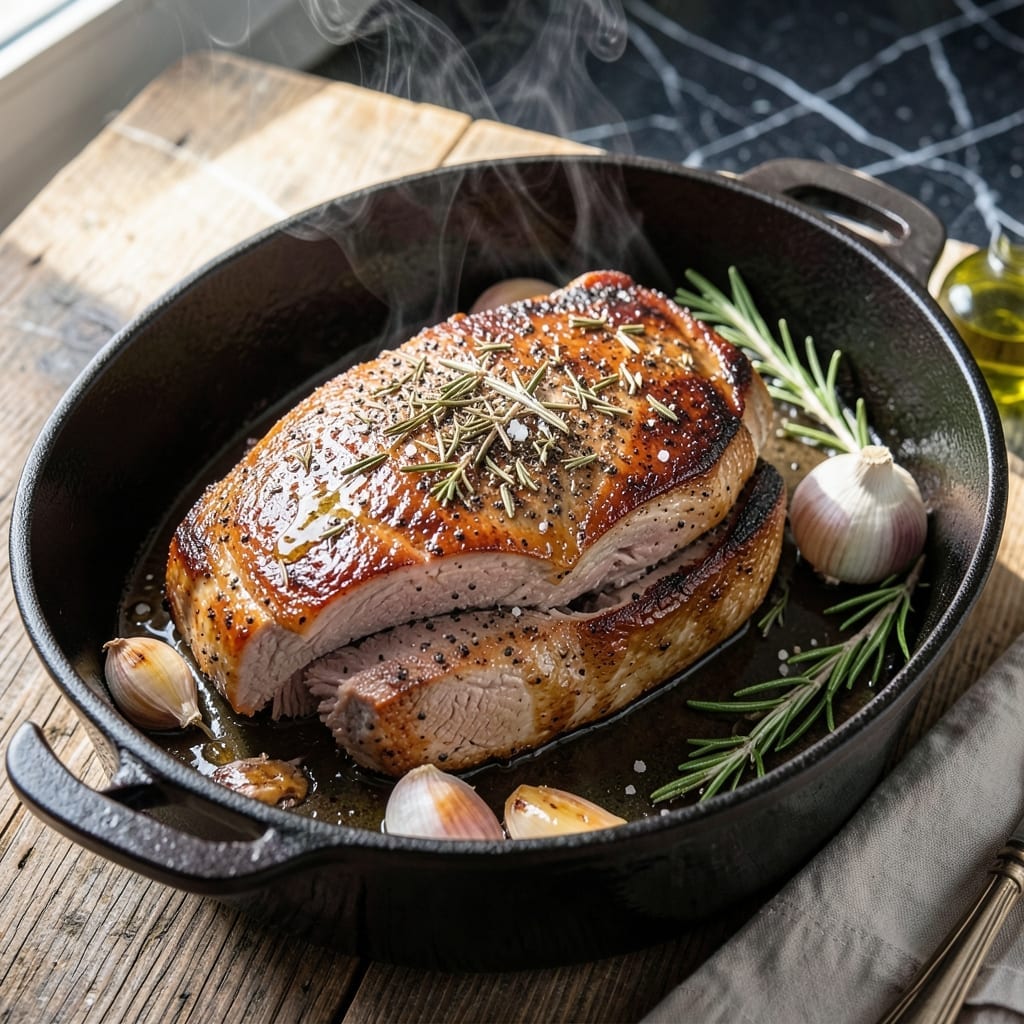
This Dutch oven method transforms pork sirloin into a tender, juicy masterpiece with minimal effort. The slow braising process ensures every bite stays moist while developing deep, complex flavors.
I’ve refined this technique over years of testing, and the key is searing the roast first to create a caramelized crust before the low-and-slow cook. The Dutch oven locks in moisture while allowing the exterior to brown beautifully.
The result is fall-apart pork with a rich, flavorful crust that’s impressive enough for guests but simple enough for weeknights. The aroma alone will have everyone gathering in the kitchen.
This dish proves that extraordinary results don’t require complicated steps—just patience and the right approach. The Dutch oven does most of the work for you.
Ingredients for Pork Sirloin Roast Recipe Dutch Oven
These carefully selected ingredients transform pork sirloin into a restaurant-quality Dutch oven masterpiece.
| Ingredient | Amount | Notes |
|---|---|---|
| Pork Sirloin Roast 🥩 | 2 ½ lb | Boneless, trimmed of excess fat |
| Kosher Salt 🧂 | 1 ½ tsp | Diamond Crystal preferred for even distribution |
| Freshly Ground Black Pepper 🌶️ | 1 tsp | Coarse grind for texture |
| Dried Thyme 🍃 | 1 tsp | Rubbed between fingers to release oils |
| Dried Rosemary 🍃 | 1 tsp | Crushed to enhance flavor |
| Garlic Cloves 🧄 | 4 cloves | Smashed and peeled for maximum flavor infusion |
| Yellow Onion 🧅 | 1 whole | Large, roughly chopped for braising liquid |
| Carrots 🥕 | 3 whole | Peeled and cut into large chunks |
| Celery Stalks 🌿 | 2 whole | Cut into 2-inch pieces for aromatic base |
| Olive Oil 🫒 | 2 tbsp | Extra-virgin for high-heat searing |
| Low-Sodium Chicken Broth 💧 | 2 cups | Homemade or high-quality store-bought |
| Dry White Wine 🍷 | ½ cup | Chardonnay or Sauvignon Blanc recommended |
| Tomato Paste 🍅 | 2 tbsp | For depth of flavor in braising liquid |
| Bay Leaves 🌿 | 2 whole | Dried, for aromatic complexity |
| Unsalted Butter 🧈 | 1 tbsp | For finishing the sauce |
The pork sirloin roast is the foundation here. Look for a well-marbled piece from a reputable butcher or Whole Foods—this ensures juiciness after the long braise. Trimming excess fat yourself gives better control than pre-trimmed cuts. The herbs should be freshly opened; old spices lose their potency. For the wine, any dry white works, but avoid anything too sweet—it can throw off the balance of the braising liquid.
No dry white wine? Apple cider vinegar with a splash of water can mimic the acidity (use 3 tbsp). If you lack fresh garlic, garlic powder at one-third the amount works, but fresh is ideal. For a vegetarian twist, swap the chicken broth for vegetable broth and add mushrooms to the braise. The tomato paste can be omitted, but it adds a depth that’s worth the effort.
Store the roast in the fridge for up to 3 days before cooking, or freeze for 6 months. The braised pork keeps beautifully in the fridge for 4-5 days and actually improves in flavor. Leftovers make incredible sandwiches or tacos—just shred and reheat gently with a splash of broth.
Why You’ll Love This Recipe
- One Pot Magic: I love that the Dutch oven handles everything—sear, roast, and rest—so I’m not juggling pans.
- Herb-Crusted Bliss: That rosemary and thyme rub with the peppery crust? Ridiculously good, especially on the caramelized edges.
- Sunday or Tuesday: Honestly, it’s just as at home feeding a weeknight crowd as it is starring at a holiday table.
- Leftovers for Days: One roast yields sandwiches, tacos, and fried rice—all while keeping my wallet happy.
Step-by-Step Instructions for Dutch Oven Pork Sirloin Roast
Master the technique of slow-braising to achieve fall-apart tenderness with a richly caramelized exterior.
Step 1: Season and Sear the Pork Sirloin Roast
Pat the pork sirloin roast completely dry with paper towels to ensure proper browning. Rub the surface evenly with the kosher salt, freshly ground black pepper, dried thyme, and dried rosemary. I crush the herbs between my fingers as I apply them to release their essential oils and maximize flavor penetration.
Heat the olive oil in a Dutch oven over medium-high heat until it shimmers. Add the seasoned pork sirloin roast and sear on all sides for 6-8 minutes total, turning occasionally, until the exterior develops a deep, golden-brown crust. This high-heat searing creates the Maillard reaction, which is essential for building complex flavors in the final dish.
Step 2: Sauté Aromatics and Deglaze the Pan
Remove the pork from the Dutch oven and set it aside on a plate. In the same pot, add the garlic cloves, yellow onion, carrots, and celery stalks. Sauté the vegetables for 5-6 minutes over medium heat until they begin to soften and develop some color.
Stir in the tomato paste and cook for 1-2 minutes until it darkens slightly. This step deepens its natural sweetness and prevents a raw flavor in the finished sauce. Deglaze the pan with the dry white wine, scraping up all the browned bits from the bottom of the Dutch oven with a wooden spoon. Allow the wine to reduce by half, which takes about 3-4 minutes.
Step 3: Braise the Pork to Tender Perfection
Return the pork sirloin roast to the Dutch oven, nestling it among the vegetables. Pour in the low-sodium chicken broth and add the bay leaves. The liquid should come about halfway up the side of the pork—if it doesn’t, add a bit more broth. Bring the mixture to a gentle simmer.
Cover the Dutch oven with its lid and transfer it to a preheated 325°F oven. Braise the pork for 2 to 2.5 hours, turning the roast halfway through the cooking time. The pork is done when it’s fork-tender and an instant-read thermometer inserted into the thickest part registers 195-200°F. The meat should pull apart easily with a gentle tug.
Step 4: Rest and Finish with a Glossy Sauce
Carefully transfer the pork to a cutting board and tent it loosely with foil. Let it rest for 15-20 minutes before slicing. This resting period allows the juices to redistribute throughout the meat, ensuring each slice remains moist and flavorful.
While the pork rests, skim any excess fat from the surface of the braising liquid. Place the Dutch oven on the stovetop over medium heat and simmer the sauce for 5-7 minutes until it reduces slightly. Stir in the unsalted butter until it melts, creating a glossy, rich finish. Remove and discard the bay leaves before serving the sauce with the sliced pork.
Pro Tips For Making Pork Sirloin Roast Recipe Dutch Oven
- Pat It Dry: I learned this the hard way—skip this and your roast will steam instead of sear. Use paper towels to thoroughly dry the pork before seasoning, so the salt and herbs actually stick and form that crust you want.
- Sear First, braise later: Start the pork in the Dutch oven over medium-high heat to get a deep brown crust on all sides—about 3-4 minutes per side. Sounds obvious, but it’s the one step I see people rush, and the flavor suffers.
- Don’t Crowd the Herbs: Crush the dried thyme and rosemary between your fingers before rubbing them on—it wakes up the oils. And resist the urge to dump them straight from the jar; they’ll just fall off.
- Rest Under Foil: Pull the roast when it hits 140°F internal temp, tent it with foil, and let it rest 10-15 minutes. I used to skip this, and the juices would all end up on the cutting board instead of in the meat.
Essential Equipment for pork sirloin roast recipe dutch oven
Dutch Oven Essentials
For this recipe, a heavy 5-7 quart Dutch oven is non-negotiable. I swear by my Le Creuset—it distributes heat evenly and retains it perfectly for the long braise. The enameled cast iron won’t react with acidic ingredients like the wine in your braising liquid. 💪
Thermometer Importance
An instant-read thermometer is your best friend here. I use a ThermoWorks Thermapen to check the pork’s internal temperature. It’s worth the investment for perfectly cooked meat every time. No more guessing if it’s done!
Wooden Spoon Magic
A wooden spoon is essential for deglazing the pan. It won’t scratch your Dutch oven’s surface while scraping up all those flavorful browned bits. I keep mine right by the stove for easy access during cooking.
Quality Cutting Board
Use a large, stable cutting board for prepping vegetables and resting the pork. I prefer a maple end-grain board from a local Portland woodworker—gentle on knives and beautiful in my kitchen.
It also provides enough space to work comfortably with the large roast.
Sharp Chef’s Knife
A 8-inch chef’s knife makes quick work of chopping all the vegetables. My Wüsthof has been with me since journalism school days. A sharp blade is safer and more efficient than a dull one. ✨
Nutrition Facts
Frequently Asked Questions
What’s the ideal internal temperature for this roast?
Cook until the pork reaches 195-200°F internally. This higher temperature ensures the connective tissues break down completely, creating that perfect fall-apart texture.
Can I use a slow cooker instead of a Dutch oven?
Yes, but you’ll lose the caramelized crust. Sear the roast first in a pan, then transfer to a slow cooker on low heat for 6-8 hours. The flavor will be different but still delicious.
How do I know when it’s done without a thermometer?
The meat should pull apart easily with a fork. If it resists, it needs more time. Remember that resting for 15-20 minutes is crucial for juiciness.
What if my sauce is too thin?
Simmer it uncovered on the stovetop for 5-10 minutes to reduce. For extra richness, whisk in a cornstarch slurry (1 tbsp cornstarch + 1 tbsp water) during the last 2 minutes.

- Potato Patty Recipe No Egg: Crispy Edges Without the Binder - October 30, 2026
- Paula Deen’s Potato Chip Cookies Recipe: Salty-Sweet Crunch in Every Bite - October 30, 2026
- Potato Gnocchi Recipe Ideas: Pillowy Soft Dumplings With Rustic Charm - October 30, 2026