
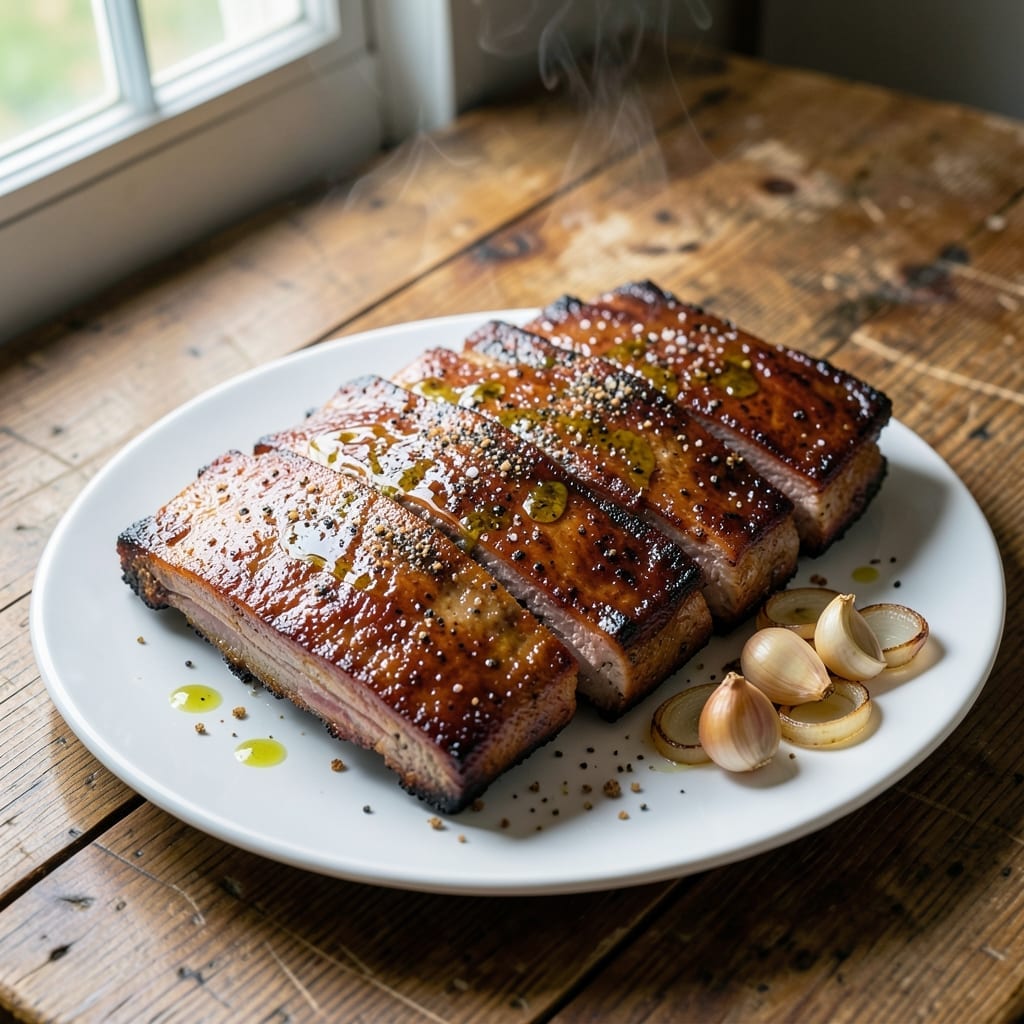
There’s a science to baking ribs that turn out fall-off-the-bone tender with a caramelized crust. This method delivers that perfect balance every time.
I developed this technique after years of trial and error, settling on a slow bake followed by a high-heat finish. The glaze reduces to a sticky, finger-licking consistency that seals in moisture.
The result is meat so tender it nearly pulls apart with a fork, yet retains enough structure to hold its shape. Each bite carries the deep, smoky-sweet flavor of the glaze.
This approach works for weeknight dinners or weekend barbecues. The oven does most of the work while you prepare the sides.
Ingredients for Pork Spare Rib Recipe Baked
These carefully selected ingredients create ribs with perfect tenderness and caramelized depth every time.
| Ingredient | Amount | Notes |
|---|---|---|
| Pork Spare Ribs 🥩 | 3 lb | Full slab, membrane removed |
| Kosher Salt 🧂 | 1 tbsp | Diamond Crystal preferred |
| Black Pepper 🌶️ | 1 tsp | Freshly ground for depth |
| Smoked Paprika 🌶️ | 1 tsp | For authentic smoky flavor |
| Garlic Powder 🧄 | 1 tsp | Not garlic salt substitute |
| Onion Powder 🧅 | 1 tsp | Granulated for even distribution |
| Brown Sugar 🍚 | ½ cup | Light or dark variety |
| Honey 🍯 | ¼ cup | Pure for glaze consistency |
| Apple Cider Vinegar 🍏 | 2 tbsp | Balances sweetness in glaze |
| Ketchup 🍅 | ½ cup | High-quality for depth |
| Worcestershire Sauce 💧 | 1 tbsp | Adds umami complexity |
| Dijon Mustard 🟡 | 1 tbsp | Smooth, not grainy |
| Olive Oil 🫒 | 1 tbsp | For initial seasoning rub |
The ribs are everything here. Full pork spare rib slabs (about 3 lbs each) yield the best texture—avoid pre-cut ribs as they dry out faster. Look for good marbling and ask your butcher to remove the membrane if you’re unsure. Costco has consistently high-quality slabs at reasonable prices. For the dry rub, Diamond Crystal kosher salt is standard in professional kitchens for its clean flavor and even distribution.
No smoked paprika? Regular paprika with a pinch of liquid smoke works in a pinch, but the flavor profile changes. Maple syrup at a 1:1 ratio can replace honey for a different sweetness. If avoiding vinegar, lemon juice at half the quantity provides acidity. For a spicier glaze, add 1/2 tsp cayenne. The ketchup can be substituted with tomato paste thinned with water, though the flavor will be more concentrated.
Ribs keep well in the fridge for 3-4 days after cooking, though they’re best served immediately. The dry rub ingredients store indefinitely in a cool, dark place. For longer storage, freeze cooked ribs in an airtight container for up to 3 months.
Why You’ll Love This Recipe
- One Pan Magic: I just season, pop in the oven, and let it do the work—no babysitting required.
- Smoky Depth: That smoked paprika and garlic powder combo gives the ribs a rich, complex flavor without a smoker.
- Crowd Pleaser: I’ve served this at BBQs and weeknight dinners, and everyone from my picky nephew to my foodie friend asks for more.
- Budget Stretch: Pork spare ribs are affordable, and leftovers (if there are any) taste even better the next day.
Step-by-Step Instructions for Pork Spare Ribs Baked
This method delivers fall-off-the-bone tenderness with a glossy, finger-licking glaze every time.
Step 1: Season the Ribs Thoroughly
Pat the 3 lb Pork Spare Ribs completely dry with paper towels to ensure the seasoning adheres properly. This step prevents steam from forming between the meat and the rub, which would inhibit browning.
In a small bowl, combine the 1 tbsp Kosher Salt, 1 tsp Black Pepper, 1 tsp Smoked Paprika, 1 tsp Garlic Powder, and 1 tsp Onion Powder. Rub this mixture evenly over all surfaces of the ribs, pressing firmly to create a flavorful crust. Drizzle with the 1 tbsp Olive Oil and massage it into the meat. Let the ribs rest at room temperature for 20-30 minutes while the oven preheats.
Step 2: Preheat and Prepare for Slow Baking
Preheat your oven to 275°F. This low temperature is crucial for breaking down the connective tissue in the ribs without drying them out. While the oven heats, line a large baking sheet with heavy-duty aluminum foil—this makes cleanup easier and helps reflect heat for even cooking.
Place a wire rack on the baking sheet to elevate the ribs, allowing hot air to circulate underneath. This setup mimics a smoker’s environment, ensuring the ribs cook evenly on all sides. The slow, steady heat will transform the tough collagen into gelatin, giving you that coveted tender texture.
Step 3: Bake the Ribs Low and Slow
Arrange the ribs meat-side up on the wire rack. Cover the entire setup tightly with another sheet of foil, creating a sealed environment. This traps steam, which gently braises the ribs while they bake.
Bake in the preheated oven for 2.5 hours. At this point, the ribs should be nearly tender but not yet falling apart. Carefully remove the foil—watch for escaping steam—to prepare for glazing. The meat should have pulled back slightly from the bones, a sign that the collagen is beginning to render.
Step 4: Apply the Glaze and Finish
In a saucepan, combine the 0.5 cup Brown Sugar, 0.25 cup Honey, 2 tbsp Apple Cider Vinegar, 0.5 cup Ketchup, 1 tbsp Worcestershire Sauce, and 1 tbsp Dijon Mustard. Simmer over medium heat for 5-7 minutes, stirring frequently, until the mixture thickens enough to coat the back of a spoon.
Brush the glaze generously over the ribs, ensuring every crevice is coated. Return them to the oven, uncovered, and bake for an additional 30-45 minutes at 375°F. Baste the ribs with the glaze every 10-15 minutes until they develop a sticky, caramelized crust. The ribs are done when the meat easily pulls away from the bone with a gentle tug.
Step 5: Rest and Serve
Transfer the ribs to a cutting board and let them rest for 10 minutes. This allows the juices to redistribute, ensuring every bite is moist and flavorful. Slice between the bones and arrange on a serving platter.
Spoon any remaining glaze from the baking sheet over the top for an extra layer of shine and flavor. The ribs should have a deep mahogany color with a glossy sheen, and the meat should be so tender it nearly falls off the bone with minimal effort.
Pro Tips For Making Pork Spare Rib Recipe Baked
- Dry the Ribs: Pat the spare ribs completely dry with paper towels before seasoning—moisture is the enemy of a good bark, and I learned this the hard way after ending up with steamed ribs instead of crispy ones.
- Low and Slow: Bake at 275°F for 2.5-3 hours, then finish with a 5-minute broil for color. Sounds weird, but it works: the meat falls off the bone without drying out.
- Don’t Skip the Rub: Coat the ribs with the salt, pepper, smoked paprika, and garlic powder at least 30 minutes before baking—this gives the spices time to penetrate beyond just the surface.
- Rest Before Serving: Pull the ribs out and let them rest under foil for 10 minutes. I used to rush this part and wondered why my ribs bled juices all over the cutting board.
Essential Equipment for This Dish
Oven Thermometer
Your oven’s built-in thermometer might be off by 25-50°F. I use a Taylor Precision oven thermometer for $10 at New Seasons Market. It hangs inside, giving accurate readings at a glance. This prevents undercooked or dry ribs. 🌡️
Wire Rack
A sturdy wire rack elevates ribs above the pan, allowing air circulation for even cooking. I prefer the Nordic Ware heavy-duty rack—it won’t bend under 3 lbs of meat. Place it on a foil-lined baking sheet for easy cleanup.
Heavy-Duty Foil
Regular foil tears easily when wrapping ribs. Invest in Reynolds Wrap Heavy Duty—its thickness handles tight sealing without punctures. Use 18-inch sheets to fully enclose the ribs, trapping steam for tenderness.
Basting Brush
For even glaze application, a silicone basting brush is essential. I love the OXO Good Grips brush—its heat-resistant bristles won’t melt. The angled head reaches into rib crevices for full coverage.
Meat Thermometer
Check doneness with an instant-read thermometer. I trust my ThermoWorks Thermapen for 195-203°F internal temp. Insert between bones, avoiding fat pockets. This ensures perfect tenderness every time. 🔥
Tongs
Handle ribs with 12-inch locking tongs to avoid piercing the meat. I use OXO spring-loaded tongs—they grip securely without crushing. Essential for flipping and serving without tearing the ribs apart.
Nutrition Facts
Frequently Asked Questions
What temperature should the oven be for baking?
Start with 275°F for the slow bake phase, then increase to 375°F for the final glazing stage. This two-step process ensures tender meat with a caramelized crust.
How long should the ribs bake covered?
Bake the ribs covered with foil for 2.5 hours at 275°F. This low-and-slow method breaks down collagen for fall-off-the-bone tenderness without drying out the meat.
Can I make the glaze ahead of time?
Yes! The glaze can be prepared up to 2 days in advance and stored in the fridge. Reheat gently before using and thin with a splash of water if needed.
Why do the ribs need to rest after baking?
Resting for 10 minutes allows juices to redistribute throughout the meat. Skipping this step can result in dry ribs as the juices spill out when cut.

- Potato Patty Recipe No Egg: Crispy Edges Without the Binder - October 30, 2026
- Paula Deen’s Potato Chip Cookies Recipe: Salty-Sweet Crunch in Every Bite - October 30, 2026
- Potato Gnocchi Recipe Ideas: Pillowy Soft Dumplings With Rustic Charm - October 30, 2026