
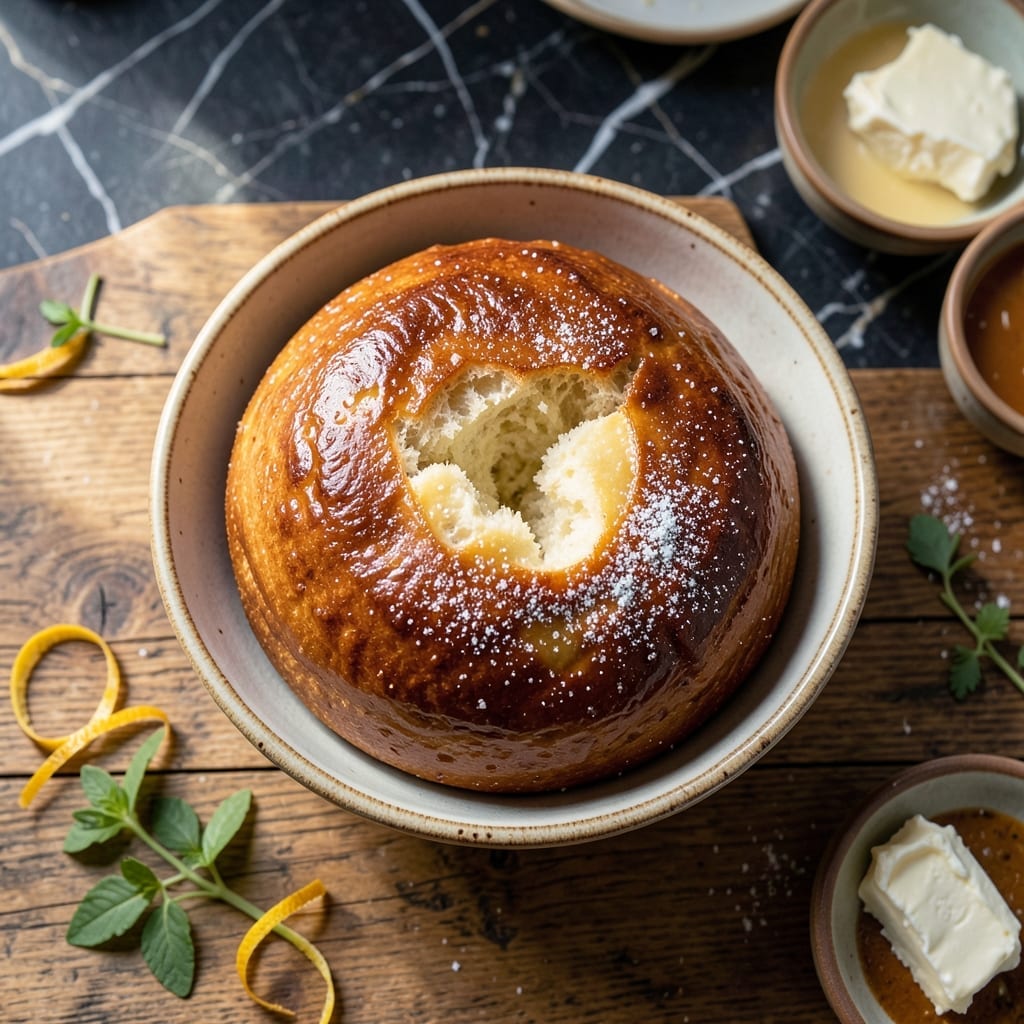
There’s something special about Portuguese sweet bread, especially the version that’s become beloved in Hawaii. This island-style loaf delivers an incredibly soft, slightly sweet bread that’s perfect for any meal.
I’ve refined this recipe to capture that signature texture—tender, light, and just sweet enough. The dough comes together with simple ingredients, but the technique ensures a loaf that’s both fluffy and rich.
The secret lies in the slow rise and gentle handling of the dough. Baked to a golden finish, it’s ideal for sandwiches, French toast, or simply enjoying warm with butter.
This bread brings a taste of Hawaii to your kitchen with every bite. Here’s how to make it right.
Ingredients for Portuguese Sweet Bread Recipe Hawaii
Simple ingredients create this island-style soft, slightly sweet Portuguese loaf everyone loves.
| Ingredient | Amount | Notes |
|---|---|---|
| All-Purpose Flour 🌾 | 4 cups | Plus extra for dusting |
| Granulated Sugar 🍚 | ½ cup | For slight sweetness |
| Active Dry Yeast 🍞 | 2 ¼ tsp | One packet, proofed |
| Whole Milk 🥛 | ¾ cup | Warm to activate yeast |
| Unsalted Butter 🧈 | ¼ cup | Melted and cooled |
| Large Eggs 🥚 | 2 whole | Room temperature |
| Salt 🧂 | 1 tsp | Fine sea salt |
| Vanilla Extract 🌿 | 1 tsp | Pure extract preferred |
| Lemon Zest 🍋 | 1 tsp | Freshly grated |
| Potato Flour 🥔 | ¼ cup | For extra softness |
| Water 💧 | ¼ cup | Warm for yeast |
The flour is the foundation—King Arthur or Gold Medal both work beautifully. Potato flour is the secret to that signature tenderness; find it in the baking aisle at most supermarkets or online. Use whole milk for richness (2% works in a pinch). The yeast needs to be fresh—check the expiration date on the packet before you start.
No potato flour? Instant mashed potato flakes at half the amount get you close. Short on milk? Evaporated milk plus water works well. Vanilla can be skipped, but add a pinch of nutmeg for warmth. For a richer dough, swap the melted butter for an equal amount of coconut oil—common in Hawaiian versions.
Dough rises best in a warm spot (around 80°F). Store cooled bread in an airtight container for 3-4 days, or freeze slices for up to 3 months. Toast frozen slices directly from the freezer.
Why You’ll Love This Recipe
- No-Knead Magic: I just mix, rise, and bake—no fancy techniques, just fluffy sweet bread with minimal effort.
- Buttery Sweetness: The whole milk and butter create a richness that makes every bite melt-in-your-mouth good.
- Breakfast or Dessert: Honestly, it’s perfect toasted with coffee or served warm with a scoop of vanilla ice cream.
- Budget-Friendly Loaf: A few pantry staples and I get two golden loaves that last all week—no special trips to the store.
Step-by-Step Instructions for Portuguese Sweet Bread Hawaii
Master the art of this island-inspired bread with these precise, tested steps for perfect texture every time.
Step 1: Activate the Yeast and Prepare Wet Ingredients
In a small bowl, combine the 0.25 cup warm Water, 2.25 tsp Active Dry Yeast, and 0.5 cup Granulated Sugar. Stir gently and let sit for 5-7 minutes until the mixture becomes frothy and cloudy—this confirms the yeast is active and ready to work its magic.
While the yeast proofs, warm the 0.75 cup Whole Milk in a saucepan until it reaches 110°F. Remove from heat and whisk in the 0.25 cup Unsalted Butter, 2 whole Large Eggs, 1 tsp Vanilla Extract, and 1 tsp Lemon Zest. The butter should melt completely but remain cool enough to touch.
Step 2: Combine Dry Ingredients and Create the Dough
In a large mixing bowl, whisk together the 4 cups All-Purpose Flour, 0.25 cup Potato Flour, and 1 tsp Salt. The potato flour is the secret to that signature soft, pillowy texture this bread is known for.
Pour the proofed yeast mixture and the warm milk mixture into the dry ingredients. Using a wooden spoon or dough hook, mix until a shaggy dough forms. The dough will be slightly sticky at this stage, but don’t add more flour yet—it will come together as it rests.
Step 3: Knead the Dough to Smooth Perfection
Turn the dough onto a lightly floured surface dusted with extra all-purpose flour. Knead for 8-10 minutes by hand, or 5-6 minutes in a stand mixer with a dough hook on low speed. The dough is ready when it’s smooth, elastic, and only slightly tacky to the touch.
Press your finger into the dough—if it springs back slowly, it’s properly kneaded. If it springs back too quickly or not at all, keep kneading. This step develops the gluten, which gives the bread its airy, light structure.
Step 4: Let the Dough Rise Until Doubled
Place the kneaded dough in a lightly greased bowl, turning once to coat all sides. Cover with a clean kitchen towel or plastic wrap and let rise in a warm, draft-free place for 1.5 to 2 hours, or until doubled in size.
To test if it’s ready, gently press two fingers into the dough. If the indentations remain, the dough has risen sufficiently. If it springs back, give it more time. This rise is crucial for achieving the bread’s tender crumb.
Step 5: Shape, Rise Again, and Bake to Golden Brown
Punch down the risen dough to release air, then shape it into a round loaf. Place it on a parchment-lined baking sheet. Cover loosely and let rise for another 45-60 minutes until puffy and nearly doubled in size.
Preheat the oven to 350°F. Bake the loaf for 30-35 minutes until the top is deep golden brown and the internal temperature reaches 190°F. The bread should sound hollow when tapped on the bottom. Cool on a wire rack before slicing to preserve the soft texture.
Pro Tips For Making Portuguese Sweet Bread Recipe Hawaii
- Warm the Milk: Heat the whole milk to 110°F—any hotter and you’ll kill the yeast, any colder and it won’t activate. I learned this the hard way after my first few loaves refused to rise.
- Use Room-Temp Butter: Take the unsalted butter out 30 minutes before mixing—cold butter won’t incorporate properly into the dough, leaving you with a dense, uneven crumb.
- Don’t Rush the Rise: Let the dough double in size, even if it takes 2 hours. Skipping this step for speed gives you a tight, chewy bread instead of the light, fluffy texture this recipe is known for.
- Brush with Butter: Right after baking, brush the top with melted unsalted butter. Sounds simple, but it keeps the crust soft and adds that rich, buttery flavor Hawaiian-style sweet bread is famous for.
Storing and Reheating Leftovers
Room Temperature Storage
Once completely cooled, keep your loaf in an airtight container or wrapped tightly in plastic wrap at room temperature. It stays fresh for 2-3 days this way. I like using a bread box if I have one handy. 💡
Refrigerator Storage
For longer freshness, store slices in an airtight container in the fridge for up to 5 days. The cold can dry it out slightly, so I recommend reheating before serving to restore that soft texture.
Freezing for Long-Term
Slice the loaf before freezing for easy portions. Wrap individual slices in plastic wrap, then place in a freezer bag for up to 3 months. This method keeps the bread tasting almost fresh-baked when reheated. ❄️
Oven Reheating
Preheat your oven to 300°F. Wrap the bread in aluminum foil and heat for 10-15 minutes until warmed through. For frozen slices, add 5-10 minutes. This brings back that just-baked softness.
Microwave Quick Fix
For a single slice, microwave on 50% power for 20-30 seconds. Place a damp paper towel over it to prevent drying. I do this for breakfast when I’m in a rush.
Toaster Method
Pop frozen slices directly into the toaster on medium setting. It crisps the edges while keeping the inside soft. Perfect for quick French toast or sandwiches.
Nutrition Facts
Frequently Asked Questions
Why does this recipe include potato flour?
Potato flour creates an extra-soft, moist texture that’s signature to Hawaiian-style versions. It absorbs more liquid than regular flour, keeping the bread tender for days.
Can I skip the lemon zest?
Yes, but it adds a subtle brightness that balances the sweetness. For a traditional Hawaiian touch, try 1/2 tsp orange zest instead.
What if my dough doesn’t rise?
Check your yeast freshness first. Ensure your rising spot is warm enough (around 80°F). Old yeast or cold temperatures are the most common culprits.
How do I get a darker crust?
Brush the loaf with an egg wash before baking. For extra shine, add 1 tbsp honey to the wash. Bake until internal temperature reaches 190°F.

- Potato Patty Recipe No Egg: Crispy Edges Without the Binder - October 30, 2026
- Paula Deen’s Potato Chip Cookies Recipe: Salty-Sweet Crunch in Every Bite - October 30, 2026
- Potato Gnocchi Recipe Ideas: Pillowy Soft Dumplings With Rustic Charm - October 30, 2026