
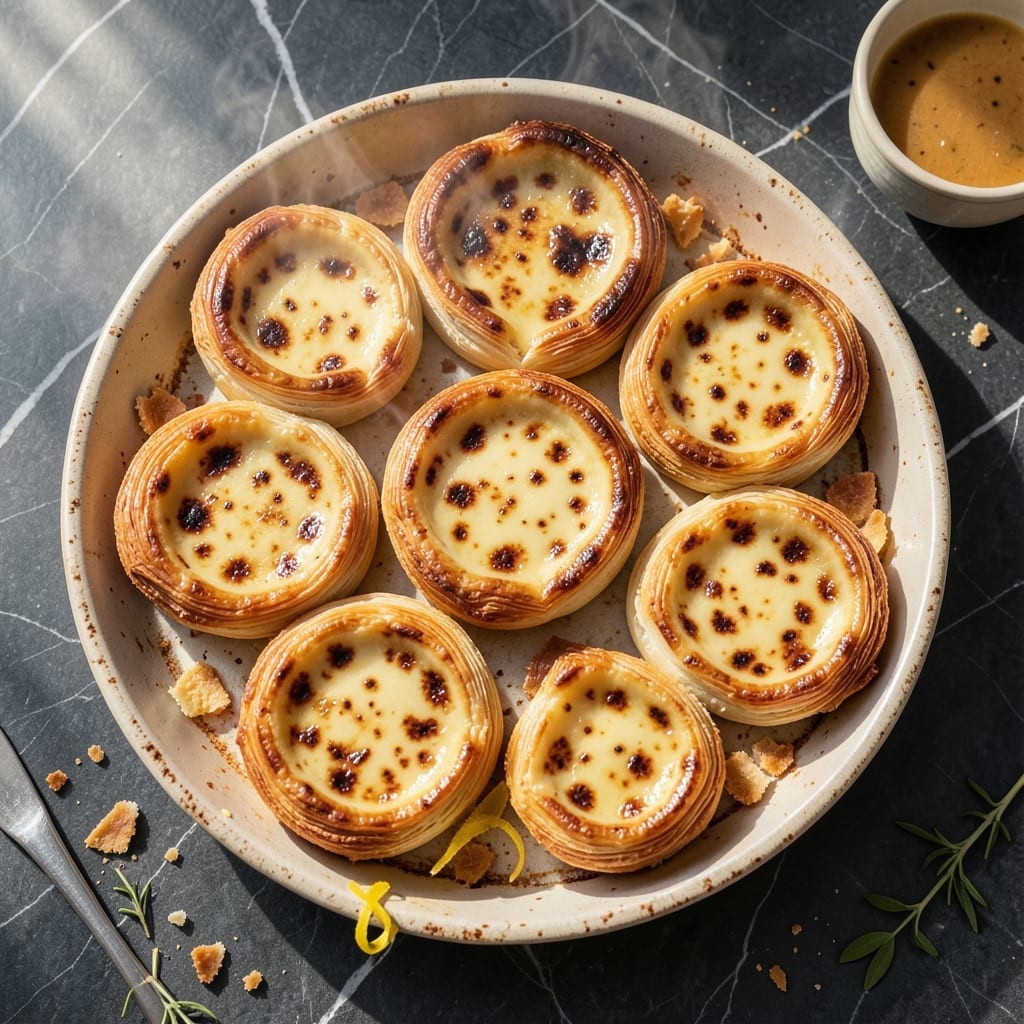
This recipe delivers the iconic flaky layers and creamy custard that define authentic Portuguese egg tarts. I’ve refined the technique to ensure consistent results at home, focusing on precise lamination and custard temperature for that perfect swirl.
The crust comes together through careful folding and resting, creating dozens of delicate layers that shatter with each bite. Meanwhile, the custard strikes a balance between rich and light, with just the right amount of sweetness and a hint of vanilla.
Baked at high heat, these tarts develop a golden, blistered top while maintaining a tender interior. The contrast between the crisp pastry and silky filling is what makes them irresistible.
Follow the steps closely, and you’ll achieve professional-quality tarts that rival any bakery. The accompanying video will guide you through each stage for visual clarity.
Ingredients for Portuguese Egg Tart Recipe Video
Twelve ingredients create those iconic flaky layers and creamy custard swirls everyone loves.
| Ingredient | Amount | Notes |
|---|---|---|
| All-Purpose Flour 🌾 | 3 cups | Plus extra for dusting |
| Granulated Sugar 🍚 | ¼ cup | For laminated dough |
| Salt 🧂 | ½ tsp | Fine sea salt preferred |
| Unsalted Butter 🧈 | 1 ½ cups | Cold, cubed for lamination |
| Water 💧 | ½ cup | Ice cold for dough |
| Whole Milk 🥛 | 1 ½ cups | For custard base |
| Granulated Sugar 🍚 | 1 ½ cups | For custard filling |
| Large Eggs 🥚 | 6 whole | Room temperature preferred |
| Egg Yolks 🥚 | 6 whole | Extra yolks for richness |
| Vanilla Extract 🌿 | 2 tsp | Pure extract recommended |
| All-Purpose Flour 🌾 | ¼ cup | For thickening custard |
| Cinnamon Stick 🌿 | 1 whole | Optional for infusion |
The butter is critical here. Plugrá or European-style (higher fat content) gives the best lamination. Most supermarkets carry it—look for 82% fat on the label. The flour should be all-purpose; bread flour’s higher protein won’t work for this delicate pastry. For the milk, whole milk is non-negotiable for the custard’s richness (trust me on the full-fat version).
No cinnamon stick? Half a teaspoon of ground cinnamon steeped in warm milk works fine. Short on eggs? Don’t skip the extra yolks—they’re what give the custard that silky, golden color. If you must substitute, use pasteurized liquid eggs at the same volume. The vanilla should be pure extract, not imitation; Nielsen-Massey is the gold standard.
The dough rests best overnight, but 2 hours in the fridge works in a pinch. Custard can be made a day ahead. Finished tarts are best eaten the same day, but they’ll keep for 2 days in an airtight container (reheat at 350°F for 5 minutes to restore crispness).
Why You’ll Love This Recipe
- One-Bowl Wonder: I mix the dough right in the same bowl I use for the custard—no extra dishes, just buttery, flaky layers waiting to happen.
- That Golden Crunch: The butter in the crust browns to perfection while the sugar caramelizes just enough to make every bite ridicuously good.
- Brunch or Midnight Snack: Honestly, these tarts are just as welcome at Sunday brunch as they are straight from the fridge at 2 a.m.
- Pocket-Friendly Luxury: A handful of pantry staples turns into something that tastes like a Lisbon bakery—without the plane ticket.
Step-by-Step Instructions for Portuguese Egg Tarts
Master the technique for achieving that signature flaky crust and creamy custard filling.
Step 1: Create the Laminated Dough Base
Begin by combining the 3 cups All-Purpose Flour, 0.25 cup Granulated Sugar, and 0.5 tsp Salt in a large bowl. I always whisk these dry ingredients together first to ensure even distribution of the sugar and salt throughout the dough.
Cut in the 1.5 cups Unsalted Butter (cold and cubed) using a pastry cutter or your fingertips until the mixture resembles coarse crumbs. The butter should remain visible in pea-sized pieces—this is what creates those flaky layers. Gradually add the 0.5 cup Water (ice cold) until the dough just comes together. Don’t overwork it; the dough should be shaggy, not smooth.
Step 2: Chill and Roll the Dough
Wrap the dough tightly in plastic wrap and refrigerate for at least 1 hour. This resting period allows the gluten to relax and the butter to firm up, making it easier to roll out without the butter melting into the dough. I often let it chill overnight for convenience.
On a lightly floured surface, roll the chilled dough into a 16×12-inch rectangle. Fold it in thirds like a letter, then rotate 90 degrees and roll out again. Repeat this folding and rolling process 3 more times to create multiple layers. Each fold builds on the previous one, creating that characteristic flakiness. Keep the dough cold between folds if it starts to soften.
Step 3: Prepare the Custard Filling
In a saucepan, heat the 1.5 cups Whole Milk with the 1 whole Cinnamon Stick over medium heat until it just begins to simmer. Remove from heat, cover, and let the cinnamon infuse for 10 minutes. This adds a subtle warmth to the custard that complements the eggs perfectly.
In a separate bowl, whisk together the 6 whole Large Eggs, 6 whole Egg Yolks, 1.5 cups Granulated Sugar, 2 tsp Vanilla Extract, and 0.25 cup All-Purpose Flour. Remove the cinnamon stick from the milk and slowly whisk the hot milk into the egg mixture to temper it. This prevents the eggs from scrambling when they meet the hot liquid.
Step 4: Assemble and Bake the Tarts
Preheat your oven to 475°F. Roll out the laminated dough to 1/8-inch thickness and use it to line a muffin tin, pressing gently into each cup. I like to let the dough overhang slightly—it creates a beautiful ruffled edge as it bakes. Fill each tart shell 3/4 full with the custard mixture.
Bake on the top rack for 15-18 minutes until the edges are deep golden brown and the centers are slightly puffed with small blisters. The high heat is crucial for achieving that distinctive caramelized top layer while the custard remains creamy underneath. Watch them closely after 12 minutes to prevent over-browning.
Let the tarts cool in the pan for 5 minutes before transferring to a wire rack. The custard will set slightly as it cools, but it should still have a slight jiggle in the center when you remove them from the oven. Serve warm for the best texture contrast between the crisp pastry and creamy filling.
Pro Tips For Making Portuguese Egg Tart Recipe Video
- Chill the Dough: After mixing the flour, butter, and water, wrap the dough and refrigerate for at least 30 minutes—I learned this the hard way when my tart shells kept shrinking in the pan.
- Blind Bake First: Pre-bake the crust at 375°F for 10 minutes with pie weights or dried beans to prevent a soggy bottom, even if you’re tempted to skip it.
- Use Room Temp Butter: Take the unsalted butter out 1 hour before starting—cold butter makes flaky dough, but room temp blends smoother for the filling.
- Roll Thin, Not Too Thin: Aim for 1/8-inch thickness when rolling the dough; any thinner and it’ll tear, any thicker and the tarts won’t crisp up right.
Wine and Beer Pairings for portuguese egg tart recipe video
Portuguese Wine Pairings
These tarts pair beautifully with Moscatel de Setúbal, a sweet Portuguese dessert wine. Its honeyed notes complement the custard’s richness perfectly. Serve it chilled at 50-55°F for the best experience. I love how the wine’s acidity cuts through the buttery pastry. 🍷
Portuguese Beer Options
Super Bock, Portugal’s classic lager, offers a crisp contrast to the tarts’ sweetness. The light bitterness cleanses your palate between bites. For craft beer lovers, try a Sagres with its slightly malty profile.
Non-Alcoholic Choices
A chilled glass of Portuguese lemonade (limonada) with its tart citrus notes balances the dessert’s richness. I make mine with 3 parts sparkling water to 1 part fresh lemon juice and a touch of honey.
Coffee Pairing
Espresso is a traditional choice in Lisbon’s pastelarias. The bold, bitter notes contrast wonderfully with the sweet custard. I recommend a short espresso (about 1 oz) to avoid overpowering the delicate flavors.
Tea Alternatives
Chá Galleão, a popular Portuguese black tea, works surprisingly well. Its robust flavor stands up to the tarts’ richness. Brew it strong with 1 tsp loose leaves per cup and serve with a lemon slice. 💛
Nutrition Facts
Frequently Asked Questions
Can I use store-bought puff pastry instead?
Yes, but the texture won’t be the same. Store-bought lacks the intricate layers of homemade laminated dough. For best results, use all-butter puff pastry and roll it to 1/8-inch thickness.
Why did my custard curdle?
This happens if the hot milk is added too quickly to the eggs. Always temper by whisking in the milk slowly while constantly stirring. If it does curdle, strain through a fine sieve before baking.
How do I get those signature blisters on top?
Bake at 475°F on the top rack. The high heat creates steam that forms blisters. Don’t open the oven door during the first 12 minutes of baking.
Can these be made ahead of time?
The dough can rest overnight in the fridge. The custard can be prepared 1 day ahead and stored covered in the refrigerator. Bake just before serving for the freshest texture.

- Potato Patty Recipe No Egg: Crispy Edges Without the Binder - October 30, 2026
- Paula Deen’s Potato Chip Cookies Recipe: Salty-Sweet Crunch in Every Bite - October 30, 2026
- Potato Gnocchi Recipe Ideas: Pillowy Soft Dumplings With Rustic Charm - October 30, 2026