
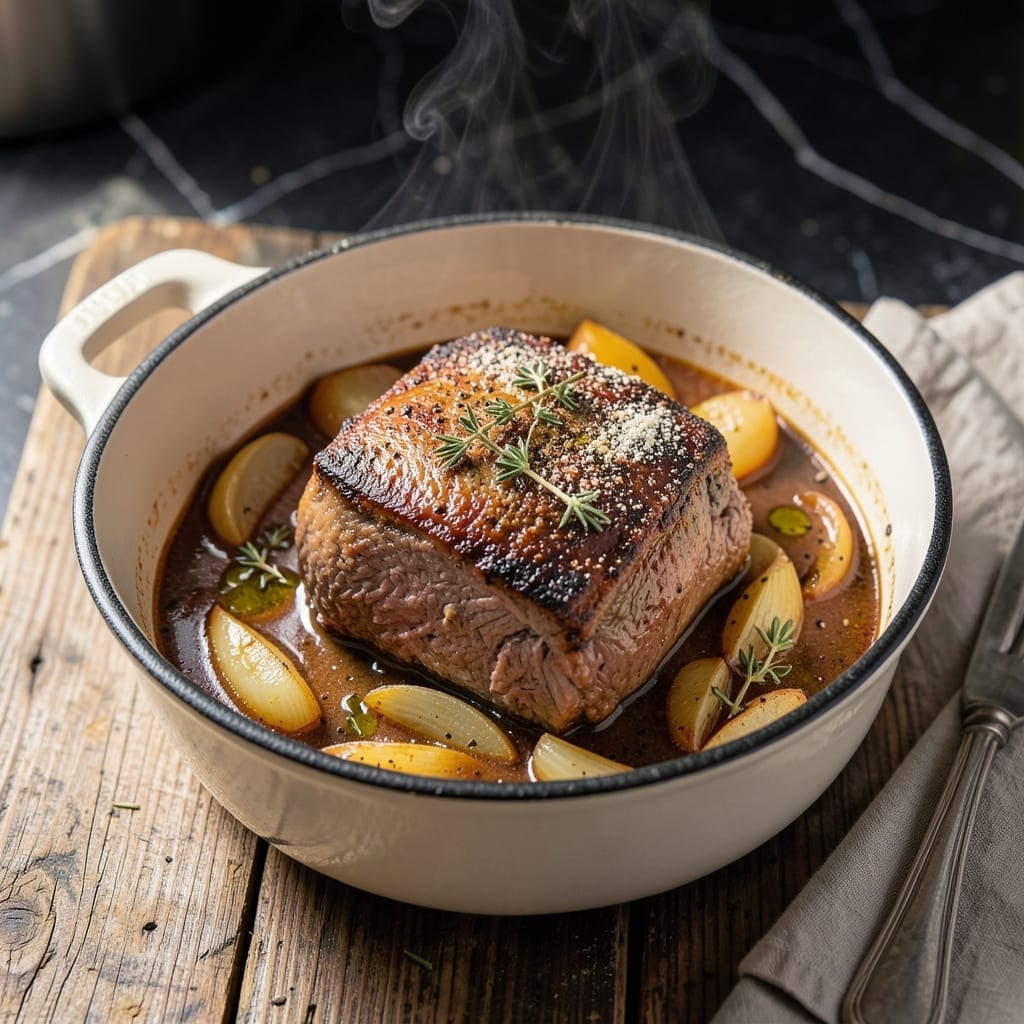
There’s a reason pot roast remains a Sunday dinner classic—it transforms humble ingredients into something extraordinary. I’ve tested this method in my tiny Boston kitchen, perfecting the balance of tenderness and depth of flavor.
Using a Dutch oven on the stovetop creates an ideal environment for slow braising. The heavy pot distributes heat evenly, allowing the meat to break down while vegetables absorb rich, savory juices. This technique delivers fall-apart tender results every time.
The secret lies in the browning step. Searing the beef first builds a flavorful crust that deepens as it braises. Root vegetables added midway through cooking soak up the meaty broth without turning to mush.
What emerges is a meal that tastes like it simmered all day—melt-in-your-mouth beef, carrots and potatoes saturated with flavor, and a gravy so good you’ll want to drink it straight from the pot.
Ingredients for Pot Roast Recipe Dutch Oven Stovetop
Humble ingredients, extraordinary results. Chuck roast, root vegetables, and a Dutch oven work magic.
| Ingredient | Amount | Notes |
|---|---|---|
| Chuck Roast 🥩 | 3 lb | Well-marbled, boneless preferred |
| Kosher Salt 🧂 | 2 tsp | Diamond Crystal preferred |
| Black Pepper 🌶️ | 1 tsp | Freshly ground for best flavor |
| All-Purpose Flour 🌾 | ¼ cup | For dusting beef |
| Olive Oil 🫒 | 2 tbsp | Divided for searing and sautéing |
| Yellow Onion 🧅 | 1 whole | Large, diced into chunks |
| Garlic Cloves 🧄 | 6 cloves | Smashed, peeled |
| Carrots 🥕 | 4 whole | Peeled, cut into 2-inch pieces |
| Yukon Gold Potatoes 🥔 | 1 ½ lb | Quartered, skin-on |
| Beef Stock 💧 | 2 cups | Low-sodium preferred |
| Red Wine 🍷 | 1 cup | Dry variety like Cabernet |
| Tomato Paste 🍅 | 2 tbsp | For depth of flavor |
| Fresh Thyme Sprigs 🌿 | 4 sprigs | Tied with kitchen twine |
| Fresh Rosemary Sprigs 🌿 | 2 sprigs | Tied with kitchen twine |
| Bay Leaves 🍃 | 2 whole | Dried, for aromatic depth |
The chuck roast is non-negotiable here. Look for well-marbled cuts—that fat melts into the meat as it braises, giving you that fall-apart texture. I grab mine from Whole Foods or the butcher at Market Basket (Boston locals know). Don’t trim too much fat off; it adds flavor. The beef stock matters too—Better Than Bouillon base makes a rich, concentrated broth that beats most boxed stocks.
No red wine? Extra beef stock plus a splash of balsamic vinegar works in a pinch. Fresh herbs are ideal, but dried at one-third the amount gets you close—just tie them in cheesecloth. Potatoes can be swapped for parsnips or sweet potatoes (cut them larger so they don’t turn to mush). If you’re missing tomato paste, a tablespoon of ketchup surprisingly works—don’t knock it till you try it.
Leftovers taste even better the next day. Store in the fridge for up to 4 days, or freeze for 3 months. The gravy thickens as it cools—just reheat gently with a splash of water. I always make a double batch of this one.
Why You’ll Love This Recipe
- One Pot Wonder: It’s just sear, simmer, and serve—no fancy steps, and the dutch oven does all the work.
- Rich & Tender: The chuck roast soaks up the juices, and that flour crust locks in a deep, savory flavor.
- Sunday or Tuesday: Honestly, I’ve made this for company and for lazy weeknights with zero complaints.
- Leftovers for Days: That pot of meat stretches into sandwiches, tacos, or stew—no waste, just more meals.
Step-by-Step Instructions for Dutch Oven Pot Roast
Here’s my stovetop method for fall-apart tender beef with richly braised vegetables.
Step 1: Sear the Chuck Roast to Deep Brown
Pat the 3 lb Chuck Roast completely dry with paper towels. Season all sides aggressively with the 2 tsp Kosher Salt and 1 tsp Black Pepper—this creates a flavorful crust. Dredge the beef in the 0.25 cup All-Purpose Flour, shaking off any excess.
Heat 1 tbsp of the Olive Oil in your Dutch oven over medium-high heat until shimmering. Add the beef and sear for 4-5 minutes per side until deeply browned. This step is non-negotiable—it builds the flavor foundation for the entire dish. Transfer the beef to a plate and set aside.
Step 2: Sauté Aromatics and Deglaze
In the same Dutch oven, add the remaining 1 tbsp Olive Oil. Add the Yellow Onion, Garlic Cloves, Carrots, and Yukon Gold Potatoes. Sauté for 5-6 minutes until the onion begins to soften and the vegetables develop some color.
Stir in the 2 tbsp Tomato Paste and cook for 1-2 minutes until it darkens slightly. Pour in the 1 cup Red Wine and scrape up all the browned bits from the bottom of the pot. This deglazing step captures all that concentrated beef flavor.
Step 3: Braise the Beef with Herbs
Return the seared beef to the Dutch oven along with any accumulated juices. Add the 2 cups Beef Stock, Fresh Thyme Sprigs, Fresh Rosemary Sprigs, and Bay Leaves. The liquid should come about halfway up the beef—add a splash more stock if needed.
Bring to a simmer, then reduce the heat to low. Cover and let it braise for 2.5 to 3 hours, turning the beef occasionally, until the meat is fork-tender and nearly falls apart. You’ll know it’s ready when a fork slides in with almost no resistance.
Step 4: Rest and Serve
Carefully transfer the beef to a cutting board. Skim any excess fat from the surface of the braising liquid, then discard the Fresh Thyme Sprigs, Fresh Rosemary Sprigs, and Bay Leaves. If you prefer a thicker sauce, simmer the vegetables in the liquid for 5-10 minutes until it reduces slightly.
Slice the beef against the grain or pull it into chunks. Serve it over the vegetables and sauce, ensuring each portion gets plenty of the rich braising liquid. The beef should be melt-in-your-mouth tender with vegetables that have absorbed all that deep, meaty flavor.
Pro Tips For Making Pot Roast Recipe Dutch Oven Stovetop
- Sear It Hard: Crank the heat to medium-high and don’t move the chuck roast for at least 3-4 minutes per side—I learned this the hard way after pulling it too soon and ending up with pale, steamed meat instead of that deep brown crust.
- Dry the Meat: Pat the chuck roast bone-dry with paper towels before seasoning, or the flour won’t stick properly and you’ll lose that crucial crispy coating that thickens the gravy later.
- Skip the Crowding: If your dutch oven isn’t big enough for all the roast in one layer, sear it in batches—steam from overcrowding turns the flour coating gummy and ruins the texture.
- Use Room-Temp Meat: Pull the chuck roast out of the fridge 30-45 minutes before cooking, or it’ll seize up in the hot oil and cook unevenly, leaving the center tough while the edges overcook.
Essential Equipment for This Recipe
Dutch Oven Essentials
Invest in a 5-6 quart enameled cast iron Dutch oven—I swear by Lodge or Le Creuset. The heavy base prevents scorching, while the tight lid traps steam for perfect braising. My Lodge has outlasted three Boston apartments and still looks brand new. 🔥
Thermometer Importance
An instant-read thermometer ensures your pot roast hits 195-205°F for fall-apart tenderness. I use a ThermoWorks Thermapen for accuracy. Don’t trust the “done” look alone—temperature is your best guide.
Wooden Spoon Must
A sturdy wooden spoon won’t scratch your Dutch oven while scraping up browned bits. Mine has a slight curve that fits perfectly against the pot’s edges. Look for one with a long handle to avoid steam burns.
Tongs for Turning
Use 12-inch locking tongs to flip the beef during searing and braising. The length keeps your hands safe from splatters. I prefer OXO Good Grips for their comfortable handles. 💪
Kitchen Twine
Tie your herb sprigs with unbleached cotton kitchen twine for easy removal. It’s also great for trussing if you’re feeling fancy. Keep a roll in your drawer—you’ll use it more than you think.
Splatter Screen
Searing creates splatters. A stainless steel splatter screen saves your stovetop from grease mess. I learned this the hard way after one too many cleanup sessions in my tiny kitchen.
Nutrition Facts
Frequently Asked Questions
What cut of beef works best?
Chuck roast is ideal for its marbling and connective tissue. These break down during the 2.5 to 3 hours braising time, creating that melt-in-your-mouth texture. Avoid lean cuts like round—they’ll stay tough.
Can I skip the red wine?
Yes! Substitute with an extra 1 cup of beef stock plus 1 tbsp balsamic vinegar. The acidity mimics wine’s role in tenderizing the meat and balancing flavors.
How do I know when it’s done?
The meat is ready when it reaches 195-205°F internally and shreds easily with a fork. If it resists, give it more time—low and slow is key here.
Can I add vegetables later?
For firmer veggies, add carrots and potatoes during the last 1 to 1.5 hours of cooking. This prevents them from turning mushy while still soaking up rich flavors.

- Protein Pudding Recipe With Sugar Free Pudding: High-Protein Creamy Indulgence - November 3, 2026
- Progresso Recipe Starters Creamy Parmesan Basil Cooking Sauce: Rich Herb-Infused Base for Pasta and More - November 3, 2026
- Pudding Recipe With Egg Yolks: Silky Smooth Custard in Minutes - November 3, 2026