
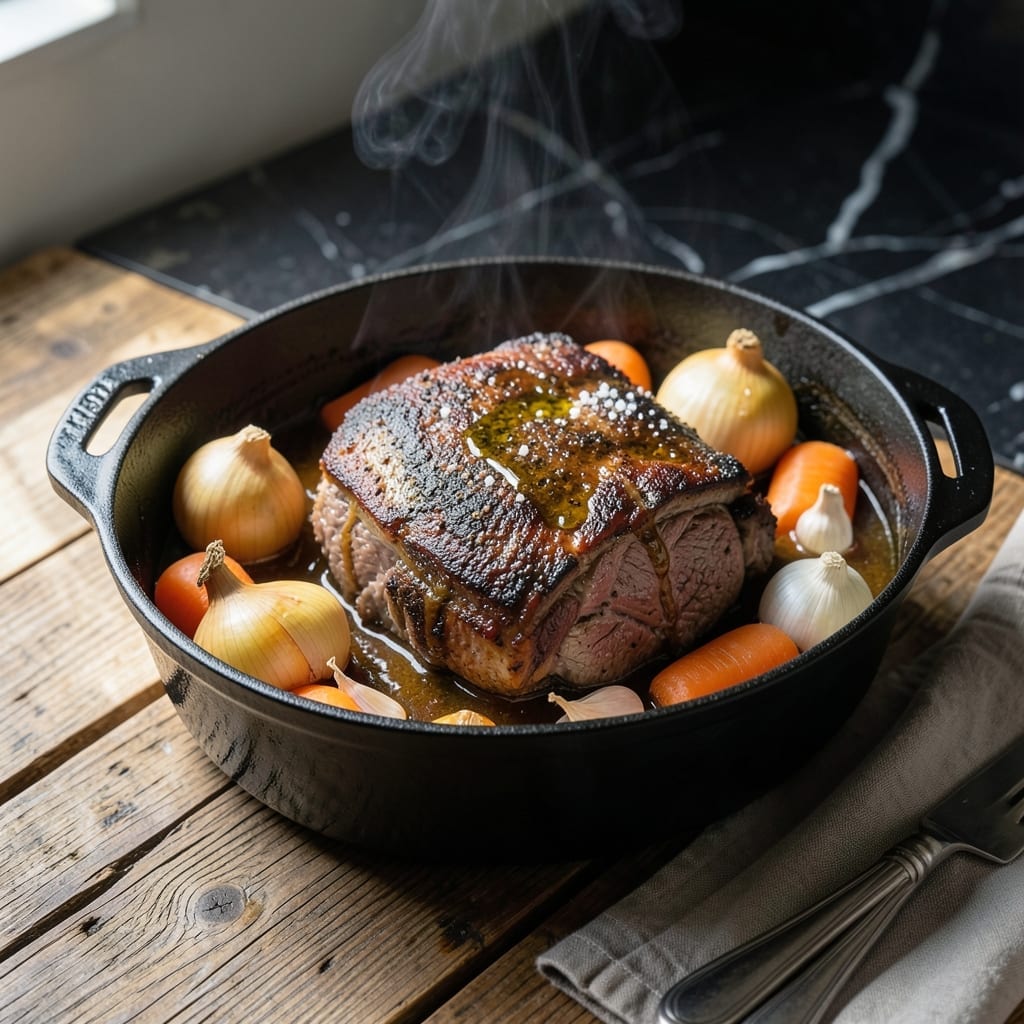
Mastering pot roast temperature is the difference between tough meat and perfectly braised beef that falls apart at the touch of a fork. I learned this lesson the hard way during my early cooking experiments in a tiny Boston kitchen.
The key is maintaining a consistent 325°F oven temperature, which allows the connective tissue to break down slowly without drying out the meat. This low and slow method transforms even the most affordable cuts into something extraordinary.
What emerges after hours of gentle cooking is beef so tender it nearly melts, surrounded by a rich, flavorful broth that soaks into every bite. The meat pulls apart effortlessly while staying juicy and full of depth.
This approach works every time, whether you’re using a Dutch oven or slow cooker. The temperature control ensures perfect results regardless of the cut you choose.
Ingredients for Pot Roast Recipe Temperature
A chuck roast and pantry staples transform into something extraordinary with time and temperature.
| Ingredient | Amount | Notes |
|---|---|---|
| Chuck Roast 🥩 | 3 lb | Well-marbled, boneless preferred |
| Kosher Salt 🧂 | 2 tsp | Diamond Crystal preferred |
| Black Pepper 🌶️ | 1 tsp | Freshly ground for best flavor |
| Olive Oil 🫒 | 2 tbsp | Extra-virgin for richness |
| Yellow Onions 🧅 | 2 whole | Medium-sized, roughly chopped |
| Garlic Cloves 🧄 | 6 cloves | Peeled, smashed for depth |
| Carrots 🥕 | 4 whole | Large, cut into chunks |
| Celery Stalks 🥬 | 3 whole | Cut into 2-inch pieces |
| Beef Broth 💧 | 3 cups | Low-sodium preferred for control |
| Red Wine 🍷 | 1 ½ cups | Bold, dry variety like Cabernet |
| Tomato Paste 🍅 | 2 tbsp | Double-concentrated for richness |
| Fresh Thyme Sprigs 🌿 | 4 whole | Tied with kitchen twine |
| Fresh Rosemary Sprigs 🌿 | 2 whole | Woody stems removed |
| Bay Leaves 🍃 | 2 whole | Dried, for aromatic depth |
The chuck roast is non-negotiable here—look for good marbling at the butcher counter or Costco for the best value. I always grab mine from Whole Foods when I want organic (the color is deeper, the flavor richer). The beef broth matters too; Better Than Bouillon makes a robust base if you’re not using homemade. Don’t skip the wine—it adds acidity that brightens the whole dish (any bold red works).
No red wine? Substitute with an extra cup of beef broth plus 1 tbsp of balsamic vinegar. Fresh herbs not on hand? Dried at one-third the amount works in a pinch (just add them earlier so they rehydrate). If you’re missing tomato paste, a splash of ketchup can stand in, but the paste gives a deeper, more concentrated flavor. The carrots and celery can be swapped for parsnips or potatoes if that’s what you’ve got.
This tastes even better the next day—store leftovers in an airtight container for up to 5 days in the fridge or 3 months in the freezer. The fat will solidify on top when chilled; just skim it off before reheating. Perfect for meal prep or Sunday suppers.
Why You’ll Love This Recipe
- Set and Forget: I just season the chuck roast with kosher salt and black pepper, sear it, and let the oven do the rest—no babysitting required.
- Feeds the Week: I make it Sunday and we’re eating leftovers in sandwiches, tacos, and stews till Wednesday.
- Pantry Stretch: Honestly, five ingredients—olive oil, onions, salt, pepper, and the roast—and I’ve got a meal that tastes like a splurge.
Step-by-Step Instructions for Pot Roast
Here’s my proven method that guarantees fall-apart tender beef with rich, complex flavors.
Step 1: Sear the Chuck Roast to Build Flavor
Pat the 3 lb Chuck Roast dry with paper towels, then season aggressively with the 2 tsp Kosher Salt and 1 tsp Black Pepper on all sides. I like to press the seasoning into the meat so it adheres well during searing.
Heat the 2 tbsp Olive Oil in a Dutch oven over medium-high heat until shimmering. Add the chuck roast and sear undisturbed for 4-5 minutes per side until a deep, rich brown crust forms. This creates the flavor foundation for your entire dish.
Remove the roast and set aside. The fond left in the pot will be the base for your braising liquid.
Step 2: Build the Aromatic Base
In the same Dutch oven, add the 2 whole Yellow Onions, 4 whole Carrots, and 3 whole Celery Stalks. Cook over medium heat for 5-7 minutes, stirring occasionally, until the vegetables begin to soften and develop some color.
Add the 6 cloves Garlic Cloves and 2 tbsp Tomato Paste, then cook for 1-2 minutes until the garlic is fragrant and the tomato paste darkens slightly. This step intensifies the umami depth of your braise.
Pour in the 1.5 cups Red Wine to deglaze, scraping up all the browned bits from the bottom. Let it simmer for 3-4 minutes until reduced by half.
Step 3: Braise Low and Slow to Perfection
Return the chuck roast to the pot. Add the 3 cups Beef Broth, 4 whole Fresh Thyme Sprigs, 2 whole Fresh Rosemary Sprigs, and 2 whole Bay Leaves. The liquid should come about two-thirds up the side of the roast.
Bring to a simmer, then cover and transfer to a 325°F oven. Braise for 2.5-3 hours, turning the roast once halfway through, until the meat is fork-tender and pulls apart easily.
This low and slow cooking method transforms the tough chuck roast into buttery, melt-in-your-mouth perfection while infusing it with the flavors of the aromatic vegetables and herbs.
Step 4: Rest and Reduce the Sauce
Carefully remove the chuck roast from the pot and set it on a cutting board. Tent loosely with foil and let it rest for 15-20 minutes before slicing or pulling apart.
Meanwhile, skim any excess fat from the surface of the braising liquid. Bring it to a boil over medium-high heat and cook for 8-10 minutes until it reduces to a rich, velvety sauce that coats the back of a spoon.
Taste and adjust seasoning if needed. The sauce should have a deep, concentrated flavor that complements the tender beef beautifully. Serve the pot roast with the reduced sauce spooned over the top.
Pro Tips For Making Pot Roast Recipe Temperature
- Start Hot, Finish Low: Sear the chuck roast in olive oil over high heat until deeply browned—this builds flavor you can’t fake. Then drop the oven temp to 300°F for slow, even cooking.
- Salt the Night Before: I learned this the hard way—dry-brine the roast with kosher salt at least 12 hours ahead. It seasons all the way through and locks in moisture better than any last-minute sprinkle.
- Don’t Crowd the Pan: Resist the urge to throw all the onions in at once. Cook them in batches if needed, or they’ll steam instead of caramelize, leaving your pot roast with a weak, watery base.
- Use a Meat Thermometer: After burning one too many roasts, I finally figured out the only reliable way to know it’s done: pull it at 195°F internal temp. The meat will be fork-tender every time, no guessing.
Perfect Pairings for This Dish
Classic Comfort Sides
I always pair this with creamy mashed potatoes—they soak up that rich braising liquid like a dream. Use 2 lbs Yukon Golds boiled with ½ cup whole milk and 4 tbsp butter for the perfect texture. Honestly, it’s my Nonna’s method and it never fails. 💛
Fresh Green Balance
A simple green salad with a bright vinaigrette cuts through the richness. Toss 6 cups mixed greens with 3 tbsp olive oil, 1 tbsp lemon juice, and a pinch of Dijon mustard. The acidity wakes up your palate between bites.
Bread for Soaking
Crusty Italian bread from a local Boston bakery is my go-to for mopping up every last drop of sauce. Toast thick slices with garlic butter for 2-3 minutes at 375°F if you want to get fancy.
Wine Pairings
The same bold Cabernet you used in cooking works beautifully served alongside. For white lovers, a buttery Chardonnay stands up to the richness. I learned this pairing during Sunday dinners in my triple-decker. 🍷
Vegetable Variations
Swap the carrots and celery for roasted Brussels sprouts or steamed asparagus in spring. Toss with 1 tbsp olive oil and roast at 400°F for 20 minutes until crispy.
Family-Style Serving
Serve everything on a big platter with the roast shredded and vegetables arranged around it. The communal style reminds me of those loud, joyful meals with my Irish-Italian family. The sauce goes on the side for dipping.
Nutrition Facts
Frequently Asked Questions
What’s the best oven temperature for braising?
Use 325°F for optimal results. This low and slow method breaks down connective tissue without drying the meat. Higher temps risk tough beef, while lower ones take too long.
Can I use a slow cooker instead?
Yes! Cook on low for 7-8 hours or high for 4-5 hours. The temperature stays consistent, and the result is just as tender. Add 30 minutes extra if the meat isn’t falling apart yet.
How do I know when it’s done?
Test with a fork—it should slide in like butter. If it resists, give it another 30-45 minutes. Don’t rush it; undercooked pot roast is tough.
Why did my pot roast turn out dry?
Oven temperature was likely too high, or it wasn’t covered. Always use 325°F and keep it tightly lidded to trap moisture. Overcooking can also dry it out, so check early.

- Potato Patty Recipe No Egg: Crispy Edges Without the Binder - October 30, 2026
- Paula Deen’s Potato Chip Cookies Recipe: Salty-Sweet Crunch in Every Bite - October 30, 2026
- Potato Gnocchi Recipe Ideas: Pillowy Soft Dumplings With Rustic Charm - October 30, 2026