
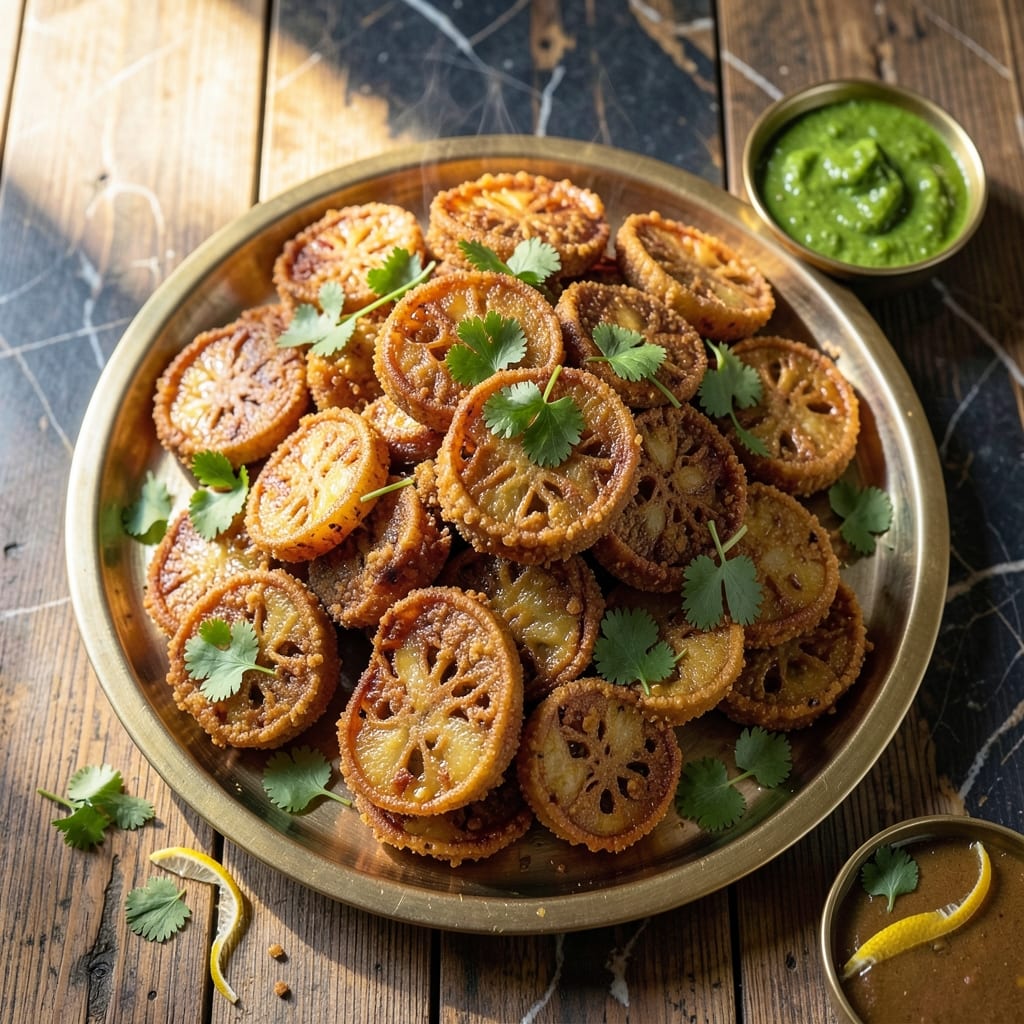
There’s something magical about the first bite of perfectly crispy potato bhajia, where the golden exterior gives way to tender, spiced potato inside. This Gujarati street food classic transforms humble ingredients into an irresistible treat.
The secret lies in the batter—a light, airy chickpea flour mixture that fries up impossibly crispy while staying delicate. Traditional recipes often include a touch of turmeric and cumin for authentic flavor, with green chilies adding just the right amount of heat.
These fritters emerge from the oil with a shatteringly crispy texture that holds up beautifully, even when served with cooling mint or tamarind chutney. The contrast between hot, spiced bhajia and sweet-tangy chutney is what makes this dish truly special.
Whether you’re recreating memories of Mumbai streets or introducing new flavors to your table, this recipe delivers restaurant-quality results at home.
Ingredients for Potato Bhajia Recipe Gujarati
Transform humble potatoes and chickpea flour into these irresistibly crispy Gujarati street food fritters.
| Ingredient | Amount | Notes |
|---|---|---|
| Russet Potatoes 🥔 | 2 lb | Peeled and thinly sliced |
| Chickpea Flour 🌾 | 1 ½ cups | Also called besan or gram flour |
| Rice Flour 🌾 | ½ cup | For extra crispiness |
| Ground Turmeric 🌿 | 1 tsp | For color and earthy flavor |
| Ground Cumin 🌿 | 1 tsp | Freshly ground preferred |
| Red Chili Powder 🌶️ | 1 tsp | Adjust for heat preference |
| Fresh Cilantro 🌿 | ¼ cup | Finely chopped for batter |
| Green Chilies 🌶️ | 2 whole | Finely minced with seeds |
| Fresh Ginger 🌿 | 1 tbsp | Grated or minced finely |
| Water 💧 | 1 ¼ cups | Room temperature for batter |
| Vegetable Oil 🫒 | 3 cups | For deep frying |
| Salt 🧂 | 1 tsp | Fine sea salt or kosher |
| Baking Soda 🧂 | ½ tsp | For light, airy batter |
| Lemon Juice 🍋 | 1 tbsp | Freshly squeezed |
The chickpea flour is non-negotiable here—look for besan at Indian grocery stores or well-stocked international aisles. Bob’s Red Mill carries a reliable version if you’re shopping mainstream. Russet potatoes give the best texture (starchy, fluffy interior), but Yukon Golds work too. For the oil, use something with a high smoke point like vegetable or sunflower. Peanut oil adds a nice depth if you have it.
No green chilies? Jalapeños work in a pinch—just remove the seeds for milder heat. Fresh ginger can be swapped for half the amount of ground ginger, though the flavor won’t be as bright. If you can’t find rice flour, cornstarch at the same quantity gets you similar crispness. The turmeric is mostly for color, so skip it if you must (but the golden hue is half the appeal).
Fry in batches and keep finished bhajia warm on a wire rack (so they stay crispy). Best eaten same-day, but leftovers reheat decently in a 350°F oven for 10 minutes. The batter doesn’t hold well—mix it fresh each time.
Why You’ll Love This Recipe
- No Fuss Batter: The chickpea and rice flour mix comes together in seconds—no resting, no waiting.
- Crispy Turmeric Bite: That golden crust with turmeric and cumin hits just right, warm and earthy.
- Tea Time Hero: Honestly, these disappear faster than I can fry them during monsoon evenings.
- Pocket Friendly: Russet potatoes and pantry staples mean I can make a batch for under five dollars.
Step-by-Step Instructions for Potato Bhajia
Master the technique for achieving perfectly crispy fritters with a light, flavorful batter.
Step 1: Prepare the Potato Slices
Peel the 2 lb Russet Potatoes and slice them thinly, about ⅛-inch thick. I use a mandoline for consistent slices, but a sharp knife works too. The uniform thickness ensures even cooking and prevents some slices from burning while others remain undercooked.
Place the sliced potatoes in a bowl of cold water to prevent browning while you prepare the batter. This also helps remove excess starch, which can make the fritters gummy instead of crispy. Drain and pat them completely dry with a clean kitchen towel before frying.
Step 2: Create the Spiced Batter
In a large mixing bowl, combine the 1.5 cups Chickpea Flour, 0.5 cup Rice Flour, 1 tsp Ground Turmeric, 1 tsp Ground Cumin, 1 tsp Red Chili Powder, and 1 tsp Salt. Whisk until the dry ingredients are thoroughly blended and free of lumps.
Add the 0.25 cup Fresh Cilantro, minced 2 whole Green Chilies, and 1 tbsp Fresh Ginger to the dry mixture. Pour in the 1.25 cups Water and 1 tbsp Lemon Juice, then stir until smooth. Finally, add the 0.5 tsp Baking Soda and mix gently—this creates a light, airy batter that crisps beautifully when fried.
Step 3: Heat the Oil for Frying
Pour the 3 cups Vegetable Oil into a deep, heavy-bottomed pot or Dutch oven. Heat over medium-high heat until the oil reaches 350-375°F. To test the temperature without a thermometer, drop a small piece of potato into the oil—it should sizzle immediately and rise to the surface within seconds.
Maintain a consistent temperature throughout frying. If the oil is too cool, the bhajia will absorb excess oil and become greasy. If it’s too hot, the exterior will burn before the interior cooks. Adjust the heat as needed to keep the oil at the optimal frying temperature.
Step 4: Fry the Bhajia to Golden Perfection
Dip each potato slice into the batter, ensuring it’s fully coated on both sides. Let any excess batter drip off before carefully sliding it into the hot oil. Avoid overcrowding the pot—fry in batches to prevent the oil temperature from dropping too much.
Fry the slices for 3-4 minutes per side or until they turn a deep, golden brown and the edges look crispy. Use a slotted spoon to turn them occasionally for even cooking. Transfer the fried bhajia to a paper towel-lined plate to drain excess oil.
Step 5: Serve Immediately While Hot
These fritters are best enjoyed fresh and hot, straight from the fryer. The batter should be crisp and golden, with the potatoes tender inside. Serve them with your favorite chutney or a simple tamarind sauce for dipping.
If you need to keep them warm while frying subsequent batches, place them on a wire rack in a 200°F oven. This prevents steam from making the bhajia soggy. Avoid stacking them, as this can trap moisture and soften the crispy coating.
Pro Tips For Making Potato Bhajia Recipe Gujarati
- Fry in Hot Oil: Heat the oil to 350°F before adding the bhajia—any cooler and they’ll soak up oil like a sponge. I learned this the hard way after making greasy, sad bhajias more times than I’d like to admit.
- Slice Potatoes Thin: Cut the russets into ¼-inch slices for even cooking and a crispy texture. Thicker slices stay raw inside while the outside burns, and nobody wants that.
- Skip the Overmixing: Stir the chickpea and rice flour batter just until combined—overmixing makes the bhajia tough. It’ll look lumpy, but that’s exactly how it should be.
- Drain on a Rack: After frying, place the bhajia on a wire rack instead of paper towels to keep them crispy. Paper towels trap steam, and soggy bhajia are a tragedy no one should endure.
Make-Ahead Tips for This Dish
Prep Ahead Strategy
You can peel and slice the 2 lb Russet Potatoes up to 4 hours in advance. Store them in cold water in the fridge to prevent browning. This saves time on busy cooking days while keeping the texture perfect. 💡
Batter Preparation
The batter is best made fresh, but you can pre-measure all dry ingredients the night before. Store the 1.5 cups Chickpea Flour, 0.5 cup Rice Flour, and spices in an airtight container. Just add wet ingredients when ready to fry.
Frying Efficiency
Heat the 3 cups Vegetable Oil in advance, but don’t start frying until you’re ready to serve. The oil maintains temperature well, so you can keep it warm at 325°F between batches if needed.
Keeping Warm
Place finished bhajia on a wire rack in a 200°F oven while you fry the rest. This keeps them crispy for up to 30 minutes without getting soggy. Never cover them, as trapped steam ruins the texture.
Reheating Leftovers
If you must store leftovers, let them cool completely first. Reheat in a 350°F oven for 8-10 minutes on a wire rack to restore crispiness. The microwave will make them soft and chewy.
Chutney Pairings
Prepare your chutneys the day before—they taste even better after 24 hours as flavors meld. Mint and tamarind chutneys both keep well refrigerated for up to 5 days. 🌿
Nutrition Facts
Frequently Asked Questions
Can I use sweet potatoes instead of russets?
Yes, sweet potatoes work well and add a natural sweetness. Slice them slightly thicker (¼-inch) as they soften faster. The batter and frying process remain the same.
Why did my bhajia turn out soggy?
Sogginess usually means the oil wasn’t hot enough (350-375°F) or the potato slices weren’t dried well before frying. Always pat slices completely dry and test oil temperature first.
How can I make this gluten-free?
The recipe is naturally gluten-free! Both chickpea flour and rice flour are safe. Just ensure your spices are pure and not mixed with wheat-based anti-caking agents.
What chutneys pair best with these fritters?
Mint and tamarind chutneys are classic choices. For something different, try coriander or date chutney. Serve at room temperature for the best flavor contrast.

- Potato Patty Recipe No Egg: Crispy Edges Without the Binder - October 30, 2026
- Paula Deen’s Potato Chip Cookies Recipe: Salty-Sweet Crunch in Every Bite - October 30, 2026
- Potato Gnocchi Recipe Ideas: Pillowy Soft Dumplings With Rustic Charm - October 30, 2026