
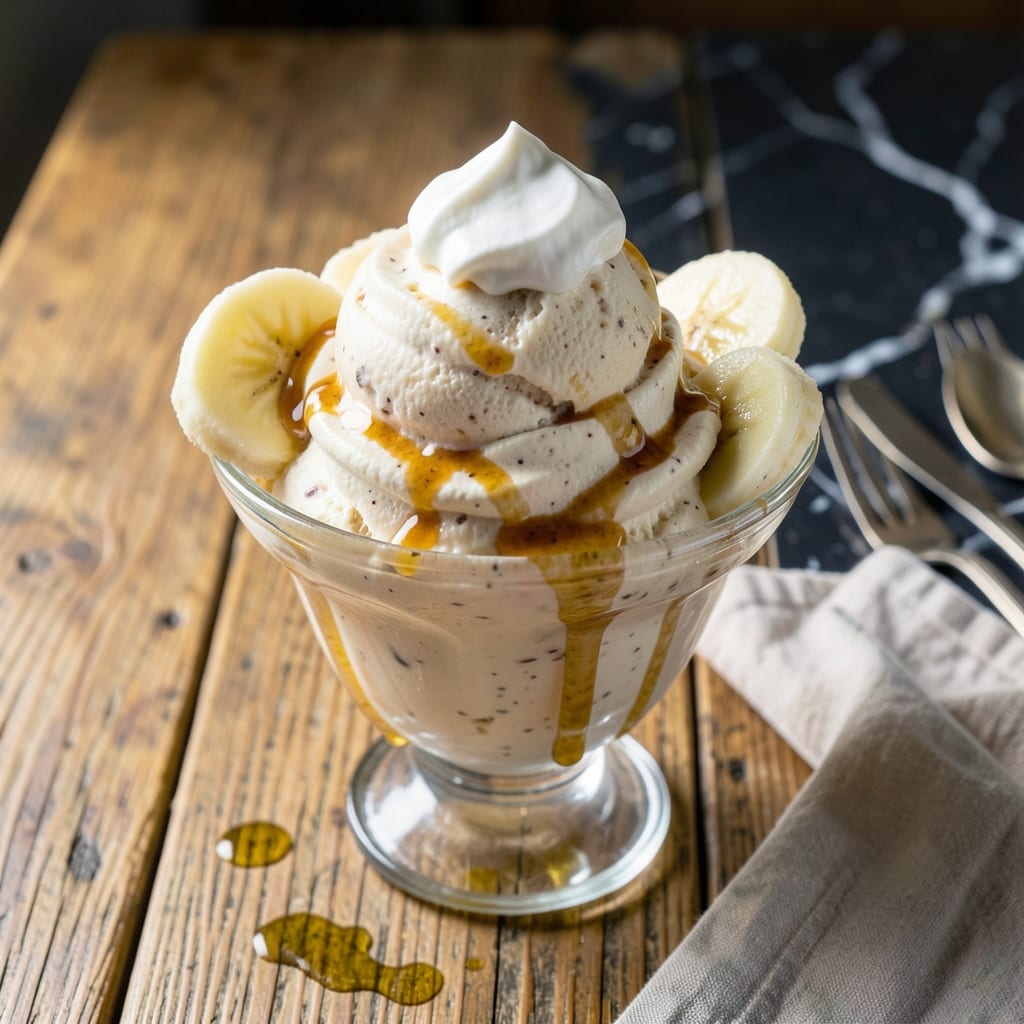
This blender protein ice cream delivers a creamy, high-protein treat without the guilt. I developed this method to satisfy sweet cravings while keeping macros in check.
The secret is frozen bananas as the base, which blend into a smooth, soft-serve texture. Protein powder and Greek yogurt boost the protein content while maintaining that classic ice cream consistency.
You’ll achieve a rich, velvety dessert that’s ready in under 5 minutes. The result is surprisingly indulgent, with no ice cream maker required.
Customize with your favorite mix-ins like nuts, chocolate chips, or fruit. This recipe proves healthy eating can still taste like a treat.
Ingredients for Protein Ice Cream Recipe Blender
Frozen bananas, protein powder, and Greek yogurt blend into a dreamy high-protein dessert.
| Ingredient | Amount | Notes |
|---|---|---|
| Frozen Bananas 🍌 | 2 whole | Peeled, sliced, frozen overnight |
| Vanilla Protein Powder 💪 | 1 cup | Whey or plant-based variety |
| Plain Greek Yogurt 🥛 | ½ cup | Full-fat for creaminess |
| Milk 🥛 | ¼ cup | Any variety, adjust for thickness |
| Vanilla Extract 🌿 | 1 tsp | Pure vanilla preferred |
| Honey 🍯 | 1 tbsp | Or maple syrup for vegan |
| Salt 🧂 | 0.125 tsp | Enhances sweetness balance |
| Chocolate Chips 🍫 | ¼ cup | Optional mix-in, dark or semi-sweet |
| Chopped Nuts 🌰 | 2 tbsp | Optional mix-in, almonds or walnuts |
| Peanut Butter 🥜 | 1 tbsp | Optional mix-in for richness |
The bananas are key—use overripe ones (the spottier, the sweeter) and freeze them solid. Costco’s Kirkland vanilla protein powder is great for this, but any brand works. For the Greek yogurt, Fage or Chobani full-fat gives that ultra-creamy texture. I grab mine at Whole Foods since they usually have the freshest stock. The milk is just for thinning, so whatever you drink daily is perfect.
No protein powder? Blended silken tofu at half the amount adds protein without changing the flavor much. Swap honey for maple syrup or agave if you’re avoiding bee products. For a nut-free version, sunflower seed butter works instead of peanut butter. The chocolate chips can be cacao nibs for a bittersweet crunch (and extra antioxidants).
This is best fresh—eat it right after blending for that perfect soft-serve. Leftovers freeze solid, so let them sit at room temp for 10-15 minutes before scooping. Keeps in the freezer for 1 month, but honestly, it never lasts that long.
Why You’ll Love This Recipe
- Blender Magic: I toss in frozen bananas, protein powder, and yogurt—blend, and it’s ready. No churning, no waiting.
- Creamy Dream: The Greek yogurt gives it that rich, velvety texture, and the vanilla extract ties it all together.
- Post-Workout Savior: Honestly, it’s my go-to after the gym—packed with protein and doubles as a sweet treat.
- Budget Friendly: Frozen bananas and basic pantry staples mean I’m not breaking the bank for a healthy dessert.
Step-by-Step Instructions for Protein Ice Cream
This method is quick, foolproof, and delivers creamy results every time.
Step 1: Blend the Frozen Bananas and Liquid Base
Add the 2 whole Frozen Bananas to your blender first—they should be pre-sliced and frozen solid overnight. Then pour in the 0.5 cup Plain Greek Yogurt and 0.25 cup Milk. The milk helps the blades catch the frozen fruit initially.
Blend on low speed, using a tamper if your blender has one, until the mixture starts to break down. You’ll hear the motor strain at first—that’s normal. Scrape down the sides as needed. The goal is a smooth, thick base before adding the remaining ingredients.
Step 2: Incorporate Protein Powder and Sweeteners
Add the 1 cup Vanilla Protein Powder, 1 tsp Vanilla Extract, 1 tbsp Honey, and 0.125 tsp Salt to the blender. The salt might seem small, but it enhances all the flavors beautifully.
Blend again, starting on low and gradually increasing to high. This prevents the protein powder from creating clouds of dust. Stop and scrape the sides at least once—the mixture will be very thick. You’re aiming for a soft-serve consistency that holds its shape when scooped.
Step 3: Add Mix-Ins and Finalize Texture
With the blender off, add the 0.25 cup Chocolate Chips, 2 tbsp Chopped Nuts, and 1 tbsp Peanut Butter. Pulse just 2-3 times to distribute these mix-ins evenly without over-blending. You want visible chunks for texture.
If the mixture seems too thick to blend, add an extra splash of milk—no more than 1-2 tablespoons. The blades should move freely but the ice cream should remain dense and creamy, not runny.
Step 4: Freeze to Desired Consistency
Transfer the mixture to a freezer-safe container with a lid. Smooth the top with a spatula for even freezing. Cover and freeze for at least 1 hour for a soft-serve texture or 2-3 hours for a firmer scoopable consistency.
Check after 1 hour—if it’s too soft, give it more time. The edges will firm up first. For best results, let it sit at room temperature for 5 minutes before serving to make scooping easier.
Pro Tips For Making Protein Ice Cream Recipe Blender
- Chill the Blender: Pop your blender jar in the freezer for 10 minutes before starting—I learned this the hard way after my first three batches turned into sad, melty soups.
- Slice the Bananas: Cut your bananas into 1-inch chunks before freezing, or they’ll jam the blades and leave you with lumpy, uneven texture.
- Add Milk Last: Start with the yogurt and protein powder, then drizzle in milk as needed—about 2-3 tablespoons usually does it. Too much upfront makes it runny fast.
- Use Ripe Bananas: Overripe, spotty bananas are the thing that matters most here. They’re sweeter and creamier, so your ice cream won’t taste like sad, starchy disappointment.
Pro Cooking Tips for This Dish
Blender Choice Matters
A high-powered blender is non-negotiable for smooth results. I swear by my Vitamix 5200—its tamper lets me push frozen bananas into the blades without stopping. Budget pick: Ninja BL610 handles this well for under $100. 💡
Layer Ingredients Strategically
Always add liquids first, then frozen bananas, then powders. This prevents your blender from seizing up. I place the 0.5 cup Greek yogurt and 0.25 cup milk at the bottom, then the 2 frozen bananas on top.
Pulse, Don’t Blend
For mix-ins like chocolate chips, use the pulse function instead of continuous blending. This keeps chunks intact. I pulse 2-3 times max—any longer turns your add-ins into powder.
Temperature Control
If your kitchen is warm, chill your blender jar for 10 minutes beforehand. This helps maintain a colder environment for the ice cream base. I keep mine in the freezer when not in use.
Thickness Adjustment
Too thick? Add milk in 1 tbsp increments. Too thin? Add 1-2 ice cubes and blend again. The perfect texture should hold a peak when scooped but still be easy to blend.
Serve Immediately
For the creamiest texture, eat right after blending. The warmth from the blades creates that perfect soft-serve consistency I love. If freezing, let it sit for 5 minutes before serving. 🔥
Nutrition Facts
Frequently Asked Questions
Can I use fresh bananas instead of frozen?
No, frozen bananas are essential for the creamy, thick texture. Fresh bananas will make your dessert too thin and watery. Freeze them overnight for best results.
How do I prevent a grainy texture?
Blend the bananas and liquids first until completely smooth. Then add protein powder slowly while blending on low. A high-speed blender works best for silky results.
What can I use instead of protein powder?
Try 1/2 cup silken tofu or extra Greek yogurt for protein. Note that the flavor and texture may vary slightly from the original recipe.
Why does my mixture get stuck in the blender?
Always add liquids first, then frozen ingredients. Use the tamper to push food into the blades. If needed, stop and scrape the sides with a spatula.

- Pudding Recipe With Egg Yolks: Silky Smooth Custard in Minutes - November 3, 2026
- Pudding Pops Recipe Cook and Serve: Silky Frozen Treats Without the Machine - November 3, 2026
- Protein Ice Cream Recipe Blender Xanthan Gum: Ultra Creamy Texture Without the Guilt - November 3, 2026