
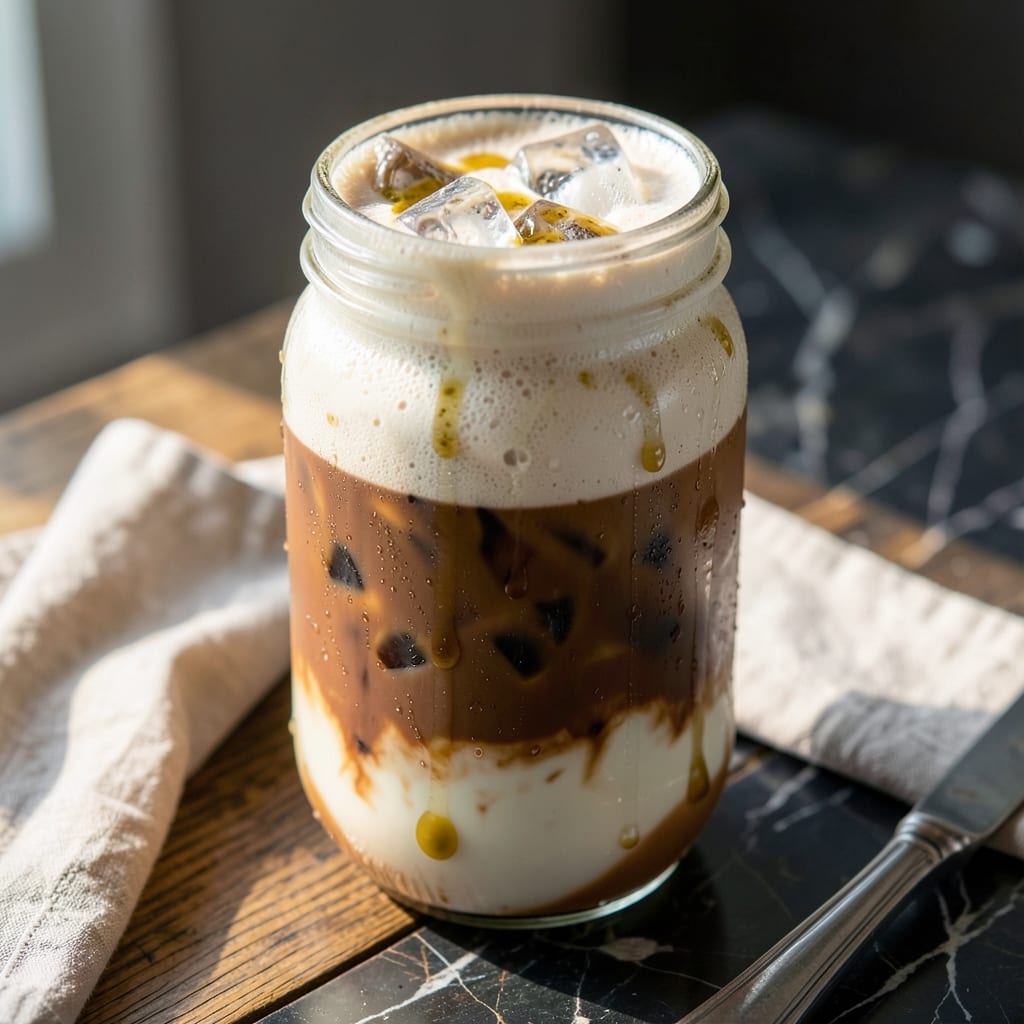
This barista-style iced coffee delivers the creamy satisfaction of a coffeehouse drink with added protein. I developed this recipe after years of testing coffee blends and protein powders to find the perfect balance.
The key is using cold brew concentrate for bold flavor without bitterness, combined with a smooth protein powder that dissolves completely. A splash of milk creates that signature creamy texture without overpowering the coffee.
What you get is a refreshing, energizing drink that keeps you full for hours. The coffee flavor remains robust while the protein integrates seamlessly, never leaving a chalky aftertaste.
Perfect for breakfast on the go or an afternoon pick-me-up. This version rivals any coffee shop creation.
Ingredients for Protein Iced Coffee Recipe Starbucks
Creamy, energizing, and packed with protein. Just nine ingredients to barista-level perfection at home.
| Ingredient | Amount | Notes |
|---|---|---|
| Cold Brew Coffee Concentrate ☕ | ½ cup | Chilled, bold roast preferred |
| Unsweetened Vanilla Protein Powder 💪 | 1 scoop | Whey or plant-based, smooth blending |
| Whole Milk 🥛 | ½ cup | Or preferred milk alternative |
| Vanilla Extract 🌿 | ½ tsp | Pure extract for best flavor |
| Ice Cubes ❄️ | 2 cups | Crushed or cubed, fresh |
| Water 💧 | ½ cup | Filtered for clean taste |
| Granulated Sugar 🍚 | 1 tbsp | Optional, adjust to taste |
| Cinnamon 🌿 | ¼ tsp | Ground, for garnish |
| Salt 🧂 | 0.125 tsp | Fine grain, enhances flavor |
The cold brew concentrate is non-negotiable here. Stumptown or Chameleon brands deliver that bold, smooth flavor without the bitterness. I grab mine from Whole Foods or Target—both stock it in the coffee aisle. If you’re grinding your own, use a coarse grind and steep for 18-24 hours. The protein powder needs to be super soluble—Orgain or Ghost dissolve like a dream (avoid chalky brands at all costs).
No protein powder? Greek yogurt blended in adds creaminess and a protein boost. Dairy-free? Oat milk or almond milk works great, though oat gives that extra creaminess. Short on time? Use pre-made cold brew instead of concentrate—just double the amount. The vanilla extract can be swapped for almond extract (use half the amount, it’s potent).
This tastes best fresh, but you can prep the concentrate mix ahead. Keeps in the fridge for 3-4 days before the flavors start to dull. Shake well before using if you’ve stored it—things settle. The ice will dilute it slightly, so go strong on the coffee if you like it robust.
Why You’ll Love This Recipe
- 5-Minute Fix: I just shake the cold brew concentrate, protein powder, and milk in a jar—no blender, no fuss.
- Creamy Vanilla Kick: The vanilla protein powder and whole milk make it taste like a dessert, but it’s packed with protein.
- Grab-and-Go Fuel: I prep a batch on Sunday and it’s my breakfast all week—just add ice and go.
- No Waste Win: Honestly, the concentrate lasts forever in the fridge, so I never throw out stale coffee again.
Step-by-Step Instructions for Protein Iced Coffee
Here’s the method I’ve perfected for that barista-style creamy texture at home.
Step 1: Blend the Coffee Base
In a blender, combine the 0.5 cup Cold Brew Coffee Concentrate, 0.5 cup Whole Milk, 0.5 cup Water, 0.5 tsp Vanilla Extract, 1 tbsp Granulated Sugar, and 0.125 tsp Salt. I always use chilled cold brew for the smoothest flavor profile.
The liquid should reach about halfway up the blender jar. This precise ratio ensures maximum creaminess without making the drink too thin. Pulse a few times to begin the blending process, then switch to high speed.
Step 2: Incorporate the Protein Powder
With the blender running on low, add the 1 scoop Unsweetened Vanilla Protein Powder through the feed tube. This prevents clumping and ensures even distribution throughout the liquid. I’ve found that adding the powder while blending eliminates those pesky protein powder chunks.
Increase the speed to high and blend for 20-30 seconds until completely smooth. Watch for the mixture to turn a uniform light brown color—this visual cue tells you the protein powder is fully incorporated. The texture should be silky with no graininess.
Step 3: Add Ice and Blend to Perfection
Now add the 2 cups Ice Cubes to the blender. I use full ice cubes for a thicker, milkshake-like consistency, but crushed ice works too for a lighter texture. Blend on high for 30-45 seconds until the ice is completely crushed and the mixture is smooth.
Stop the blender and check the consistency. You’re looking for a creamy, frothy texture that coats the back of a spoon. If it’s too thick, add a splash more water and blend briefly. If too thin, add a few more ice cubes and blend again.
Step 4: Finish with Cinnamon and Serve
Pour the protein iced coffee into two tall glasses. The drink should have a beautiful light brown color with a creamy froth on top—this is how you know you’ve achieved that signature barista-style texture.
Sprinkle 0.25 tsp Cinnamon evenly over the top of each serving. I like to add a little extra cinnamon on mine for both the flavor and the aromatic finish. Serve immediately with a straw for the full coffee shop experience.
Pro Tips For Making Protein Iced Coffee Recipe Starbucks
- Chill Your Milk: Use ice-cold whole milk straight from the fridge—warm milk makes the protein powder clump and ruins the smooth texture.
- Blend the Protein: I learned this the hard way—mix the protein powder with 2 oz of milk first into a paste before adding to the coffee, or you’ll get stubborn lumps no matter how hard you stir.
- Dilute the Concentrate: Cold brew concentrate is potent; use equal parts water to coffee (1:1 ratio) to balance the strength, otherwise it’ll overpower the vanilla and protein flavors.
- Use Crushed Ice: Sounds weird, but it works: pulse your ice cubes in the blender first for a slushier texture that blends better with the protein and stays colder longer.
Serving Suggestions for This protein iced coffee recipe starbucks
Glassware Matters
Serve this in a 16-ounce mason jar for that rustic coffee shop feel—I picked up a set of these at Central Market last summer. The wide mouth makes it easy to blend in extra ice or stir in toppings. Plus, the glass keeps your drink colder longer than plastic. 💛
Straw Selection
Use a wide reusable straw (I love the silicone ones from Klean Kanteen) to accommodate the creamy texture. Metal straws work too but can get too cold. Avoid skinny straws—they’ll clog with the protein thickness.
Temperature Control
Serve immediately after blending for the best texture. If you need to prep ahead, store the coffee base in the fridge without ice, then blend with fresh ice right before serving. This prevents dilution that makes the drink watery.
Garnish Elevations
Beyond cinnamon, try a dusting of cocoa powder or nutmeg for depth. David swears by a drizzle of sugar-free caramel syrup—it adds sweetness without extra calories. A few coffee beans on top make it look coffeehouse-fancy.
Pairing Suggestions
This works beautifully with my almond flour banana muffins for breakfast. For an afternoon treat, pair with dark chocolate—the bitterness complements the sweetness perfectly. I pack this with a muffin when heading to Emma’s soccer games. ✨
On-the-Go Tips
For travel, use an insulated tumbler like Yeti or RTIC to keep it cold. Prep the night before by mixing everything except ice, then blend with ice in the morning. Shake well before drinking if it’s been sitting.
Nutrition Facts
Frequently Asked Questions
Can I use hot coffee instead of cold brew?
Yes, but cool it completely first to prevent melting the ice too quickly. Cold brew works best because its smooth, low-acid profile blends perfectly with protein powder without bitterness.
Why does my protein powder clump in the coffee?
This happens when protein powder isn’t added slowly. Always blend the liquid ingredients first, then sprinkle in the powder while blending on low. Using a high-quality, finely milled powder helps too.
How can I make this dairy-free?
Simply swap the milk for oat milk or almond milk. Oat milk gives the creamiest texture, while almond milk offers a lighter option. Both work beautifully in this recipe.

- White Jello Shot Recipe: Creamy Vodka Magic in 30 Seconds - November 5, 2026
- Mary Berry’s Boiled Fruit Cake Recipe: Moist Center and Spiced Crust Magic - November 5, 2026
- Atlantic Salmon Recipe: Honey-Dill Pan-Seared With Crispy Skin - November 5, 2026