
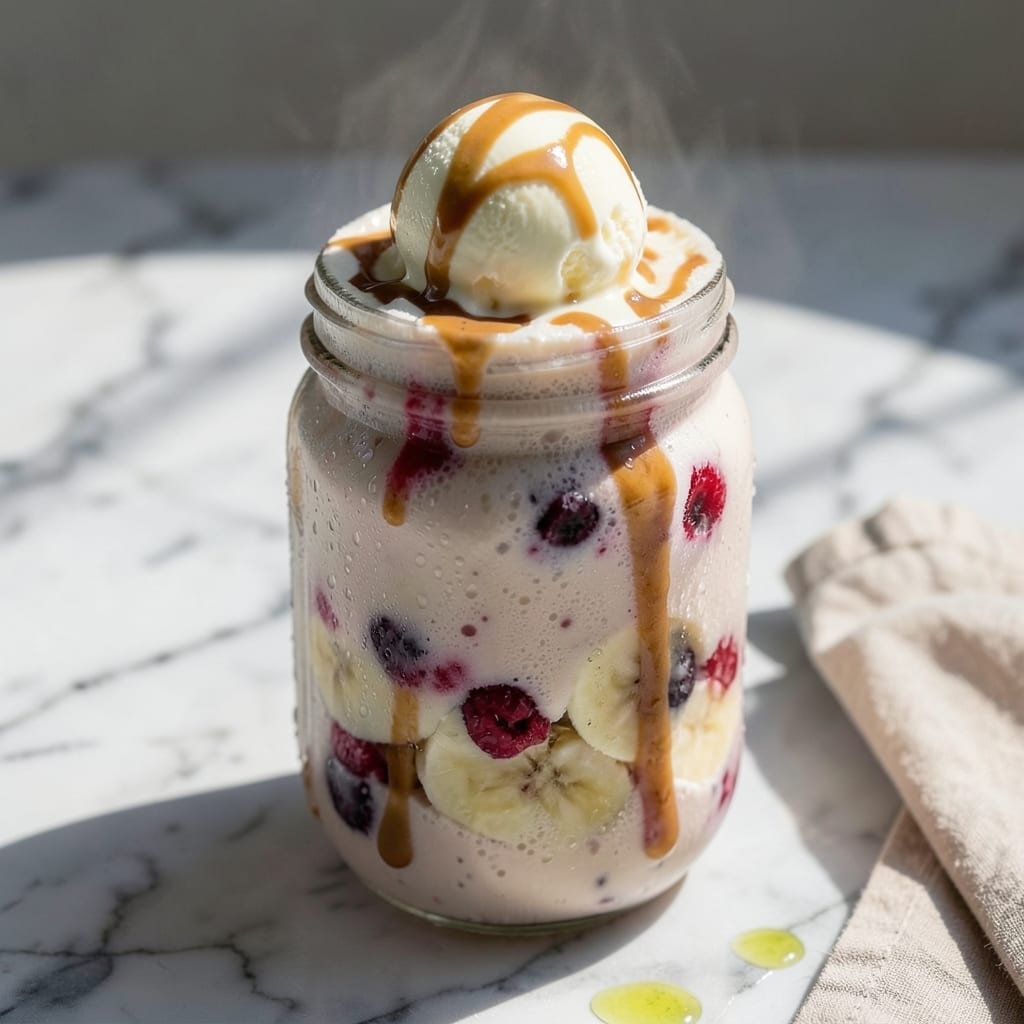
This protein milkshake delivers a perfectly creamy texture that tastes like a dessert but fuels like a meal. I developed this recipe to satisfy post-workout cravings without sacrificing nutrition.
The secret is blending frozen fruit with ice cream for thickness, while protein powder adds muscle-building benefits. It takes just 5 minutes to make, with no cooking required.
What you get is a rich, velvety shake that’s packed with protein and tastes indulgent. The ice cream creates that classic milkshake consistency while keeping it nutritious.
Perfect for breakfast, post-gym, or when you need a satisfying snack. Here’s how to make it right.
Ingredients for Protein Milkshake Recipe with Ice Cream
Thick, creamy, and packed with protein. Just ten ingredients to fuel your day.
| Ingredient | Amount | Notes |
|---|---|---|
| Vanilla Ice Cream 🍦 | 2 cups | Full-fat for creaminess |
| Frozen Banana 🍌 | 1 whole | Peeled and sliced |
| Vanilla Protein Powder 💪 | 2 scoops | Whey or plant-based |
| Milk 🥛 | 1 cup | Any variety or dairy-free |
| Frozen Mixed Berries 🍓 | 1 cup | Strawberries, blueberries, raspberries |
| Peanut Butter 🥜 | 2 tbsp | Creamy or crunchy |
| Greek Yogurt 🥣 | ½ cup | Plain or vanilla flavor |
| Honey 🍯 | 1 tbsp | Or maple syrup for vegan |
| Vanilla Extract 🌿 | 1 tsp | Pure extract preferred |
| Ice Cubes ❄️ | 1 cup | For thicker consistency |
The ice cream is non-negotiable for that classic milkshake texture. Full-fat vanilla gives the richest result—Häagen-Dazs or Ben & Jerry’s are my go-tos. Protein powder quality matters too: Optimum Nutrition Gold Standard blends smoothly without that chalky aftertaste. For the frozen fruit, Costco’s organic mixed berries are a great deal (and already prepped). Always use ripe bananas—green ones taste starchy.
No protein powder? Greek yogurt at double the amount adds protein but changes the texture slightly. Swap peanut butter for almond or cashew butter if that’s what you have. Dairy-free? Oat or almond milk works fine, and coconut milk ice cream keeps it creamy. The honey can be omitted entirely if you prefer less sweetness (the fruit adds plenty).
Blends best fresh, but leftovers keep 24 hours in the fridge—stir well before drinking. Freeze extras in popsicle molds for a protein-packed frozen treat. Always add the ice last for the thickest shake.
Why You’ll Love This Recipe
- Blender Magic: I dump everything in and hit pulse—no measuring spoons, no fancy steps, just creamy vanilla ice cream and frozen banana doing the work.
- Sweet Tooth Fix: The berries add that tart pop against the smooth protein powder sweetness, like dessert and a workout shake had a baby.
- Post-Gym Savior: I keep the ingredients stocked so I can blend one up the second I walk in from the gym, still in my sweaty clothes.
- Budget Boost: Honestly, it’s cheaper than my old habit of buying pre-made shakes, and I control exactly what goes in.
Step-by-Step Instructions for a Protein Milkshake with Ice Cream
This method delivers maximum creaminess with every sip—thick, rich, and packed with protein.
Step 1: Prep the Frozen Ingredients
Peel and slice the frozen banana into thick coins. This makes it easier for your blender to process evenly. Measure out the frozen mixed berries and 1 cup Ice Cubes—these are your thickness builders.
I always add frozen ingredients first when blending. They sit at the bottom near the blades, ensuring they get pulverized completely rather than bouncing around. This creates that ultra-smooth texture we’re after.
Step 2: Layer Liquid and Powdered Ingredients
Pour in the 1 cup Milk followed by the 0.5 cup Greek Yogurt. The liquid creates the base for blending, while the yogurt adds extra creaminess and a protein boost. Next, add the 2 scoops Vanilla Protein Powder and 2 tbsp Peanut Butter.
Here’s the thing—I place the protein powder on top of the liquids rather than at the bottom. This prevents it from clumping together before the blender can incorporate it. The peanut butter will soften slightly from the milk, making it easier to blend.
Step 3: Add Sweetness and Flavor Enhancers
Drizzle in the 1 tbsp Honey and 1 tsp Vanilla Extract. Then add the star ingredient—2 cups Vanilla Ice Cream. I use full-fat for that luxurious texture, but any variety works if that’s your preference.
At this stage, your blender should be about three-quarters full. The order matters: liquids at the bottom, powders in the middle, and frozen ingredients at the top. This layering ensures everything blends smoothly without straining your machine.
Step 4: Blend to Creamy Perfection
Start blending on low speed, then gradually increase to high. Use a tamper if your blender has one to push ingredients toward the blades. Blend for 45-60 seconds until completely smooth and creamy.
Stop and scrape down the sides if needed, then blend for another 15-20 seconds. You’ll know it’s ready when the mixture is thick with no ice chunks remaining, and it flows like soft-serve ice cream. If it’s too thick, add a splash of milk and blend again.
Step 5: Serve Immediately for Best Texture
Pour into chilled glasses and serve right away. The shake will be at its thickest and creamiest immediately after blending. If you need to store it, transfer to an airtight container and refrigerate for up to 2 hours.
Before serving, give it a quick stir—some separation is natural. For an extra touch, top with a few extra berries or a drizzle of peanut butter. This delivers on the creamy promise with every rich, satisfying sip.
Pro Tips For Making Protein Milkshake Recipe With Ice Cream
- Pre-soften the ice cream: Let the vanilla ice cream sit out for 5-7 minutes before blending—I learned this the hard way after burning out two blenders on rock-solid scoops.
- Use cold milk: Pour in milk straight from the fridge to keep the shake thick and creamy; warm milk turns it into a sad, watery mess.
- Add protein powder last: Blend the ice cream, banana, and berries first, then add the protein powder to avoid clumps that stick to the bottom like cement.
- Freeze your banana sliced: Cut the banana into coins before freezing so it blends smoothly instead of leaving chunky bits that ruin the texture.
Perfect Pairings for This protein milkshake recipe with ice cream
Breakfast Pairings
This shake pairs perfectly with oatmeal topped with sliced banana and a drizzle of peanut butter. The combination gives you slow-release carbs plus extra protein to start your day strong. 💪
Post-Workout Boosters
Add a side of hard-boiled eggs or a handful of almonds for healthy fats that complement the protein. I often grab a handful of mixed nuts for an easy, no-prep energy boost.
Dessert Complements
Serve with a small square of dark chocolate (70% cocoa or higher) to satisfy sweet cravings without overdoing sugar. The richness of the chocolate enhances the creamy texture of the shake.
Healthy Sides
Balance the indulgence with fresh mixed berries or apple slices. The tartness of the fruit cuts through the richness, making each sip feel lighter and more refreshing. 🍓
Protein-Packed Snacks
Pair with Greek yogurt and granola for a protein double-whammy. I like adding a sprinkle of chia seeds for extra fiber and omega-3s to keep me full for hours.
Caffeine Kick
Enjoy alongside a cup of cold brew coffee for a morning or afternoon pick-me-up. The bitterness of the coffee contrasts beautifully with the sweetness of the shake.
Nutrition Facts
Frequently Asked Questions
Can I use frozen yogurt instead of ice cream?
Yes, but the texture will be slightly lighter. Frozen yogurt works well if you want fewer calories, though it may not be as rich. Add an extra 1/2 banana for thickness.
How can I make it thicker without ice?
Use more frozen fruit or add 1/4 cup oats before blending. Chilling your glass beforehand also helps maintain that perfect consistency.
Will it taste chalky if I use too much protein powder?
Stick to 2 scoops max per serving. For smoother results, blend the powder with milk first, then add other ingredients.
Can I prepare this the night before?
It’s best fresh, but you can store it in the fridge for up to 2 hours. Stir well before drinking as separation is natural.

- White Jello Shot Recipe: Creamy Vodka Magic in 30 Seconds - November 5, 2026
- Mary Berry’s Boiled Fruit Cake Recipe: Moist Center and Spiced Crust Magic - November 5, 2026
- Atlantic Salmon Recipe: Honey-Dill Pan-Seared With Crispy Skin - November 5, 2026