
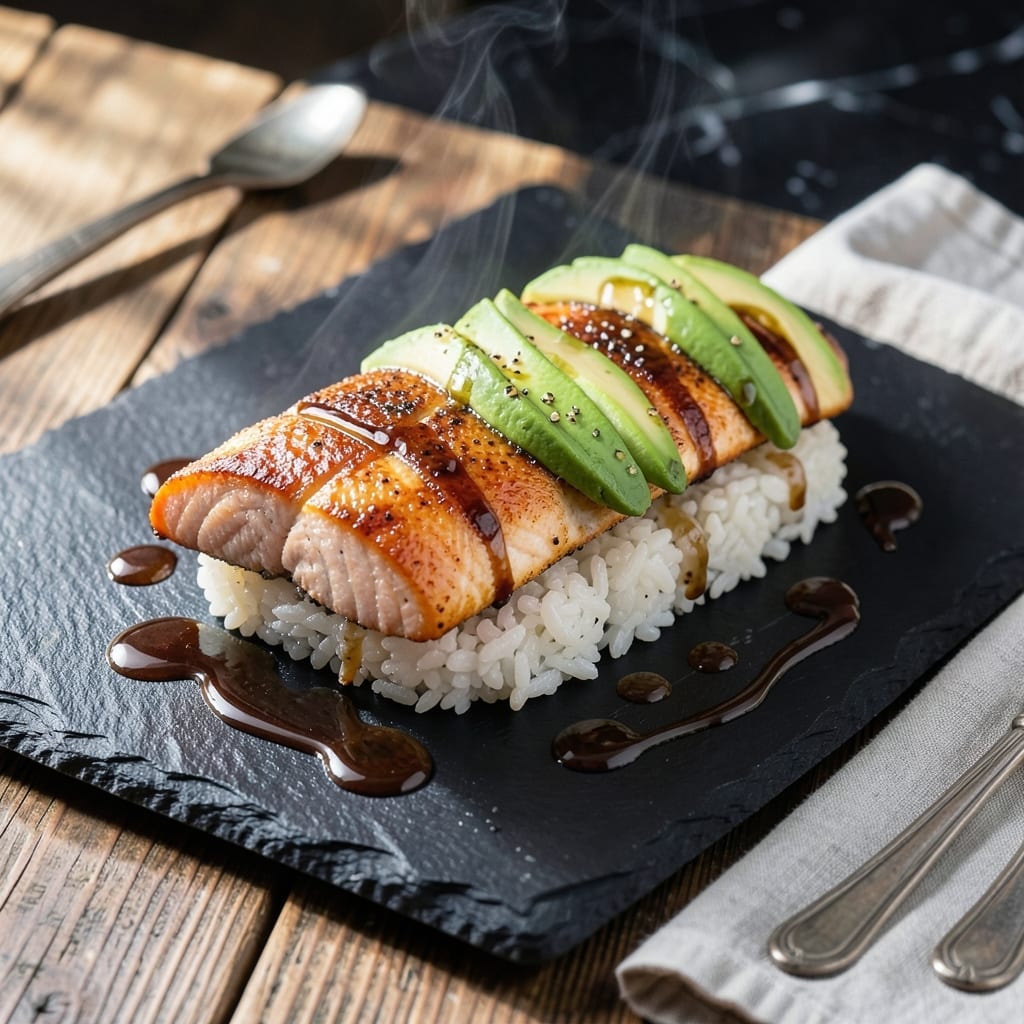
Japanese flavors meet oven convenience in this inspired take on sushi-style salmon. I developed this method after countless attempts to recreate restaurant-quality results at home.
The secret lies in baking the salmon at 400°F until just opaque, then pairing it with sushi rice seasoned with rice vinegar, sugar, and salt. This creates the perfect balance of textures and flavors.
What emerges is tender, flaky salmon with a slightly crisp exterior, served atop vinegared rice with traditional accompaniments. The result is a dish that captures the essence of sushi without the raw fish.
This approach makes sushi accessible to home cooks while maintaining authentic taste and presentation. The oven method ensures consistent, professional results every time.
Ingredients for Salmon Baked Recipe Sushi
Fresh salmon and sushi rice come together for restaurant-quality results at home.
| Ingredient | Amount | Notes |
|---|---|---|
| Salmon Fillets 🐟 | 1 ½ lb | Skin-on, center-cut preferred |
| Sushi Rice 🍚 | 2 cups | Rinsed until water runs clear |
| Rice Vinegar 💧 | ¼ cup | Seasoned or unseasoned works |
| Granulated Sugar 🍚 | 1 tbsp | Dissolved into vinegar mixture |
| Kosher Salt 🧂 | 1 tsp | Diamond Crystal preferred |
| Soy Sauce 🫒 | 2 tbsp | Low-sodium if desired |
| Pickled Ginger 🌿 | ½ cup | Sliced thinly, for serving |
| Nori Sheets 🍱 | 2 sheets | Cut into strips for garnish |
| Sesame Seeds 🌾 | 1 tbsp | Toasted for garnish |
| Wasabi Paste 🟢 | 1 tbsp | Optional, for serving |
| Scallions 🧅 | 3 whole | Thinly sliced, green parts only |
| Neutral Oil 🫒 | 1 tbsp | Avocado or grapeseed recommended |
The salmon quality is non-negotiable here. Wild-caught sockeye or king salmon from Whole Foods or a trusted seafood counter gives the best texture and flavor. Look for fillets with vibrant color and no fishy odor. Skin-on helps keep the fish moist during baking, and center-cut pieces ensure even cooking. Sushi rice brands like Nishiki or Koshihikari are readily available at Asian markets or well-stocked supermarkets.
No sushi rice? Short-grain white rice works in a pinch, though the texture won’t be quite as sticky. Skip the wasabi if it’s not your thing—sriracha or chili garlic sauce adds a nice kick. The rice vinegar can be swapped for apple cider vinegar at a 1:1 ratio, but the flavor profile will shift slightly. For a gluten-free version, use tamari instead of soy sauce.
Cooked salmon keeps in the fridge for 2-3 days—store it separate from the rice to maintain texture. The rice is best served immediately but can be reheated gently with a splash of water. Both components freeze well for up to 1 month if tightly wrapped.
Why You’ll Love This Recipe
- One Pan Magic: I toss the salmon and rice in one dish, pop it in the oven, and that’s it—no rolling or fussing with nori.
- Sweet-Savory Balance: The rice vinegar and sugar give the rice that classic sushi taste, while the salmon’s richness ties it all together.
- Weeknight Lifesaver: Honestly, I make this for quick dinners, picnics, or even when I’m craving takeout but want to save money.
- Leftovers? Yes Please: The flavors deepen overnight, so I pack it for lunch the next day—still ridicuously good cold.
Step-by-Step Instructions for Salmon Baked Recipe Sushi
This Japanese-inspired method delivers perfectly cooked salmon with authentic sushi accompaniments.
Step 1: Prepare the Sushi Rice Base
Rinse the 2 cups Sushi Rice under cold water until the liquid runs completely clear. This removes excess starch and ensures fluffy, separate grains. Drain thoroughly in a fine-mesh sieve for 10 minutes.
Combine the 0.25 cup Rice Vinegar, 1 tbsp Granulated Sugar, and 1 tsp Kosher Salt in a small bowl, stirring until dissolved. Cook the rice using your preferred method, then gently fold in the vinegar mixture while the rice is still warm. Cover and let it sit at room temperature.
Step 2: Bake the Salmon Fillets
Preheat your oven to 400°F. Pat the 1.5 lb Salmon Fillets completely dry with paper towels—this is crucial for achieving a good sear. Brush the skin side lightly with 1 tbsp Neutral Oil and place skin-side down on a parchment-lined baking sheet.
Bake for 12-15 minutes until the salmon reaches an internal temperature of 145°F and the flesh flakes easily with a fork. The skin should be crisp and the top just beginning to turn opaque. Avoid overcooking, as the salmon will continue to set as it rests.
Step 3: Prepare the Garnishes
While the salmon bakes, thinly slice the 3 whole Scallions (green parts only) and cut the 2 sheets Nori Sheets into thin strips. Toast the 1 tbsp Sesame Seeds in a dry skillet over medium heat for 1-2 minutes until golden brown and fragrant, stirring constantly to prevent burning.
Drain and slice the 0.5 cup Pickled Ginger into thin pieces. Arrange all garnishes on a serving platter, keeping the 1 tbsp Wasabi Paste and 2 tbsp Soy Sauce in small bowls for dipping.
Step 4: Assemble and Serve
Divide the seasoned sushi rice among four serving bowls. Place a portion of the baked salmon on top of each, skin-side up to showcase the crisp texture. Drizzle any accumulated juices from the baking sheet over the fish for added flavor.
Arrange the nori strips, scallions, and toasted sesame seeds around the salmon. Serve immediately with pickled ginger, wasabi paste, and soy sauce on the side. The contrast of warm salmon with cool rice and tangy accompaniments creates an authentic sushi-inspired experience.
Pro Tips For Making Salmon Baked Recipe Sushi
- Preheat the Salmon: Pull the salmon out 10-15 minutes before baking—cold fish straight from the fridge cooks unevenly, and I learned this the hard way with dry edges and a raw center.
- Rinse the Rice: Wash the sushi rice until the water runs clear, or your rice will turn out gummy instead of sticky and fluffy. Sounds tedious, but it’s the non-negotiable step.
- Don’t Overbake: Salmon’s done at 125°F—yank it out then and let it rest 5 minutes. After burning three fillets, I finally figured out that internal temp beats guesswork every time.
- Season the Rice Warm: Mix the rice vinegar, sugar, and salt into the rice while it’s still hot so it absorbs the flavor. I was skeptical until I tried it, and now my sushi rice tastes like it’s from a restaurant.
Essential Equipment for salmon baked recipe sushi
Baking Sheet Essentials
A half-sheet pan (13×18 inches) is my go-to for even heat distribution. I line mine with parchment paper to prevent sticking. Look for heavy-duty aluminum pans like Nordic Ware for durability. The dark color helps achieve that perfect crisp on the salmon skin. 💡
Rice Cooker Investment
For foolproof sushi rice, a rice cooker is worth every penny. I use a Zojirushi 3-cup model that consistently delivers perfect texture. The automatic keep-warm function is perfect for timing with your salmon bake. Even budget models from Black+Decker work well for beginners.
Digital Thermometer Precision
An instant-read thermometer ensures your salmon hits exactly 145°F internal temperature. I swear by my ThermoWorks ThermoPop for its speed and accuracy. The thin probe is perfect for fish, giving readings in just 3-4 seconds. Never guess doneness again.
Fine-Mesh Sieve
Rinsing sushi rice properly requires a fine-mesh sieve. The OXO Good Grips version fits perfectly over my sink. This step removes excess starch, which is crucial for achieving the right sticky texture. I rinses mine 4-5 times until the water runs completely clear.
Sharp Chef’s Knife
A razor-sharp 8-inch chef’s knife makes portioning salmon and slicing garnishes effortless. I use a Victorinox Fibrox that’s both affordable and professional-grade. Keep it honed with a ceramic sharpening rod for precision cuts every time.
Small Mixing Bowls
For the rice vinegar mixture, I prefer 1-quart stainless steel bowls from Winco. They’re lightweight, nest for storage, and won’t absorb odors. The perfect size for whisking the rice vinegar, sugar, and salt together before folding into warm rice. 🌟
Nutrition Facts
Frequently Asked Questions
Can I use pre-cooked rice for this?
Freshly cooked rice works best for texture and flavor. Pre-cooked rice tends to dry out and won’t absorb the vinegar mixture as well. If using leftovers, warm and moisten with a splash of water first.
What if my salmon skin doesn’t crisp?
Pat the skin extra dry before baking and ensure your oven is fully preheated to 400°F. Place the fillets directly on parchment paper without crowding for best crispiness.
Can I make this gluten-free?
Use tamari instead of soy sauce and verify your rice vinegar is gluten-free. All other ingredients are naturally gluten-free, making this an easy adaptation.

- Bread Recipe KitchenAid Mixer: Foolproof Loaf With Perfect Rise - September 28, 2026
- BBQ Oysters Recipe Grill: Smoky Garlic Butter Bliss - September 28, 2026
- Crock Pot Mac and Cheese Recipe Paula Deen: Ultra Creamy Southern-Style Comfort - September 28, 2026