
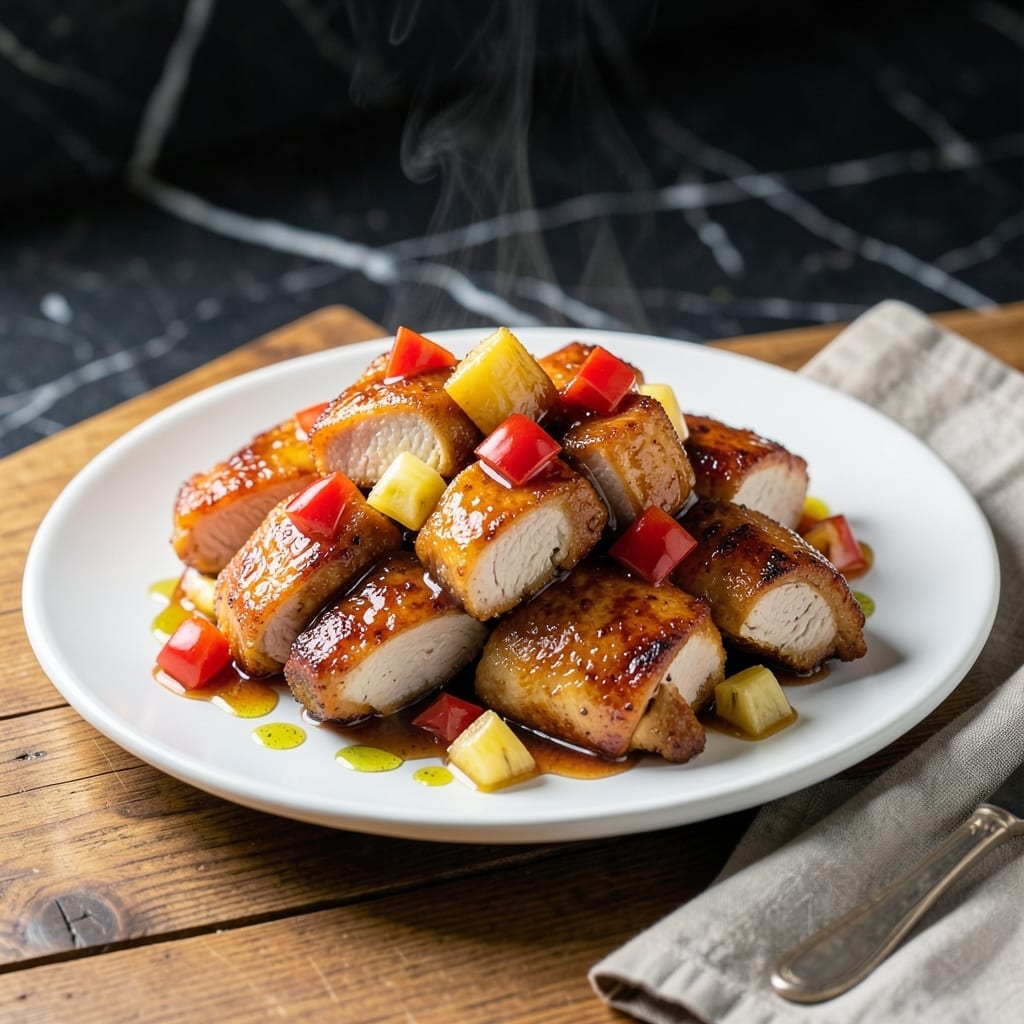
This recipe delivers crispy chicken in a tangy sauce with minimal effort. After years of testing, I’ve perfected a method that guarantees that perfect crunch every time.
The key is a simple two-step frying process followed by tossing in a balanced sweet and sour sauce. No complicated techniques—just straightforward steps that home cooks can master in their own kitchens.
You’ll achieve golden, crispy pieces coated in a glossy sauce that’s neither too sweet nor too sour. The texture contrast between the crunchy exterior and tender chicken makes this dish irresistible.
Serve with steamed rice for a complete meal. This approach ensures consistent results without the hassle.
Ingredients for Sweet and Sour Chicken Recipe Easy
Golden, crispy chicken meets tangy sauce with pantry staples you likely have already.
| Ingredient | Amount | Notes |
|---|---|---|
| Boneless Chicken Breast 🍗 | 1 ½ lb | Cut into 1-inch pieces |
| All-Purpose Flour 🌾 | ¾ cup | For dredging chicken |
| Cornstarch 🌾 | ¼ cup | For extra crispiness |
| Large Eggs 🥚 | 2 whole | Beaten for coating |
| Granulated Sugar 🧂 | ½ cup | For sweetness in sauce |
| White Vinegar 💧 | ⅓ cup | For tangy flavor |
| Ketchup 🍅 | ½ cup | Base for sauce |
| Soy Sauce 🫒 | 2 tbsp | For umami depth |
| Garlic Cloves 🧄 | 3 cloves | Minced for sauce |
| Vegetable Oil 🫒 | 2 cups | For frying chicken |
| Green Bell Pepper 🌶️ | 1 whole | Diced for texture |
| Pineapple Chunks 🍍 | 1 cup | Fresh or canned, drained |
| Salt 🧂 | 1 tsp | Kosher or sea salt |
| Ground Black Pepper 🌶️ | ½ tsp | Freshly ground preferred |
The chicken is the star here. Boneless, skinless breasts give you the best texture—avoid pre-cut tenders as they dry out. Costco or Sam’s Club are great for bulk purchases if you’re making this often. For the coating, cornstarch is non-negotiable—it delivers that signature crunch. Use a neutral oil with a high smoke point like vegetable or canola for frying.
Need to swap something? Chicken thighs work too but have a slightly different texture. No pineapple? Mandarin oranges or peaches add a similar sweetness. Out of white vinegar? Apple cider vinegar at the same ratio gets you close. For a gluten-free version, swap the soy sauce for tamari and use a gluten-free flour blend for dredging.
Leftovers keep in the fridge for 3-4 days but the chicken loses crispiness. Reheat in a dry skillet to revive the texture. The sauce can be made ahead and stored for 1 week in the fridge. Freezing isn’t recommended—it softens the chicken too much.
Why You’ll Love This Recipe
- One Bowl Wonder: I toss the chicken in flour, cornstarch, and egg all in the same bowl—no extra dishes to wash.
- Crave-Worthy Contrast: That crispy coating with the tangy-sweet glaze? I’ll admit I sneak bites straight from the pan.
- Feeds the Picky: Honestly, it’s the only dish my nephew and my foodie friend both request for dinner.
- Stretches Farther: Leftovers taste even better the next day, and the ingredients are all pantry staples I already have.
Step-by-Step Instructions for Sweet and Sour Chicken
This straightforward method guarantees crispy chicken with a perfectly balanced tangy-sweet sauce every time.
Step 1: Coat and Season the Chicken
Cut the 1.5 lb Boneless Chicken Breast into 1-inch pieces and pat dry with paper towels. Season with 1 tsp Salt and 0.5 tsp Ground Black Pepper—this ensures every bite is flavorful. The drier the chicken, the crispier the coating will be.
In a shallow bowl, whisk together the 0.75 cup All-Purpose Flour and 0.25 cup Cornstarch. In another bowl, beat the 2 whole Large Eggs until frothy. Dip each chicken piece into the egg, letting excess drip off, then roll in the flour mixture until fully coated.
Step 2: Fry the Chicken to Golden Perfection
Heat the 2 cups Vegetable Oil in a deep skillet over medium-high heat until it reaches 350°F. To test, drop in a pinch of flour—if it sizzles immediately, the oil is ready. Fry the chicken in batches to avoid overcrowding, which lowers the oil temperature and results in soggy coating.
Cook for 4-5 minutes per side until the chicken is golden brown and the internal temperature reaches 165°F. Use a slotted spoon to transfer the chicken to a wire rack set over a paper towel-lined plate. This keeps the coating crisp while you finish the batch.
Step 3: Sauté the Vegetables and Aromatics
Drain all but 2 tablespoons of oil from the skillet. Add the diced 1 whole Green Bell Pepper and cook over medium heat for 3-4 minutes until it begins to soften. Stir in the minced 3 cloves Garlic Cloves and cook for 30 seconds until fragrant.
The green bell pepper adds texture and color, while the garlic builds the sauce’s aromatic base. Be careful not to burn the garlic—it turns bitter quickly.
Step 4: Create the Tangy-Sweet Sauce
In a small bowl, whisk together the 0.5 cup Ketchup, 0.5 cup Granulated Sugar, 0.33 cup White Vinegar, and 2 tbsp Soy Sauce until the sugar dissolves. Pour this mixture into the skillet with the vegetables and stir to combine.
Simmer over medium heat for 3-4 minutes until the sauce thickens slightly and becomes glossy. The ketchup provides the base, while the vinegar adds the tangy kick that balances the sugar’s sweetness.
Step 5: Combine and Serve Immediately
Return all the fried chicken to the skillet and gently toss to coat in the sauce. Add the 1 cup Pineapple Chunks and stir just until heated through, about 1-2 minutes. The pineapple chunks should remain distinct but warm, adding a juicy contrast to the crispy chicken.
Serve immediately while the chicken is still crispy. The sauce should cling lightly to each piece, with vibrant green bell pepper and golden pineapple chunks visible throughout.
Pro Tips For Making Sweet And Sour Chicken Recipe Easy
- Cut Chicken Small: Dice the boneless chicken breast into 1-inch pieces—any larger and they won’t cook through before the coating burns.
- Dry the Chicken: Pat the chicken pieces completely dry with paper towels before dredging. I learned this the hard way—wet chicken makes the coating slide right off.
- Double Coat for Crisp: After the first flour dip, repeat the egg wash and cornstarch coating. It adds 2 minutes but gives that extra crunch that makes the dish.
- Fry in Batches: Crowding the pan drops the oil temp and turns your chicken soggy. Cook in single-layer batches—yes, even if you’re hungry.
Health Benefits of This sweet and sour chicken recipe easy
Lean Protein Source
This dish delivers 1.5 lb of boneless chicken breast, providing about 35g of protein per serving. Protein is essential for muscle repair and growth, keeping you full and energized throughout the day. 💪
Vitamin C Boost
The green bell pepper adds a significant dose of vitamin C, with one pepper offering about 150% of your daily needs. This antioxidant supports immune function and skin health.
Pineapple Enzymes
The 1 cup of pineapple chunks contains bromelain, an enzyme that aids digestion and reduces inflammation. It’s a natural way to support gut health while enjoying a sweet treat.
Balanced Energy
The combination of protein from chicken, natural sugars from pineapple, and carbs from the coating provides sustained energy. This balance helps avoid blood sugar spikes.
Low-Calorie Option
By baking instead of deep-frying, you can reduce the calorie count significantly. Even with frying, portion control keeps this dish reasonable at about 400 calories per serving with rice. 💛
Essential Minerals
Chicken breast is rich in selenium and phosphorus, which support thyroid function and bone health. The soy sauce adds a small but meaningful amount of iron.
Nutrition Facts
Frequently Asked Questions
Can I use chicken thighs instead of breasts?
Yes, boneless thighs work well and stay juicier. They may need 1-2 minutes extra frying time. The flavor is richer, but the texture will be slightly different.
How do I keep the coating crispy?
Fry in batches to avoid overcrowding. Use a wire rack to drain, not paper towels, so steam doesn’t soften the crust. Serve immediately for best texture.
Can I make this without deep frying?
For a lighter version, bake at 400°F for 20-25 minutes, flipping halfway. The coating won’t be as crispy but still delicious.
What if my sauce is too thin?
Simmer it longer to thicken. For a quick fix, mix 1 tbsp Cornstarch with 1 tbsp water and stir into the sauce. It’ll thicken in under a minute.

- BBQ Sausage Recipe Oven: Smoky Depth Without the Grill - September 28, 2026
- BBQ Chicken Bowl Recipe Rice: Smoky Sweetness Over Fluffy Grains - September 28, 2026
- Beef Cutlet Recipe Ideas: Crispy Breaded Patties With Bold Seasonings - September 28, 2026