
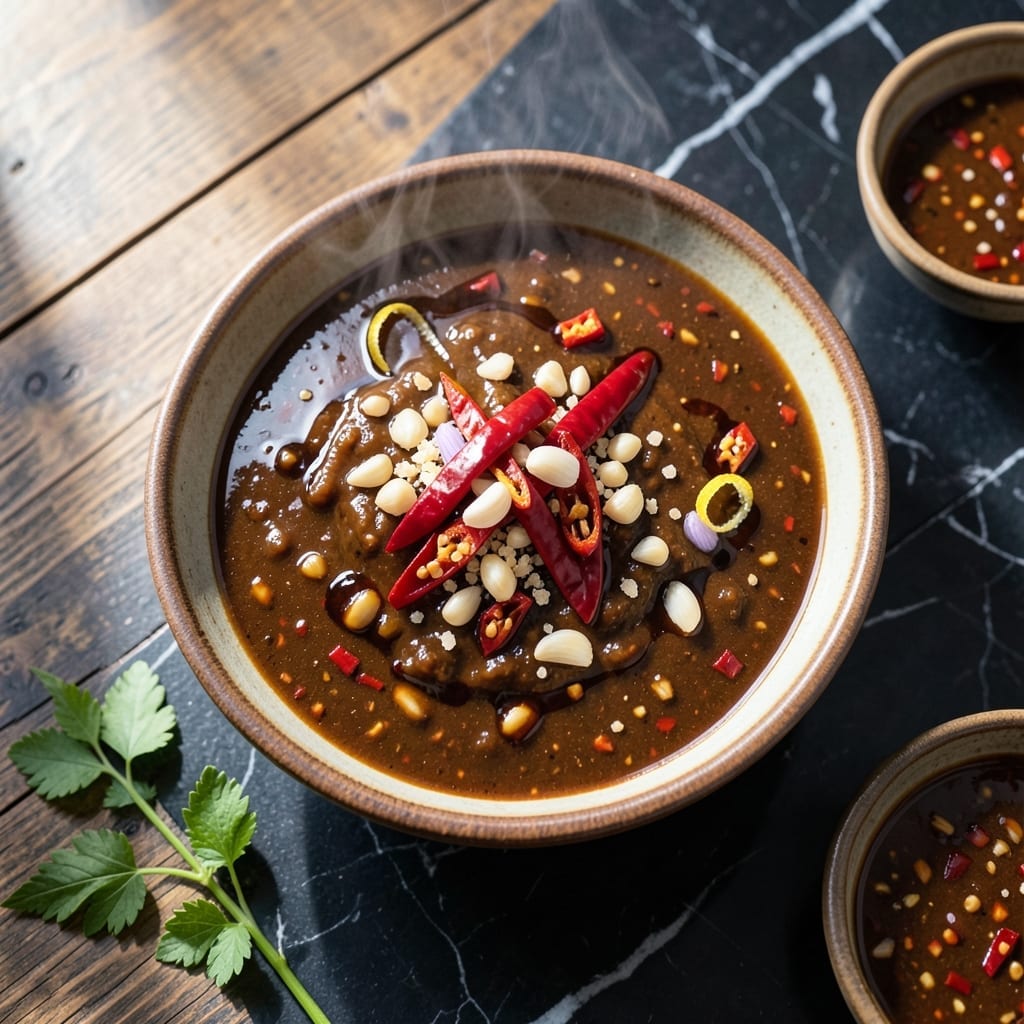
This vibrant sauce delivers authentic Thai flavors with a perfect balance of heat, sweetness, and tang. The secret lies in the careful blend of fresh chilies, garlic, and tamarind.
With just 10 minutes of prep and simple ingredients, you can create a versatile condiment that elevates everything from noodles to grilled meats. Store in an airtight jar for up to 2 weeks.
Ingredients for Thai Chili Recipe Sauce
Nine bold ingredients deliver authentic Thai heat, sweetness, and tang in every jar.
| Ingredient | Amount | Notes |
|---|---|---|
| Thai Bird's Eye Chilies 🌶️ | 10 whole | Stems removed, finely chopped |
| Garlic Cloves 🧄 | 6 cloves | Peeled, minced |
| Tamarind Paste 🍈 | ¼ cup | Seedless, pure pulp |
| Palm Sugar 🍚 | ½ cup | Shaved or granulated |
| Fish-Free Soy Sauce 🫒 | 2 tbsp | Vegan alternative to fish sauce |
| Rice Vinegar 🍶 | ¼ cup | White or apple cider as substitute |
| Lime Juice 🍋 | 3 tbsp | Freshly squeezed essential |
| Shallots 🧅 | 2 whole | Finely minced |
| Fresh Cilantro 🌿 | ¼ cup | Stems removed, chopped |
The chilies define this sauce—Thai bird’s eye are traditional, but serranos work if that’s what you can find. Asian markets will have the best selection, or try the frozen section at Trader Joe’s. Tamarind paste is non-negotiable for that signature tang; Swan or Maesri brands are reliable. Palm sugar adds depth, but brown sugar (with a touch of molasses) can substitute in a pinch.
No tamarind? Lime juice plus a touch of brown sugar gets you close but not identical. Coconut aminos can replace the soy sauce for a gluten-free version. For less heat, remove some chili seeds—half the amount cuts the spice significantly. Fresh cilantro stems actually have more flavor than the leaves, so don’t toss them—finely chop and use the whole bunch.
This keeps beautifully in the fridge for 2 weeks—the flavors actually deepen over time. Glass jars are ideal (sterilize first), and always use a clean spoon to prevent contamination. Freezing isn’t recommended; the texture separates when thawed.
Why You’ll Love This Recipe
- 5-Minute Blend: I toss everything in the blender and it’s done. No chopping marathons, just a quick whirl with those bird’s eye chilies and garlic.
- Sweet Heat Balance: The tamarind and palm sugar hit that perfect tangy-sweet contrast, while the chilies bring the fire I crave.
- Drizzle on Anything: Honestly, I’ve put this on noodles, grilled tofu, even scrambled eggs—it’s my new secret weapon in the fridge.
- Stays Fresh for Weeks: A small batch lasts me ages in the fridge, so I always have that bold, punchy flavor on hand.
Step-by-Step Instructions for Thai Chili Sauce
This method ensures balanced heat, sweetness, and tang in every batch.
Step 1: Prepare the Aromatics Base
Finely chop the 10 whole Thai Bird’s Eye Chilies after removing stems, ensuring even heat distribution. Mince the 6 cloves Garlic Cloves and 2 whole Shallots to a consistent texture—this prevents any single bite from being overwhelmingly pungent.
I process these in a mortar and pestle first for maximum flavor extraction, but a sharp knife works equally well. The finer the chop, the more the flavors meld into the sauce. You’ll notice the chilies release their capsaicin oils as you work, which is exactly what we want.
Step 2: Create the Sweet-Tangy Foundation
In a saucepan over medium heat, combine the 0.25 cup Tamarind Paste with 0.5 cup Palm Sugar. Stir constantly as the palm sugar melts—it has a higher melting point than regular sugar, so this takes 3-5 minutes of patience.
The mixture will transform from grainy to a glossy, thick syrup. At this stage, add the 0.25 cup Rice Vinegar and 2 tbsp Fish-Free Soy Sauce. The vinegar will cause some bubbling, which is normal. You’re building layers of complexity here—the tamarind’s sourness, palm sugar’s caramel notes, and vinegar’s sharpness.
Step 3: Incorporate the Aromatics and Finish
Add the chili-garlic-shallot mixture to the saucepan and reduce heat to medium-low. Cook for 8-10 minutes, stirring frequently, until the shallots become translucent and the raw garlic aroma mellows into something sweeter and more rounded.
This is where the magic happens: the heat from the chilies infuses the syrup while the aromatics deepen in flavor. The sauce will thicken slightly as the moisture from the shallots evaporates. Don’t let it reduce too much—you want a pourable consistency.
Step 4: Brighten and Balance the Sauce
Remove the saucepan from heat and let it cool for 2-3 minutes before stirring in the 3 tbsp Lime Juice. The residual heat will gently incorporate the lime without curdling the sauce. This addition brings the crucial bright, citrusy top note that prevents the sauce from being cloyingly sweet.
Taste and adjust the balance if needed—though with these exact proportions, you should achieve the perfect equilibrium of heat, sweet, sour, and salty. The lime also helps preserve the vibrant green color of the chilies.
Finally, stir in the 0.25 cup Fresh Cilantro. The fresh herb adds a final layer of complexity and a pop of color. Let the sauce sit for 10 minutes before transferring to a jar to allow the flavors to marry completely.
Pro Tips For Making Thai Chili Recipe Sauce
- Toast the Aromatics: Fry the garlic and chilies in oil over medium-low heat until fragrant but not browned—I learned this the hard way after burning three batches to a bitter crisp.
- Dissolve the Palm Sugar: Mix the palm sugar with 2 tablespoons of warm water before adding to the sauce; sounds weird, but it works and prevents grainy texture.
- Balance the Tamarind: Start with half the tamarind paste, taste, then add more—this isn’t the prettiest method, but it’s the tastiest way to avoid overpowering sourness.
- Simmer Gently: Once combined, let the sauce simmer for 5-7 minutes on low heat to meld the flavors—resist the urge to crank it up or you’ll scorch the sugars.
Perfect Pairings for These Flavors
Dipping Delights
This sauce shines with fresh spring rolls—dip the delicate rice paper wrappers for a burst of flavor. I love pairing it with crisp vegetables like cucumber, bell peppers, or jicama for a refreshing contrast to the heat. 🥗
Noodle Perfection
Toss rice noodles or pad thai with 2-3 tbsp of this sauce for an instant flavor upgrade. The tangy heat clings beautifully to the noodles. Add crushed peanuts and fresh lime wedges for texture and brightness.
Grilled Companions
Brush onto grilled chicken, shrimp, or tofu during the last 2 minutes of cooking. The heat caramelizes slightly, creating a sticky, flavorful glaze. I use it on skewers for a quick and impressive appetizer.
Sandwich Spread
Mix 1 tbsp of this sauce with 2 tbsp mayonnaise for a bold spread on banh mi or veggie sandwiches. The creamy texture tames the heat while letting the vibrant flavors shine through. Try it on a crisp baguette.
Stir-Fry Boost
Add 1-2 tbsp to stir-fries just before serving to preserve the fresh, zesty flavors. It pairs especially well with bell peppers, snap peas, and tofu. The sauce adds depth without overpowering the dish.
Cocktail Twist
Use a ½ tsp in a Thai basil gin cocktail for a spicy, tangy kick. The sauce’s complexity elevates the drink, balancing the botanicals in the gin. Stir well and garnish with a lime wheel. 🍹
Frequently Asked Questions
What can I use instead of tamarind?
Use equal parts lime juice with 1 tsp brown sugar per 2 tbsp needed. It won’t be identical but gives a similar tangy-sweet balance.
How do I reduce the heat level?
Remove all chili seeds and use only 5 chilies instead of 10. For mild heat, substitute with serrano peppers.
Can this sauce be made ahead?
Yes! It keeps in an airtight container in the fridge for up to 2 weeks. Flavors deepen after 24 hours.
What’s the best way to store it?
Use a clean glass jar with a tight lid. Always use a dry spoon to prevent mold. Never freeze it.
Nutrition Facts

- BBQ Sausage Recipe Oven: Smoky Depth Without the Grill - September 28, 2026
- BBQ Chicken Bowl Recipe Rice: Smoky Sweetness Over Fluffy Grains - September 28, 2026
- Beef Cutlet Recipe Ideas: Crispy Breaded Patties With Bold Seasonings - September 28, 2026