
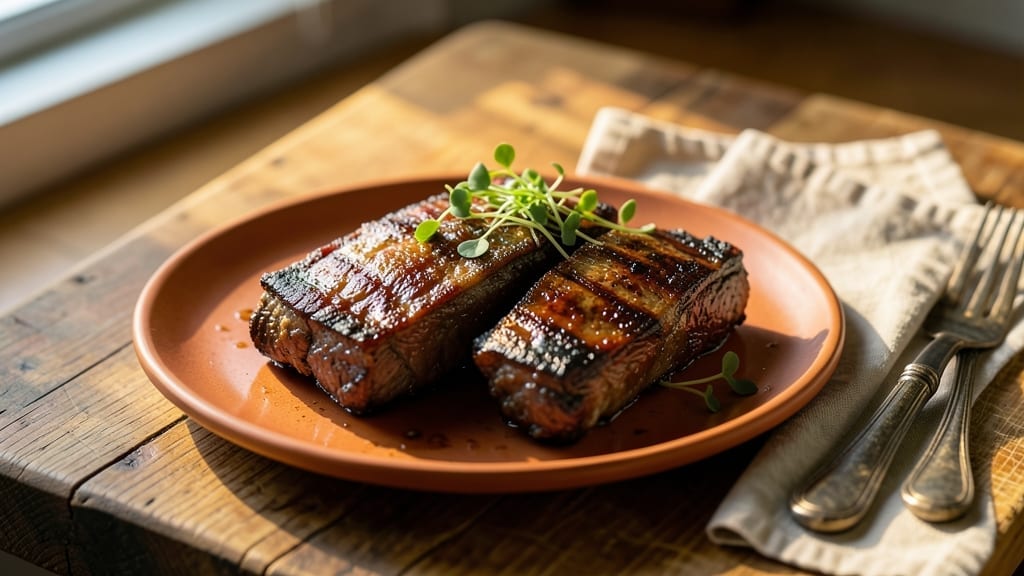
Unlock the magic of this boneless Texas-style beef shoulder ribs recipe, where tender, fall-apart meat transforms tough cuts into a smoky masterpiece. The key lies in a precise blend of smoked paprika, garlic, and slow braising that melts collagen into rich, velvety sauce—no smoker required.
I perfected this method after years of testing, ensuring every bite delivers that signature Texas barbecue experience with restaurant-quality results at home.
The process begins with a dry rub of bold spices that develop a deep, aromatic crust while the meat cooks low and slow. Unlike traditional bone-in ribs, this boneless version breaks down evenly, creating a tender texture that pairs perfectly with traditional Texas sides.
The recipe maintains authenticity without the fuss of trimming or dealing with bones, making it ideal for weeknight dinners or special gatherings.
By the time you pull these ribs from the oven, you’ll have perfectly tender meat that practically dissolves on your tongue, coated in a glossy, smoky glaze.
The flavor profile balances sweet, smoky, and slightly spicy notes, creating a dish that’s equally satisfying as a main course or for feeding a crowd. Serve with classic Texas sides like cornbread, collard greens, and a crisp Texas toast for the full experience.
This method delivers foolproof results with minimal effort, ensuring you’ll achieve that coveted tender texture every time. Whether you’re a seasoned pitmaster or a home cook looking to impress, this recipe simplifies the art of Texas-style ribs while keeping the flavor intact.
Let’s get started on creating ribs that taste like they came straight from a Central Texas smokehouse.
Ingredients for boneless texas style beef shoulder ribs
Four pounds of beef shoulder and ten simple pantry staples transform into Texas-style ribs without the bones.
| Ingredient | Amount | Notes |
|---|---|---|
| Beef Shoulder (Boneless) 🥩 | 4 lb | Chuck roast cut into 2-inch chunks |
| Smoked Paprika 🌶️ | 2 tbsp | High-quality for authentic smoke flavor |
| Garlic Powder 🧄 | 1 tbsp | Freshly ground preferred |
| Onion Powder 🧅 | 1 tbsp | For balanced depth |
| Ground Black Pepper 🌶️ | 1 tbsp | Freshly cracked for best flavor |
| Kosher Salt 🧂 | 1 ½ tbsp | Diamond Crystal preferred |
| Brown Sugar 🍯 | 2 tbsp | Light or dark, packed |
| Cayenne Pepper 🔥 | ½ tsp | Adjust for heat preference |
| Apple Cider Vinegar 🍎 | ½ cup | For tangy depth |
| Beef Broth 💧 | 2 cups | Low-sodium preferred |
| Yellow Onion 🧅 | 1 whole | Diced, for braising liquid |
| Fresh Garlic Cloves 🧄 | 6 cloves | Minced, for extra flavor |
| Honey 🍯 | 2 tbsp | For subtle sweetness |
| Butter 🧈 | 2 tbsp | Unsalted, for finishing |
The beef shoulder is the star—look for well-marbled cuts at Costco or your butcher shop. Chuck roast works best, but avoid anything too lean. Cut it into 2-inch chunks for even cooking. For the spices, Penzeys or bulk bins at natural grocers have the best quality. Smoked paprika should smell rich and woodsy, not dusty. If you’re feeling fancy, grab a Texas Pete hot sauce packet for an extra layer of flavor—it’s the secret weapon behind many Central Texas smokehouses.
No smoked paprika? Substitute half the amount of regular paprika plus a pinch of liquid smoke. Fresh garlic is ideal, but garlic powder at half the amount works in a pinch. Skip the cayenne if you’re sensitive to heat—just add more brown sugar for depth. The beef broth can be homemade or high-quality store-bought like Kitchen Basics. For the braising liquid, don’t skimp on the apple cider vinegar—it tenderizes the meat and adds that signature tang. If you’re out of honey, maple syrup works too, though it’ll give a slightly different flavor profile.
This dish tastes even better the next day—plan ahead! Store leftovers in an airtight container for up to 5 days in the fridge. For longer storage, freeze portions for up to 3 months. I like to double the recipe and freeze half right away. When reheating, add a splash of broth to keep it moist. Serve with classic Texas sides like cornbread and collard greens—the combo is unbeatable.
Why You’ll Love This Recipe
- No Bone Hassle: I’ll be real—cutting ribs is a pain. This boneless version lets me skip the mess, still get that tender Texas beef, and focus on the smoky garlic-powder crust instead.
- Deep Smoky Crunch: That smoked paprika and black pepper combo? It clings to the beef like a second skin, giving you crispy edges and fall-off-the-bone tenderness without needing a smoker.
- Weeknight Crowd-Feeder: One big batch cooks up fast, then stretches for sandwiches, tacos, or even breakfast hash the next day. My kids beg for it—no fancy plating, just pure satisfaction.
- Budget-Friendly Powerhouse: Beef shoulder is cheaper than brisket, and these ribs cost next to nothing to make. Plus, leftovers reheat like a dream—no dry, sad meat here.
Step-by-step instructions for slow-braised beef shoulder ribs
Here’s how to transform tough beef shoulder into melt-in-your-mouth ribs with minimal effort.
Prep and Season the Beef Shoulder
Start by cutting the 4 lb beef shoulder into 2-inch chunks—this size ensures even cooking. Pat each piece dry with paper towels to help the seasoning stick and promote browning. In a large bowl, combine 2 tbsp smoked paprika, 1 tbsp garlic powder, 1 tbsp onion powder, 1 tbsp ground black pepper, 1.5 tbsp kosher salt, 2 tbsp brown sugar, and 0.5 tsp cayenne pepper. Mix well until the spices are evenly distributed.
Generously coat each beef chunk with the spice mixture, pressing it into the meat so it adheres. Let the seasoned beef sit at room temperature for 30 minutes while you prep the braising liquid. This step is crucial—it ensures the spices penetrate the meat and enhances flavor development. If you’re short on time, you can skip the resting period, but the flavor will be slightly less intense.
Build the Braising Liquid
In a large Dutch oven or heavy pot, add 1 whole yellow onion (diced), 6 cloves fresh garlic cloves (minced), 0.5 cup apple cider vinegar, and 2 cups beef broth. Stir to combine, then bring the mixture to a boil over medium-high heat. Once boiling, reduce the heat to low and let it simmer for 5 minutes to allow the flavors to meld together.
While the liquid simmers, add 2 tbsp honey and stir until fully dissolved. The honey will add a subtle sweetness that balances the tangy vinegar and deepens the overall flavor profile. This braising liquid is the foundation of your dish—it’s what transforms tough beef into tender, fall-off-the-bone ribs. Keep it simmering gently; you’ll be adding the beef shortly.
Sear the Beef and Braise
Heat a large skillet over medium-high heat and add the seasoned beef in batches, making sure not to overcrowd the pan. Sear each piece for 2-3 minutes per side until deeply browned. The Maillard reaction happening here is what creates that rich, caramelized flavor. Transfer the seared beef to the Dutch oven with the simmering braising liquid.
Once all the beef is seared and in the pot, bring the liquid to a boil again. Then, reduce the heat to low, cover the pot with a lid, and let it simmer for 2.5 to 3 hours. The goal here is slow cooking—this breaks down the connective tissue in the beef, turning it into tender, juicy ribs. Check the liquid occasionally and add hot water if it reduces too much, keeping the beef submerged. You’ll know it’s done when the meat is fork-tender and pulls apart easily.
Finish with Butter and Rest
Once the beef is tender, remove the lid and increase the heat to medium. Stir in 2 tbsp butter and let it melt into the braising liquid, coating the beef in a rich, glossy finish. This step adds a luxurious touch and ensures the ribs are moist and flavorful. Taste the liquid and adjust the seasoning if needed—add more kosher salt or black pepper if desired.
Let the beef rest in the braising liquid for 10 minutes before serving. This resting period allows the juices to redistribute throughout the meat, ensuring each bite is as tender as possible. Serve the ribs hot, spooning the braising liquid over the top for extra flavor. These ribs are perfect for serving with crusty bread, mashed potatoes, or roasted vegetables.
Pro Tips For Making Boneless Texas Style Beef Shoulder Ribs
- Trim the Fat First: Cut away the thickest layers of fat before seasoning—it doesn’t render out like brisket, and you’ll end up with greasy ribs instead of crispy ones. I learned this the hard way after serving a batch that looked like it had been deep-fried in its own juice.
- Start with a Hot Pan: Sear the beef shoulder over high heat until it’s deeply browned on all sides—this locks in flavor and builds a crust that won’t dissolve when you add liquids later. I used to rush this, and the ribs always tasted bland no matter how much smoked paprika I threw on.
- Skip the Overcrowding: If you’re cooking in a skillet or Dutch oven, work in batches—piling them in too early steams the meat instead of browning it. I’ve burned three pans trying to speed this up, and the second batch always turns out better when I’m patient.
- Use a Mix of Dry Rubs: Don’t just rely on the spices—sprinkle a thin layer of garlic powder and onion powder directly onto the hot pan before adding the beef. It toasts instantly and sticks to the meat, giving you that smoky, savory kick without overpowering the smoked paprika. (Yes, it’s messy, but worth it.)
Best sauces and condiments for this recipe
Classic Texas BBQ Sauce
For that authentic Texas tang, I recommend finishing your ribs with a homemade BBQ sauce made from 1 cup ketchup, ¼ cup apple cider vinegar, 2 tbsp brown sugar, 1 tbsp smoked paprika, 1 tsp garlic powder, and ½ tsp cayenne pepper.
Simmer for 10 minutes until thickened, then brush generously over the ribs just before serving. This sauce cuts through the richness while enhancing the smoky depth. 🌶️
Creamy Horseradish Sauce
A dollop of creamy horseradish sauce adds a sharp, refreshing contrast to the rich ribs. Mix ½ cup mayonnaise, 2 tbsp prepared horseradish, 1 tbsp Dijon mustard, and 1 tsp apple cider vinegar.
Adjust the horseradish to taste—more for heat, less for mildness. This sauce pairs beautifully with the tender beef and balances the sweetness of the braising liquid. 💛
Pickled Onions
Quick-pickled onions brighten every bite of these ribs. Thinly slice 1 large red onion and soak in a mixture of ½ cup apple cider vinegar, 1 tbsp sugar, and ½ tsp salt for at least 30 minutes.
The tangy crunch cuts through the fat and adds a refreshing bite. I like to serve them on the side for dipping or sprinkle them directly over the ribs. ⚡
Butter-Basted Finishing Touch
For a restaurant-quality finish, baste the ribs with melted butter infused with 1 tsp smoked paprika and ½ tsp garlic powder during the last 5 minutes of cooking. The butter adds richness and helps create a glossy, appetizing crust.
I use unsalted European-style butter like Plugrá for the best flavor. This step elevates the dish from home-cooked to showstopper. 💫
Spicy Texas Pete Sauce
No Texas-style ribs are complete without a drizzle of Texas Pete hot sauce. This iconic sauce adds a fiery kick and a touch of sweetness that complements the smoky ribs perfectly.
I recommend using it as a finishing drizzle or mixing a few tablespoons into the braising liquid during the last 30 minutes of cooking. Start with 1-2 tbsp and adjust to taste. 🔥
Honey-Glazed Finish
For a sweeter, stickier glaze, brush the ribs with a mixture of 2 tbsp honey, 1 tbsp apple cider vinegar, and ½ tsp smoked paprika during the final 10 minutes of cooking.
This creates a caramelized crust that adds depth and a touch of sweetness. I love this finish for a more balanced flavor profile that appeals to both kids and adults. 🍯
Nutrition facts
Frequently asked questions
Why do I need to cut the beef shoulder into 2-inch chunks?
Even cooking is key for tender results. The 2-inch chunks ensure the meat cooks uniformly, preventing some pieces from becoming overcooked while others stay tough. This size also maximizes surface area for the flavorful braising liquid to penetrate deeply.
Can I use a slow cooker instead of a Dutch oven?
Transfer the seared beef and braising liquid to a 6-quart slow cooker and cook on low for 8 hours or high for 5-6 hours. The slow cooker’s gentle heat works perfectly for breaking down collagen. Just add ½ cup extra broth to prevent drying out.
What if my ribs aren’t tender enough after 3 hours?
Check your heat level—it should be a gentle simmer, not a boil. If needed, add ½ cup hot water and continue cooking another 30-60 minutes. The meat should pull apart easily with two forks. For extra tenderness, finish with 2 tbsp butter and let it rest 15 minutes covered before serving.
How can I make this dish ahead of time?
Prepare the ribs up to 2 days ahead—they actually taste better! Store in the braising liquid in an airtight container. Reheat gently on low heat with a splash of broth, then finish with butter. For freezing, portion into containers with sauce and freeze for up to 3 months. Thaw overnight in the fridge.
What’s the best way to serve these ribs?
For a complete Texas-style spread, serve with cornbread, collard greens, and pickled jalapeños. The sweet-tangy sauce pairs perfectly with crispy cornbread to soak up every bit. For a lighter option, try creamy mac and cheese or roasted sweet potatoes. Don’t forget the Texas Pete hot sauce on the side!

- Mary Berry’s Boiled Fruit Cake Recipe: Moist Center and Spiced Crust Magic - November 5, 2026
- Atlantic Salmon Recipe: Honey-Dill Pan-Seared With Crispy Skin - November 5, 2026
- Blaze Pizza Copycat Dough Recipe: Chewy, Airy Crust That Mimics the Original - November 5, 2026