
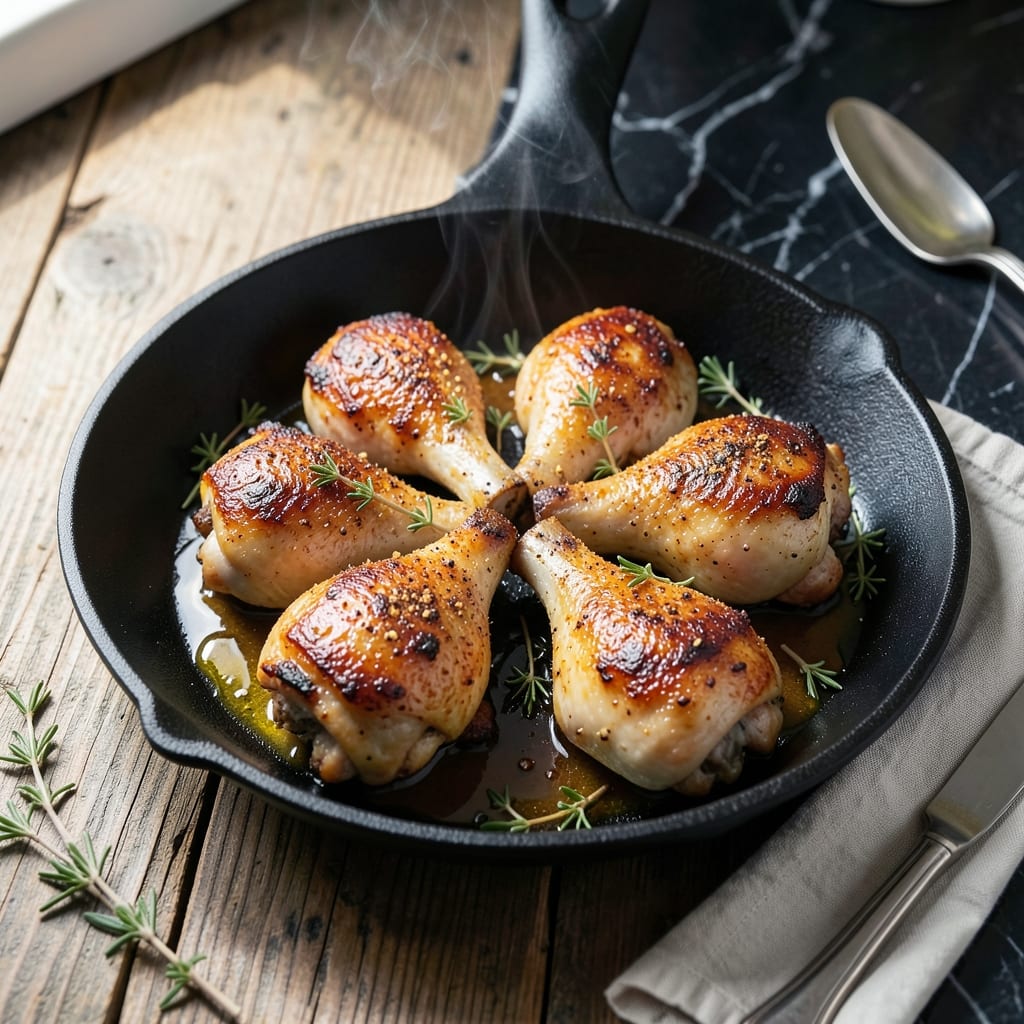
Achieving crispy skin on bone-in chicken thighs is simpler than most realize. My years in the test kitchen proved that high heat and patience transform ordinary pieces into extraordinary meals.
The method is straightforward: start skin-side down in a hot pan, then finish in the oven. This ensures the skin renders to a golden, shatteringly crispy texture while keeping the meat juicy and tender.
What you get is chicken with a perfect contrast—crunchy exterior giving way to succulent, flavorful meat. The thighs stay moist thanks to the bone, which adds depth to every bite.
Serve with roasted vegetables or a fresh salad for a complete meal. This technique delivers consistent, professional results every time.
Ingredients for Chicken Thigh Recipe Bone In
Professional results start with bone-in thighs and a handful of pantry staples for that perfect crisp.
| Ingredient | Amount | Notes |
|---|---|---|
| Bone-In Chicken Thighs 🍗 | 2 lb | Skin-on, about 4 thighs |
| Kosher Salt 🧂 | 1 ½ tsp | Diamond Crystal preferred |
| Freshly Ground Black Pepper 🌶️ | 1 tsp | Coarse grind for texture |
| Garlic Powder 🧄 | 1 tsp | Not garlic salt |
| Smoked Paprika 🌶️ | 1 tsp | For depth of flavor |
| Dried Thyme 🌿 | ½ tsp | Crushed between fingers |
| Olive Oil 🫒 | 2 tbsp | High smoke point preferred |
| Unsalted Butter 🧈 | 2 tbsp | For basting skin |
| Fresh Rosemary Sprigs 🌿 | 2 whole | For aromatic finish |
| Fresh Lemon 🍋 | 1 whole | Zest and juice for brightness |
| Chicken Stock 🍲 | ½ cup | Low-sodium if available |
The chicken thighs are non-negotiable here. Bone-in, skin-on is essential for both flavor and texture—boneless simply won’t deliver the same juiciness or crisp. Whole Foods or Costco typically carry high-quality options with good skin integrity. Look for thighs with smooth, unbroken skin and a vibrant pink hue—avoid any with a grayish tint or strong odor.
No smoked paprika? Regular paprika plus a pinch of cayenne approximates the smokiness. Fresh garlic can replace the powder at a 1:3 ratio (1 clove = ~1 tsp powder). The butter is critical for basting—European-style unsalted has a higher fat content, which helps achieve that shatteringly crisp skin. If avoiding dairy, avocado oil works in a pinch.
Thighs keep well in the fridge for 2-3 days before cooking. After cooking, store leftovers in an airtight container for up to 4 days. The crispy skin softens upon storage, but reheating in a 400°F oven for 10 minutes restores much of its texture. Freezing raw thighs is possible for 9 months.
Why You’ll Love This Recipe
- One Pan Wonder: I toss the thighs with salt, pepper, garlic powder, and smoked paprika, then roast—no chopping, no fuss.
- Smoky Depth: That smoked paprika gives it this rich, almost campfire-like flavor that’s just ridiculous with the crispy skin.
- Meal Prep Hero: I make a double batch on Sunday and we’re set for lunches or quick dinners all week.
- Budget Friendly: Bone-in thighs cost half what breasts do, and honestly, they taste twice as good.
Step-by-Step Instructions for Chicken Thigh Recipe Bone In
Here’s the method to achieve unparalleled crispiness and juiciness with every bite.
Step 1: Season and Prep the Chicken Thighs
Pat the 2 lb Bone-In Chicken Thighs completely dry with paper towels—this is non-negotiable for achieving crispy skin. The drier the surface, the better the Maillard reaction, which creates that coveted golden crust.
In a small bowl, combine the 1.5 tsp Kosher Salt, 1 tsp Freshly Ground Black Pepper, 1 tsp Garlic Powder, 1 tsp Smoked Paprika, and 0.5 tsp Dried Thyme. Rub this mixture evenly over all sides of the chicken thighs, pressing gently to adhere. Let the seasoned thighs sit at room temperature for 20 minutes to allow the salt to penetrate the meat.
Step 2: Sear the Chicken for Maximum Crispiness
Heat the 2 tbsp Olive Oil in a large, heavy skillet (cast iron is ideal) over medium-high heat until it shimmers. Add the chicken thighs skin-side down and leave them undisturbed for 6-8 minutes—this is critical. Resist the urge to move them; you want that skin to develop a deep golden-brown crust.
Flip the thighs and cook for another 4-5 minutes until the skin is evenly crisped and the internal temperature reaches 165°F. The juices should run clear when pierced with a knife. Transfer the chicken to a plate, leaving the rendered fat in the skillet.
Step 3: Build Flavor with Aromatics and Pan Sauce
Reduce the heat to medium and add the 2 tbsp Unsalted Butter, 2 whole Fresh Rosemary Sprigs, and the zest and juice of the 1 whole Fresh Lemon to the skillet. Stir to combine, scraping up any browned bits from the bottom of the pan—this adds layers of flavor to your sauce.
Pour in the 0.5 cup Chicken Stock and simmer for 3-4 minutes until the liquid reduces by half and begins to thicken slightly. The sauce should coat the back of a spoon and smell fragrant with hints of rosemary and citrus.
Step 4: Finish and Serve
Return the chicken thighs to the skillet, skin-side up, and spoon the pan sauce over them. Simmer for an additional 2-3 minutes to allow the flavors to meld and the chicken to absorb the aromatic liquid.
Remove the rosemary sprigs and transfer the chicken to a serving platter. Spoon the remaining sauce over the top. The skin should be deep golden brown and audibly crispy, while the meat remains tender and juicy. Serve immediately to preserve the crispiness of the skin.
Pro Tips For Making Chicken Thigh Recipe Bone In
- Dry the Skin: Pat the thighs thoroughly with paper towels before seasoning—I learned this the hard way after my first few batches came out steamed instead of crispy.
- Season Overnight: Rub the salt, pepper, garlic powder, and smoked paprika into the meat at least 12 hours ahead. Sounds like overkill, but it actually changes the outcome.
- Start Skin-Side Down: Place the thighs in the pan skin-side down first and resist the urge to move them for 5-7 minutes. This is the only way to get that crust without tearing the skin.
- Use a Meat Thermometer: Pull the thighs at 175°F—any lower and you risk chewy meat, any higher and they dry out. I skip this when I’m lazy, but the dish is noticeably better when I don’t.
Storing and Reheating This chicken thigh recipe bone in
Refrigerator Storage
After cooking, let the chicken cool for 30 minutes before storing. Transfer to an airtight container with the pan sauce. It keeps well in the fridge at 40°F or below for up to 4 days. The skin will soften, but the meat stays juicy. ❄️
Freezer Storage
For longer storage, freeze cooked thighs in a single layer first, then transfer to a quart-size freezer bag. Squeeze out excess air to prevent freezer burn. They’ll maintain quality for 3 months. I prefer glass containers for reheating ease.
Oven Reheating
Preheat oven to 400°F. Place thighs skin-side up on a baking sheet and reheat for 10-12 minutes. This restores crispiness better than any other method. Baste with extra pan sauce halfway through for moisture. 🔥
Stovetop Reheating
Heat a skillet over medium-low heat with 1 tbsp olive oil. Add thighs skin-side down for 4-5 minutes, then flip. Cover the pan to trap steam and warm the meat through without drying it out.
Microwave Option
For a quick meal, place thighs on a microwave-safe plate with a damp paper towel. Heat on 70% power for 1-2 minutes, then flip. The skin won’t crisp, but the meat stays tender. Add a splash of chicken stock to prevent dryness.
Nutrition Facts
Frequently Asked Questions
Should I remove the skin before cooking?
No, the skin is essential for flavor and crispiness. Leaving it on creates that golden, shatteringly crispy texture while keeping the meat juicy. Just pat it dry before seasoning.
How do I know when they’re done?
Use a meat thermometer to check for 165°F internally. The juices should run clear when pierced, and the skin should be deep golden brown. Overcooking dries them out.
Can I use boneless thighs instead?
Boneless won’t deliver the same juiciness or flavor. The bone adds depth and helps maintain moisture. Stick with bone-in for best results.
What if the skin isn’t crispy?
Dry the skin thoroughly before cooking and avoid moving the thighs in the pan. Cook skin-side down first on medium-high heat for 6-8 minutes.

- Pina Colada Dip Recipe Red Lobster: Tropical Creaminess With Toasted Coconut - October 12, 2026
- Pickled Sweet Cherry Peppers Recipe Canning: Tangy Heat for Pantry Staples - October 12, 2026
- Peppercorn Sauce Recipe Vegan: Rich Umami Depth Without Cream - October 12, 2026