
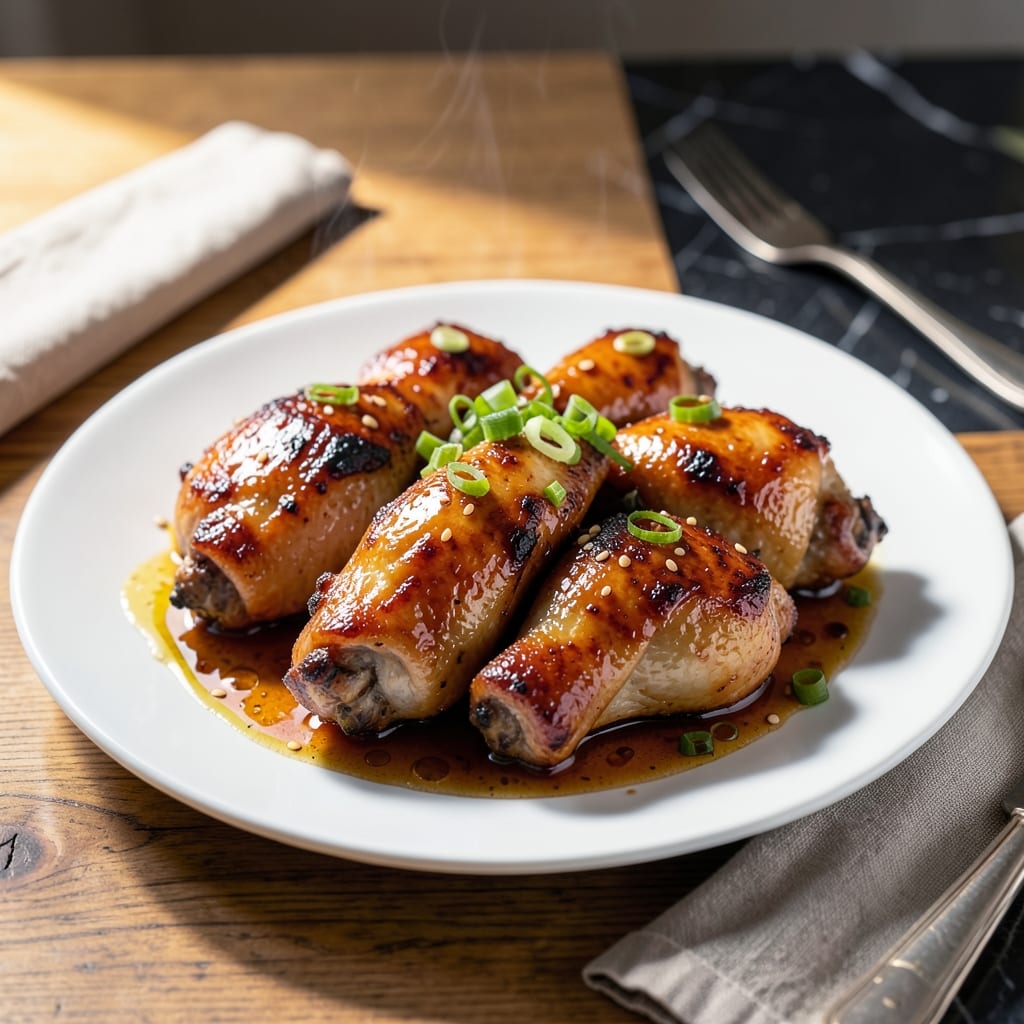
There’s a reason teriyaki chicken thighs appear on restaurant menus worldwide—they deliver sticky, sweet results every time. I’ve tested countless variations to perfect the balance between glossy glaze and juicy meat.
The secret lies in searing the thighs first to develop flavor, then simmering them in the sauce until it reduces to a thick, glossy coating. This method ensures the chicken stays tender while the glaze reaches its perfect consistency.
What emerges is fall-off-the-bone chicken with a deep amber coating that clings beautifully. The sauce caramelizes slightly at the edges, creating those coveted crispy bits that contrast with the tender meat.
Serve over steamed rice with steamed broccoli for a complete meal that looks as impressive as it tastes. This approach works for weeknight dinners or special occasions.
Ingredients for Chicken Thigh Recipe Teriyaki
A few pantry staples and fresh ingredients yield restaurant-quality teriyaki perfection at home.
| Ingredient | Amount | Notes |
|---|---|---|
| Chicken Thighs 🍗 | 2 lb | Boneless, skin-on preferred |
| Soy Sauce 🫙 | ½ cup | Low-sodium for balance |
| Brown Sugar 🍚 | ⅓ cup | Packed, for caramelization |
| Honey 🍯 | ¼ cup | Pure, for glossy finish |
| Fresh Ginger 🌿 | 1 tbsp | Minced, for zing |
| Garlic Cloves 🧄 | 3 cloves | Minced, for depth |
| Rice Vinegar 🍯 | 2 tbsp | Unseasoned, for tang |
| Sesame Oil 🫒 | 1 tbsp | Toasted, for aroma |
| Cornstarch 🌾 | 1 tbsp | For thickening sauce |
| Water 💧 | ¼ cup | For sauce consistency |
| Green Onions 🧅 | 3 whole | Sliced, for garnish |
| Sesame Seeds 🌰 | 1 tbsp | Toasted, for crunch |
| Vegetable Oil 🫒 | 2 tbsp | High smoke point, for searing |
| Steamed Rice 🍚 | 2 cups | Cooked, for serving |
| Steamed Broccoli 🥦 | 2 cups | Florets, for serving |
The chicken thighs are non-negotiable—skin-on, bone-in delivers the juiciest results (though boneless works in a pinch). Costco has excellent bulk packs, or ask your butcher for air-chilled for superior texture. Soy sauce quality matters: Kikkoman or San-J for consistent flavor. Brown sugar should be packed firmly—light or dark both work, but dark adds a molasses depth.
Out of honey? Maple syrup or agave at a 1:1 ratio works fine. No fresh ginger? Ground ginger at one-third the amount saves the day. Rice vinegar can be swapped with apple cider vinegar, but avoid white vinegar—its harshness cuts through the sweetness. For gluten-free, tamari instead of soy sauce and arrowroot powder for cornstarch.
Marinated chicken keeps 2 days in the fridge. Cooked teriyaki holds 4 days refrigerated or freezes beautifully for 3 months. Reheat gently to preserve that sticky glaze (the microwave works, but stovetop is better for texture).
Why You’ll Love This Recipe
- One Pan Wonder: I just throw everything in a skillet and let the soy sauce, honey, and ginger work their magic.
- Sweet & Sticky: The brown sugar and honey caramelize into this glossy, finger-licking glaze on the thighs.
- Feeds the Crew: I make a double batch and we’ve got lunches for days—my kids fight over the leftovers.
- Budget Hero: Chicken thighs are cheap, and this sauce makes them taste like a restaurant meal. Honestly, it’s my wallet’s favorite trick.
Step-by-Step Instructions for Chicken Thigh Teriyaki
Master this technique for perfectly glazed chicken with a sticky, caramelized finish every time.
Step 1: Sear the Chicken Thighs
Heat the 2 tablespoons vegetable oil in a large skillet over medium-high heat until shimmering. Pat the 2 lb chicken thighs dry with paper towels to ensure a good sear, then season lightly with salt.
Place the chicken thighs skin-side down in the hot oil. Sear undisturbed for 6-7 minutes until the skin is deep golden brown and crisp. Flip and sear the other side for 3-4 minutes until the meat is cooked through but still juicy. Remove the chicken to a plate and set aside.
Step 2: Create the Teriyaki Sauce Base
In the same skillet, reduce heat to medium. Add the 1 tablespoon minced fresh ginger and 3 cloves minced garlic cloves, stirring for 30-45 seconds until fragrant but not browned.
Pour in the 0.5 cup soy sauce, 0.33 cup packed brown sugar, 0.25 cup honey, and 2 tablespoons rice vinegar. Stir to dissolve the sugar, then bring to a gentle simmer. Let this mixture cook for 3-4 minutes until slightly reduced and syrupy.
Step 3: Thicken and Glaze the Chicken
In a small bowl, whisk together the 1 tablespoon cornstarch and 0.25 cup water until smooth. Slowly pour this slurry into the simmering sauce while stirring constantly. Cook for 1-2 minutes until the sauce thickens to a glossy, syrup-like consistency that coats the back of a spoon.
Return the seared chicken thighs to the skillet, skin-side up. Spoon the sauce over the chicken, ensuring each piece is well coated. Simmer for 2-3 minutes until the sauce reduces further and clings to the chicken in a thick, sticky layer.
Step 4: Rest and Garnish for Serving
Transfer the glazed chicken to a cutting board and let it rest for 5 minutes. This allows the juices to redistribute and the sauce to set slightly. While the chicken rests, toast the 1 tablespoon sesame seeds in a dry pan over low heat for 1-2 minutes until golden and fragrant.
Slice the 3 whole green onions thinly. Serve the chicken thighs over the 2 cups steamed rice with the 2 cups steamed broccoli on the side. Drizzle any remaining sauce from the pan over the top, then sprinkle with the toasted sesame seeds and sliced green onions.
Pro Tips For Making Chicken Thigh Recipe Teriyaki
- Sear Skin First: Get your pan screaming hot before adding the thighs skin-side down—I learned this the hard way after years of pale, flabby skin. That first 4-5 minutes at high heat is non-negotiable for crispy edges that hold up to the teriyaki glaze.
- Grate the Ginger: Fresh ginger is a must, but grind it fine or it’ll leave stringy bits in your sauce. I use a microplane now after picking ginger fibers out of my teeth one too many times.
- Reduce the Sauce Separately: After the chicken rests, pour the pan juices into a small pot and boil it down for 2-3 minutes. Skipping this step leaves you with watery teriyaki that slides right off the thighs.
- Use Boneless Thighs: They cook faster and soak up the sauce better than bone-in. I was skeptical until I tried it, but the flavor difference is noticeable—plus, no bones to navigate while eating.
Serving Suggestions for This Dish
Plating Perfection
I always start with a bed of steamed rice as the foundation—about ½ cup per plate. Arrange the glazed chicken thighs diagonally across the rice, skin-side up, to showcase that beautiful caramelization. The sauce should glisten under the light. 💛
Color Contrast
The bright green of steamed broccoli florets adds visual pop against the amber chicken. Place ½ cup broccoli alongside, not on top, to keep the presentation clean. A quick toss in 1 tsp sesame oil before serving enhances the color.
Garnish Like a Pro
Sprinkle toasted sesame seeds evenly over the chicken and rice, then add thinly sliced green onions in a diagonal line across the plate. The contrast of black, white, and green against the golden chicken is stunning.
Sauce Drizzle
Any remaining sauce in the pan should be drizzled artfully in a zigzag pattern over the chicken and rice. Use a spoon to control the flow—this adds that restaurant-quality finish. I sometimes add a pinch of red pepper flakes for subtle heat.
Family-Style Option
For Sunday family dinners, I serve everything on a large platter with the chicken in the center, rice and broccoli surrounding it. This encourages sharing and makes the meal feel more communal. 💪
Weeknight Shortcut
On busy nights, I plate rice and broccoli first, then top with chicken and sauce. The steam from the hot chicken softens the broccoli slightly, which my kids prefer. Always drizzle extra sauce over the rice to soak up every last bit of flavor.
Nutrition Facts
Frequently Asked Questions
Can I use bone-in thighs instead of boneless?
Bone-in adds flavor and keeps meat juicier. Just increase cooking time by 3-5 minutes per side during searing to ensure doneness. The internal temperature should reach 165°F.
How do I prevent the sauce from burning?
Keep heat at medium after adding sugar and honey. Stir frequently once the sauce begins thickening. If it starts darkening too quickly, remove pan from heat for 30 seconds to cool slightly.
What if my glaze isn’t thick enough?
Mix 1 teaspoon cornstarch with 1 tablespoon cold water and stir into simmering sauce. Cook for another 1-2 minutes until it reaches your desired consistency.
Can I make this ahead of time?
Cook chicken fully, then store in sauce in an airtight container for up to 4 days. Reheat gently on stovetop with 2 tablespoons water to loosen sauce.

- Bread Recipe For Bread Machine: Hands-Off Artisan Loaf With Perfect Rise - September 30, 2026
- BBQ Chicken Drumsticks Recipe Air Fryer: Smoky Char in Half the Time - September 30, 2026
- Korean BBQ Sauce Recipe Homemade: Sweet and Spicy Umami Glaze - September 30, 2026