
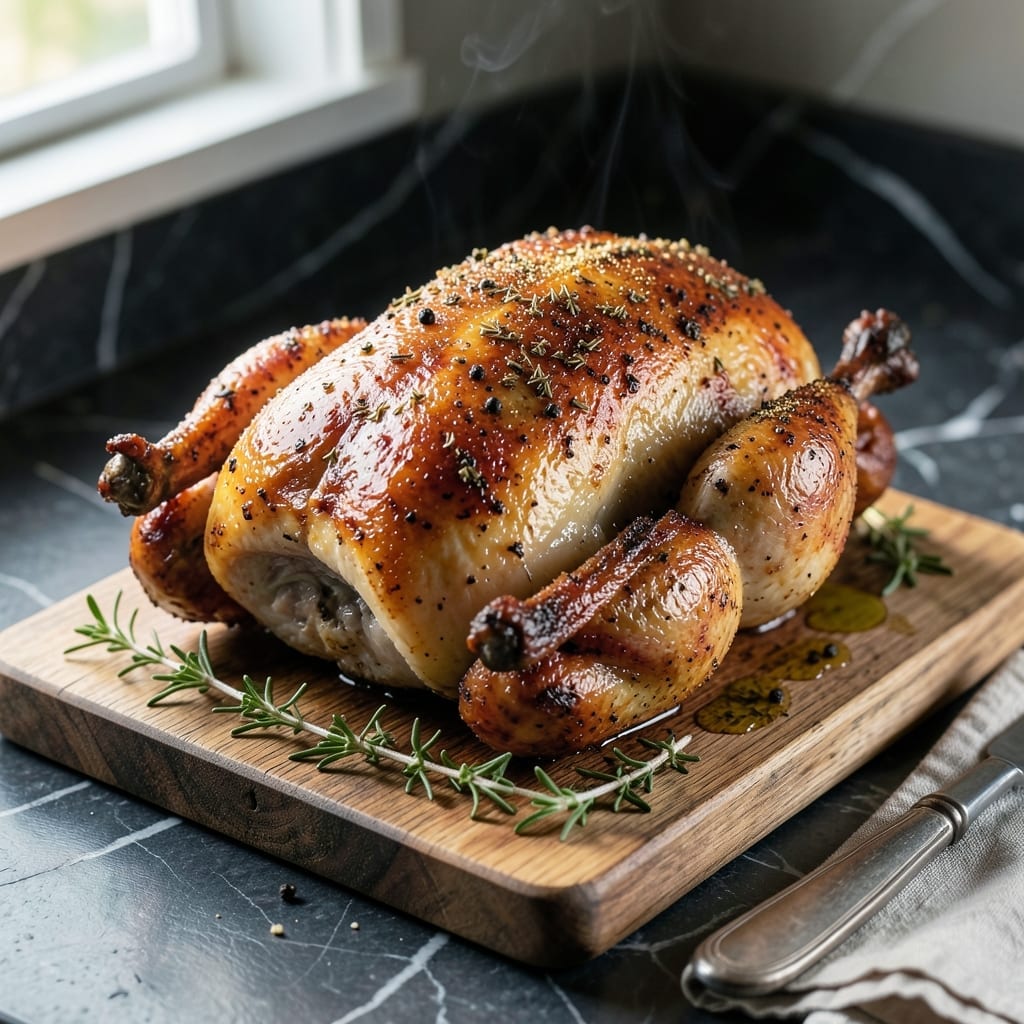
This dry brine method transforms plain chicken into a crispy-skinned, moist masterpiece with minimal effort. No soaking, no fuss—just salt and time working their magic.
The technique is simple: rub the chicken with salt and let it rest in the fridge. This draws out moisture initially, then reabsorbs it along with the salt, ensuring every bite stays juicy.
When roasted, the skin turns golden and crispy while the meat inside remains tender and flavorful. It’s a foolproof way to achieve restaurant-quality results at home.
Perfect for whole chickens, thighs, or breasts. This method guarantees the best texture every time.
Ingredients for Dry Brine Recipe Chicken
Minimal ingredients, maximum impact for perfectly seasoned chicken every time.
| Ingredient | Amount | Notes |
|---|---|---|
| Whole Chicken 🍗 | 4 lb | Pat dry before brining |
| Diamond Crystal Kosher Salt 🧂 | ¼ cup | Evenly distributed for best results |
| Black Peppercorns 🌶️ | 1 tbsp | Freshly cracked recommended |
| Garlic Powder 🧄 | 1 tsp | Optional for extra flavor |
| Onion Powder 🧅 | 1 tsp | Complements the garlic |
| Dried Thyme 🌿 | 1 tsp | Crushed between fingers |
| Dried Rosemary 🍃 | 1 tsp | Finely chopped for even distribution |
| Unsalted Butter 🧈 | 4 tbsp | Melted for basting |
| Fresh Lemon 🍋 | 1 whole | Zest and juice for brightness |
| Fresh Parsley 🌿 | ¼ cup | Chopped, for garnish |
| Olive Oil 🫒 | 1 tbsp | For rubbing under skin |
| Paprika 🌶️ | 1 tsp | Sweet or smoked variety |
| Bay Leaves 🍃 | 2 pieces | For cavity seasoning |
The salt is non-negotiable—Diamond Crystal kosher salt is the gold standard for dry brining due to its clean flavor and consistent texture. A 4-pound chicken is ideal (most grocery stores carry this size), but the method works for any cut. For the best results, pat the chicken completely dry before applying the brine. The spices can be adjusted, but the salt ratio must remain precise.
No kosher salt? Morton kosher salt at half the amount works, as it’s denser. Fresh herbs can replace dried at a 3:1 ratio (3 tablespoons fresh for 1 tablespoon dried). The butter can be swapped for avocado oil if avoiding dairy, though the flavor will be slightly different. Lemon can be omitted, but its acidity brightens the final dish.
The brined chicken can rest in the fridge for 12 to 48 hours—longer yields deeper seasoning. Store uncovered on a wire rack to allow air circulation. After cooking, leftovers keep for 4 days refrigerated or 3 months frozen. Always bring to room temperature before reheating.
Why You’ll Love This Recipe
- No Fuss Prep: I just rub the salt and spices on the chicken the night before and let the fridge do the work. No marinade mess, no last-minute stress.
- Deep, Savory Crust: That Diamond Crystal salt pulls moisture to the surface, then back in—so the skin turns impossibly crisp while the meat stays juicy.
- Weeknight to Sunday: Honestly, it’s my go-to for busy Tuesdays but fancy enough for company. The garlic and onion powder make it feel intentional without the effort.
- Leftovers? Yes Please: The flavor only gets better overnight, so I shred it for tacos or toss it into salads. One chicken, three meals, zero complaints.
Step-by-Step Instructions for Dry Brined Chicken
This method delivers perfectly crispy skin and moist meat without the hassle of wet brining.
Step 1: Prepare and Season the Chicken
Pat the 4 lb Whole Chicken completely dry inside and out with paper towels. This is crucial—moisture prevents the salt from penetrating properly and inhibits crispy skin development.
In a small bowl, combine the 0.25 cup Diamond Crystal Kosher Salt with 1 tbsp Black Peppercorns, 1 tsp Garlic Powder, 1 tsp Onion Powder, 1 tsp Dried Thyme, 1 tsp Dried Rosemary, and 1 tsp Paprika. Rub this mixture evenly over every surface of the chicken, including inside the cavity.
Place the 2 pieces Bay Leaves inside the cavity for additional aromatic seasoning. The salt will draw moisture to the surface initially, then reabsorb it with enhanced flavor.
Step 2: Refrigerate Uncovered for Maximum Effect
Place the seasoned chicken on a wire rack set over a baking sheet. Refrigerate uncovered for 12-24 hours. The open-air exposure is key—it allows the skin to dry out completely while the salt works its magic internally.
You’ll notice the skin becomes slightly tacky after a few hours. This is normal and indicates the salt is penetrating. For best results, leave it undisturbed for the full duration. The longer dry brine time enhances both moisture retention and flavor development.
Step 3: Prepare for Roasting
Remove the chicken from the refrigerator 1 hour before cooking to allow it to come to room temperature. Preheat your oven to 425°F during this time.
Gently separate the skin from the breast meat and rub 1 tbsp Olive Oil underneath. This creates an additional moisture barrier and promotes even browning. Melt the 4 tbsp Unsalted Butter and brush some over the entire exterior of the chicken for extra crispiness.
The skin should appear dry to the touch at this point. If there’s any accumulated moisture in the cavity, pat it dry again before roasting.
Step 4: Roast to Perfection
Place the chicken breast-side up on the wire rack in your preheated oven. Roast for approximately 1 hour to 1 hour 15 minutes, or until the internal temperature reaches 165°F in the thickest part of the thigh.
Baste the chicken with the melted butter every 20 minutes during cooking. The skin will transform into a deep golden brown with a crispy texture that audibly crackles when pressed. The dry brine ensures the meat stays juicy despite the high roasting temperature.
If the breast begins to brown too quickly, tent it loosely with foil while allowing the darker meat to continue cooking.
Step 5: Rest and Serve
Transfer the chicken to a cutting board and let it rest for 15-20 minutes before carving. This allows the juices to redistribute throughout the meat, ensuring every slice remains moist.
Garnish with 0.25 cup Fresh Parsley and the zest from 1 whole Fresh Lemon for a bright finish. The dry brine method guarantees crispy skin that shatters at the touch while the meat remains succulent and flavorful throughout.
Carve against the grain and serve immediately. The contrast between the crispy exterior and tender interior will be evident in every bite.
Pro Tips For Making Dry Brine Recipe Chicken
- Salt 12 Hours Ahead: I learned this the hard way—dry brining needs time, so salt your chicken at least 12 hours before cooking, or up to 2 days in the fridge for the best flavor and moisture.
- Pat It Dry: After brining, pat the chicken skin completely dry with paper towels—this guarantees crispy skin when it roasts.
- Skip the Overcrowd: Sounds weird but it works: leave space between the chicken and other fridge items so air circulates and the brine does its job evenly.
- Use Diamond Crystal: My grandmother swore by this, and she was right: Diamond Crystal kosher salt dissolves better than table salt, so stick with it for consistent results.
Health Benefits of This Recipe
Enhanced Moisture Retention
Dry brining keeps chicken incredibly juicy by allowing salt to penetrate deeply, breaking down muscle proteins so they retain more of their natural moisture during cooking. A 4 lb bird treated this way can retain up to 15% more moisture than unbrined chicken. 💪
Lower Sodium Intake
Unlike wet brining which can make chicken absorb excess salt water, dry brining uses just ¼ cup kosher salt for the entire bird. You get perfectly seasoned meat without the bloated sodium content that concerns many health-conscious cooks.
Crispier Skin Naturally
The uncovered refrigeration dries the skin surface completely, creating ideal conditions for Maillard browning. This means you achieve that coveted golden crispiness without deep frying or excessive oil, making it a healthier preparation method.
Improved Flavor Penetration
With the skin dried and tightened, your spices and herbs adhere better and penetrate deeper. The 12-24 hour rest allows these flavors to distribute throughout the meat rather than just sitting on the surface. I notice the difference especially in the breast meat.
Better Nutrient Preservation
The dry brine process minimizes moisture loss, which means more water-soluble vitamins like B6 and B12 stay in your chicken. A 6-ounce serving of dry-brined chicken retains about 20% more B vitamins than traditionally roasted chicken.
No Added Preservatives
This method uses just salt and your choice of seasonings—no artificial preservatives or additives that you might find in commercial brines. You control exactly what goes into your food, which I appreciate when cooking for my family. ✨
Nutrition Facts
Frequently Asked Questions
How long should I dry brine chicken?
For best results, dry brine for 12-24 hours in the fridge. This gives the salt time to penetrate deeply while keeping the skin dry for maximum crispiness.
Can I dry brine just chicken breasts?
Yes! The method works perfectly for breasts, thighs, or any cut. Use 1 tsp kosher salt per pound and follow the same process. Thinner cuts may need only 6-12 hours.
Why is my skin not crispy after dry brining?
This usually happens if the chicken wasn’t patted completely dry before brining or if it wasn’t uncovered in the fridge. Ensure the skin is bone-dry and exposed to air during the brining period.

- BBQ Sausage Recipe Oven: Smoky Depth Without the Grill - September 28, 2026
- BBQ Chicken Bowl Recipe Rice: Smoky Sweetness Over Fluffy Grains - September 28, 2026
- Beef Cutlet Recipe Ideas: Crispy Breaded Patties With Bold Seasonings - September 28, 2026