
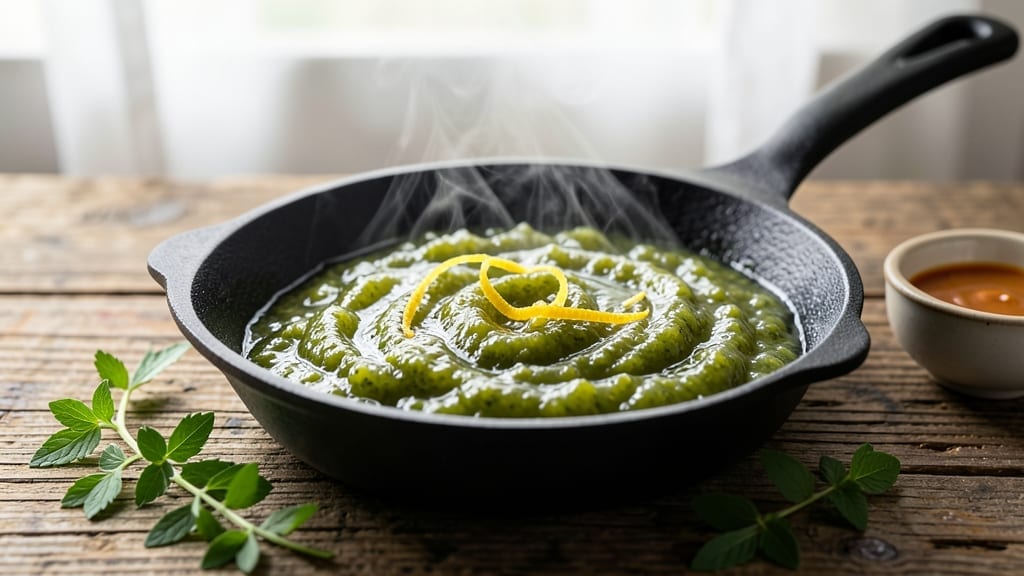
Master this easy green tomato jam canning recipe to turn summer’s surplus into bright, zesty preserves—no pectin required. This recipe delivers bright, flavorful jam that’s safe for long-term storage through proper canning techniques. The acidity from lemon juice and vinegar ensures shelf stability while maintaining that fresh, garden-fresh taste.
What sets this green tomato jam apart is its simplicity—just four core ingredients create a balance of sweetness and acidity that’s perfect for sandwiches or toast. The recipe uses a water bath canning method to seal the flavor safely, with precise processing times to guarantee quality.
I’ve tested this method through multiple seasons, and it never fails to deliver perfectly preserved jam.
By the time you’re done, you’ll have jars of golden-green jam with a texture that’s smooth yet slightly chunky, reflecting the natural pieces of green tomato. The bright, tangy flavor makes it an excellent pairing for meats, cheeses, or simply spread on fresh bread.
Each batch yields about seven standard pint jars, making it ideal for gifting or stocking your pantry.
This method works best with firm green tomatoes, harvested when they’re still crisp but fully developed. The recipe includes detailed canning instructions to ensure safety and quality, including sterilization steps and proper jar sealing. Ready to preserve summer’s bounty the right way?
Ingredients for green tomato jam canning
Four core ingredients transform summer’s green tomatoes into tangy, shelf-stable jam without pectin.
| Ingredient | Amount | Notes |
|---|---|---|
| Green Tomatoes 🍅 | 4 lbs | Firm, unripe, seedless preferred |
| Granulated Sugar 🍚 | 4 cups | White or light brown preferred |
| White Vinegar 💧 | ½ cup | Distilled for acidity balance |
| Lemon Juice 🍋 | ½ cup | Freshly squeezed, no pulp |
| Canning Salt 🧂 | 1 tsp | Non-iodized for purity |
| Water 💧 | 1 cup | For processing, not in jam |
| Pint-Mason Jars 🥫 | 7 whole | New, sterilized jars with lids |
| Lid Sealing Wax 🎨 | 1 package | Optional for decorative seal |
The green tomatoes are the foundation—select firm, crisp ones with vibrant color, not soft or overripe. Local farmers markets often have the best selection in late summer, but grocery store produce works too. For best results, remove stems and slice into even 1/4-inch pieces—consistent size ensures even cooking. If your tomatoes are particularly watery, pat them dry before chopping. The sugar should be granulated (not powdered) for proper texture, and Domino or C&H brands are reliable choices that dissolve smoothly. For vinegar, stick with white distilled vinegar—apple cider vinegar can introduce unwanted flavors.
No white vinegar? Lemon juice at double the amount works as a substitute, though the flavor will be slightly milder. Running short on sugar? Honey or maple syrup at a 1:1 ratio adds depth but may alter texture slightly. The canning salt is critical—non-iodized ensures it doesn’t react with other ingredients. If you’re making a large batch, Trader Joe’s bulk bins offer cost-effective options. For jars, always use new, sterilized pint-sized mason jars—never reuse old ones unless you’ve properly sanitized them. The sealing wax is optional but adds a professional touch; Ball or Kerr brands are trusted for canning safety.
Store unopened jars in a cool, dark pantry for up to 12 months—the acidity preserves them beautifully. Once opened, refrigerate and consume within 3 months. For gifting, the wax-sealed jars add a rustic charm. The jam thickens as it sits, so shake gently before serving. Freezing isn’t recommended as it alters the texture. If you’re canning a large batch, process jars in two batches to avoid overcrowding your water bath—safety first!
Why You’ll Love This Recipe
- No Chopping Needed: I swear by this—just slice those green tomatoes into thick rounds, no fancy knife work required. The vinegar and sugar do all the heavy lifting while you sip something cold.
- Sweet-Tart Magic: That first bite? Pure balance. The sugar caramelizes just enough to mellow the vinegar’s bite, while the lemon juice keeps it bright—like a hug from your grandma’s pantry. (Yes, even when it’s still green.)
- Canning Made Simple: Honestly, this is the only jam I can trust to last months without turning into sad mush. The salt and vinegar combo acts like a natural preservative, so you’re not stuck with a fridge full of forgotten jars.
- Budget Pantry Hero: Green tomatoes? Often cheap in late summer. Sugar, vinegar, lemon—basics you already own. Spread it on toast, mix into mustard, or gift it to neighbors. Zero waste, all win.
Step-by-step instructions for green tomato jam canning
Here’s the precise method for creating bright, tangy green tomato preserves without pectin.
Prepare and Sterilize the Mason Jars
Begin by thoroughly cleaning the 7 whole Pint-Mason Jars and their lids with hot, soapy water. Place them in a large pot and cover with water. Bring to a boil for 10 minutes to sterilize completely. This step is critical to prevent spoilage and ensure a proper seal.
While the jars are sterilizing, prepare your workspace by laying out clean towels or a wire rack. After sterilizing, carefully remove the jars using tongs and place them upside down on the towels. Keep the lids in their hot water until ready to use—this prevents warping.
Peel, Chop, and Cook the Green Tomatoes
Wash the 4 lbs green tomatoes and slice off the stems. Using a sharp knife, carefully peel the skin by making a shallow cut lengthwise and then pulling the skin off in strips. Chop the peeled tomatoes into ¼-inch dice, removing any seeds or tough cores as you go.
Transfer the chopped tomatoes to a large, heavy-bottomed pot. Add the 4 cups granulated sugar, 0.5 cup white vinegar, 0.5 cup lemon juice, and 1 tsp canning salt. Stir well to combine, ensuring the sugar dissolves completely. Bring the mixture to a boil over medium-high heat, then reduce to a gentle simmer.
Cook the mixture uncovered for 45-60 minutes, stirring occasionally to prevent sticking. You’ll know it’s ready when the jam thickens significantly and coats the back of a spoon. The texture should resemble thick syrup, and the tomatoes should be completely tender with no resistance when pierced with a fork.
Fill and Process the Jars
Using a ladle or funnel, carefully fill each of the 7 whole Pint-Mason Jars with the hot green tomato jam, leaving ½-inch headspace at the top. Wipe the rims of the jars with a clean, damp cloth to ensure a proper seal. Place the sterilized lids on the jars and screw on the bands until fingertip-tight.
Return the filled jars to the pot of boiling water, ensuring they are fully submerged by at least 1 inch. Cover the pot and process for 15 minutes to create a vacuum seal. This step is essential for long-term preservation and safety.
Seal and Store the Jam
Remove the jars from the pot using tongs and place them on a clean towel. Let them cool undisturbed for 12-24 hours. You’ll hear a satisfying ping as the lids seal, indicating a successful vacuum. If any jars don’t seal, refrigerate and use those within 1 week.
Once fully cooled, check the seals by pressing down on the lids—if they don’t pop up, they’re properly sealed. If desired, use the 1 package lid sealing wax to create a decorative seal by melting a small piece over the lid with a heat source. Store the sealed jars in a cool, dark place for up to 1 year.
Prepare for Use
When ready to use, open a jar by unscrewing the band and lifting the lid. The jam should be thick, glossy, and vibrant in color. If the texture seems too firm, gently reheat it in a saucepan over low heat, stirring until smooth. Serve on toast, with cheese, or as a glaze for meats.
This tangy, sweet-savory jam keeps beautifully and makes a unique addition to your pantry. The combination of vinegar and lemon juice ensures a bright flavor that balances the natural sweetness of the tomatoes.
Pro Tips For Making Green Tomato Jam Canning
- CUT TOMATOES EVENLY: Grab a sharp knife and slice those green tomatoes into ¼-inch rounds—no thicker, no thinner. I learned this the hard way when my jam had uneven chunks; thicker slices stay tough, and thinner ones turn to mush faster. A mandoline makes this faster, but a steady hand works too.
- SALT BEFORE SIMMERING: Sprinkle the canning salt into the pot before adding vinegar or lemon juice—this dissolves completely and seasons the jam from the start. I used to add it later and ended up with clumpy, uneven flavor. Stir it in early, even if it looks odd at first.
- STIR CONSTANTLY FIRST 15 MINUTES: Don’t walk away while the sugar and tomatoes hit the boil. Stir every 2-3 minutes for the first 15 minutes to prevent scorching—this jam gets sticky fast. After that, it’s smooth sailing, but those first minutes are critical. (Yes, even if you’re impatient like me.)
- SKIP THE BOILING VINEGAR: Add the white vinegar after the jam has thickened, not at the start. Boiling it too early makes the acidity sharp and overpowering. Wait until the mixture’s reduced by half, then stir in the vinegar and lemon juice—it balances the sweetness perfectly. Trust the process.
Storing and reheating this green tomato jam canning
Pantry Storage Basics
Store your sealed jars of green tomato jam in a cool, dark pantry—ideal temperatures are between 50-70°F. The acidity from vinegar and lemon juice preserves the jam for up to 12 months, but I recommend using it within 9 months for peak flavor.
Avoid refrigeration unless you’ve opened the jar, as the texture may thicken excessively. 🥫
Label each jar with the date using a permanent marker—this helps track freshness. I like to add a simple note like “Green Tomato Jam – [Month/Year]” to keep things organized. Store jars upright to prevent air bubbles from forming, which could compromise the seal over time.
Opening and Refrigeration
Once opened, transfer any unused jam to an airtight container and refrigerate immediately. Consume within 3 months for best quality, as the texture may change slightly over time.
I use glass containers with silicone seals—they preserve flavor better than plastic. Always check for mold or off smells before using any refrigerated jam.
If you’re unsure about a jar’s freshness, perform a simple sniff test: open the jar and smell the contents. If it smells sour, fermented, or off, discard it immediately. Properly sealed jars should have a bright, tangy aroma that’s unmistakably green tomato.
Reheating for Smooth Texture
If your jam thickens too much after opening, gently reheat it in a small saucepan over low heat. Add 1-2 tablespoons of water and stir constantly until smooth—this prevents burning.
I find that 5-7 minutes of gentle heating restores the perfect spreadable consistency. Avoid microwaving, as it can create hot spots and alter the texture.
For a quick fix, place the jar in a bowl of warm water for 10-15 minutes. The heat from the water will soften the jam without direct cooking. This method works well for small batches and preserves the jam’s natural shine.
Freezing Limitations
While green tomato jam can technically be frozen, I don’t recommend it—freezing disrupts the gel-like texture and can make the jam grainy. If you must freeze, portion it into ice cube trays or small containers, then transfer to a freezer bag.
Thaw in the refrigerator overnight before using, but expect a slightly altered consistency compared to fresh jam. 🧊
For best results, stick to pantry storage for unopened jars and refrigeration for opened ones. The natural pectin in green tomatoes works best when preserved through canning, not freezing. This method ensures your jam stays vibrant and delicious for months.
Nutrition facts
Frequently asked questions about green tomato preserves
Can I use overripe green tomatoes for this jam?
No, always select firm green tomatoes for the best texture and flavor. Overripe ones will turn mushy during cooking and make the jam too watery. Look for tomatoes that are still crisp with a bright green color—these will yield the perfect thick, glossy preserves.
Why does my jam turn out too runny?
Runny jam usually means it didn’t cook long enough or the sugar wasn’t fully dissolved. Cook the mixture uncovered for the full 45-60 minutes, stirring frequently, until it reaches a thick syrup consistency that coats the back of a spoon. If it’s still too thin, simmer uncovered for an additional 10-15 minutes to reduce it further.
How do I know if my canned jars are properly sealed?
After cooling for 12-24 hours, press down on the center of each lid. If it doesn’t pop up, the jar is sealed. You’ll also hear a satisfying ping sound as the vacuum forms. Unsealed jars should be refrigerated and used within 1 week. For extra security, check the seal by lifting the lid—if it resists, it’s properly sealed.
Can I adjust the sweetness level in this recipe?
Yes, but with caution—this recipe relies on the balance of sugar, vinegar, and lemon juice for safety and flavor. Start by reducing sugar by ½ cup increments, but never go below 3 cups total. Too little sugar can affect shelf stability. For extra tang, increase lemon juice by 1 tablespoon at a time, but don’t exceed ¾ cup total.
What are the best ways to use green tomato jam?
This tangy preserve shines on toasted bread, grilled cheese sandwiches, or as a glaze for roasted meats like pork or chicken. It also pairs beautifully with sharp cheeses like cheddar or goat cheese. For a sweet twist, spread it on warm biscuits or use it as a filling for thumbs. The bright acidity cuts through rich flavors perfectly!

- Mary Berry’s Boiled Fruit Cake Recipe: Moist Center and Spiced Crust Magic - November 5, 2026
- Atlantic Salmon Recipe: Honey-Dill Pan-Seared With Crispy Skin - November 5, 2026
- Blaze Pizza Copycat Dough Recipe: Chewy, Airy Crust That Mimics the Original - November 5, 2026