
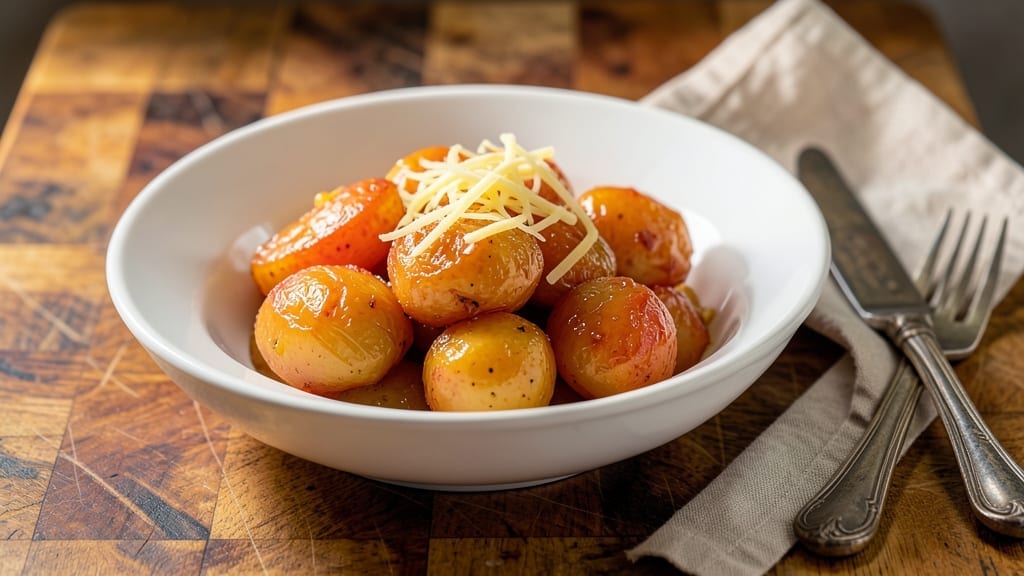
This vinegar-bright pickled potatoes recipe transforms humble spuds into crispy, tangy bites that elevate any meal—whether as a side, snack, or topping. Standing on a step stool in my grandmother’s kitchen in Sicily, I first learned how vinegar and spices could turn simple vegetables into something extraordinary.
The key? A precise balance of acidity and seasoning that keeps them crunchy and flavorful for days.
The process is simpler than it sounds: thinly sliced potatoes soak in a foolproof vinegar brine with garlic, dill, and mustard seeds, developing their signature tang and texture.
Unlike quick-pickle methods, this recipe includes a sterilization step to ensure safety and shelf life, making it perfect for meal prep or holiday sides. No fermentation required—just patience and a well-seasoned brine.
By the time they’re done, you’ll have crisp-tender potatoes with a vibrant, tangy bite that cuts through rich dishes like a knife. They’ll stay fresh in the fridge for weeks, ready to add a bright crunch to burgers, sandwiches, or even salads.
This is the kind of side that turns ordinary meals into something special—with minimal effort.
Once you try homemade pickled potatoes, store-bought versions will never compare. The secret lies in the precise brine ratio and the patience to let flavors develop. Let’s get started—your taste buds (and leftovers) will thank you.
Ingredients for pickled potatoes
The secret to perfect pickled potatoes lies in these twelve ingredients—simple but precise.
| Ingredient | Amount | Notes |
|---|---|---|
| Russet Potatoes 🥔 | 2 lbs | Thinly sliced, uniform thickness |
| White Vinegar 💧 | 1 ½ cups | Distilled preferred for clarity |
| Water 💧 | 1 ½ cups | Filtered for best flavor |
| Granulated Sugar 🍚 | ½ cup | Light brown preferred |
| Diamond Crystal Kosher Salt 🧂 | ¾ tsp | Adjust to taste |
| Garlic Cloves 🧄 | 4 cloves | Thinly sliced, not minced |
| Fresh Dill 🌿 | ¼ cup | Chopped, stems removed |
| Yellow Mustard Seeds 🌶️ | 1 tsp | Whole, not ground |
| Black Peppercorns 🌶️ | ½ tsp | Crushed lightly |
| Bay Leaves 🍃 | 2 whole | Fresh preferred |
| Red Wine Vinegar 🍷 | ½ cup | For depth of flavor |
| Extra-Virgin Olive Oil 🫒 | 2 tbsp | For final drizzle |
The potatoes are non-negotiable: Russet gives you that ideal crisp-tender texture. Grab the pre-washed variety at Whole Foods or your local market—they’re already peeled and ready to slice. If you’re slicing by hand, use a mandoline for even thickness (the $20 OXO Good Grips model is a game-changer). Thin slices = faster pickling. For the vinegar, white vinegar is the workhorse—it’s sharp and clear, but if you’ve got apple cider vinegar, swap it in for a subtler tang. The sugar? Light brown adds depth, but white works too.
No fresh dill? Dried dill at half the amount is fine, but you’ll miss that bright herbal note. Mustard seeds can be skipped if you’re avoiding crunch, but they’re worth it—they add a tiny pop. For the garlic, peel and slice thinly (don’t mince—you want visible flecks). The bay leaves? Fresh is best, but dried works if that’s what you’ve got. Short on red wine vinegar? Balsamic vinegar at half the amount adds a sweet contrast. And that olive oil? Don’t skip it—it coats the potatoes and keeps them crispy for days.
These keep for 3-4 weeks in the fridge, sealed in their brine. Portion into glass jars with airtight lids—Ball jars are perfect for this. The flavor actually improves after a few days, so make extra. Refrigerate after opening, and they’ll stay crunchy for up to a month. Need to store longer? Freeze the brine (without potatoes) for up to 6 months—just reheat and add fresh potatoes when ready.
Why You’ll Love This Recipe
- No-Cook Prep: I swear, the hardest part is peeling those Russets—then it’s just slicing and soaking. No boiling, no frying, no waiting for the oven. Just let them marinate while you handle the rest of dinner.
- Tangy Crunch Magic: That vinegar-sugar brine? It turns starchy potatoes into something bright, crunchy, and just slightly sweet—like a pickle’s cooler cousin. The salt cuts through the richness of anything you pair it with.
- Weeknight Workhorse: Serve them cold with fried chicken, toss them into a grain bowl, or pile them alongside burgers. Honestly, I’ve eaten them straight from the jar on lazy mornings, and they’re still spot-on.
- Budget-Friendly Staple: Potatoes are cheap, vinegar lasts forever, and you’ll use up every last slice before they go bad. Between us, I’ve stretched a jar for a full week of lunches—no waste, all flavor.
Step-by-step instructions for vinegar-bright pickled potatoes
Here’s how to transform simple russet potatoes into vibrant, tangy pickles with perfect texture.
Prepare the Potatoes for Perfect Slices
Begin by thoroughly washing the 2 lbs of russet potatoes under cold water to remove any dirt from the skin. Using a sharp mandoline or knife set to ⅛-inch thickness, slice the potatoes as uniformly as possible. The thinner and more even the slices, the more consistent the pickling process will be.
As you slice, arrange the potato pieces in a single layer on a clean kitchen towel. This prevents them from stacking and crushing, which would create uneven cooking later. I like to fan them out on a baking sheet for even drying—this step is crucial for achieving that satisfying crunch in your finished pickles.
Create the Flavorful Brine Mixture
In a medium saucepan, combine the 1.5 cups of white vinegar, 1.5 cups of water, 0.5 cup of granulated sugar, and 0.75 tsp of diamond crystal kosher salt. Bring the mixture to a gentle boil over medium heat, stirring until the sugar and salt completely dissolve. Here’s the thing—don’t walk away while it heats. Sugar can burn easily, and you want a clear, flavorful liquid, not a caramelized mess.
Once boiling, immediately reduce heat to maintain a simmer for exactly 3 minutes. This brief cooking time ensures the sugar fully integrates without altering the vinegar’s sharp brightness. Remove from heat and let the brine cool to room temperature. I find it helpful to place the pan in an ice bath for faster cooling—this prevents the potatoes from cooking prematurely when added later.
Add Aromatics and Prepare the Jar
While the brine cools, prepare your storage vessel. A clean, sterilized quart-sized mason jar works perfectly for this recipe. Add the 4 cloves of thinly sliced garlic, 0.25 cup of chopped fresh dill, 1 tsp of whole yellow mustard seeds, 0.5 tsp of lightly crushed black peppercorns, and 2 whole bay leaves to the bottom. These aromatics will infuse the potatoes with complex layers of flavor as they pickle.
Pour the cooled brine into the jar, leaving about 1 inch of headspace at the top. This space allows for proper heat distribution during processing and prevents the liquid from overflowing. Gently add the potato slices, packing them snugly but not too tightly—you want them to maintain their shape while allowing the brine to fully penetrate.
Incorporate the Red Wine Vinegar and Seal
After the potatoes are submerged in the jar, carefully pour the 0.5 cup of red wine vinegar over the top. This additional vinegar adds depth and complexity to the flavor profile, balancing the sharpness of the white vinegar base. The red wine vinegar should mix naturally with the existing brine as you gently stir the potatoes with a clean spoon.
Leave about ½ inch of headspace at the top of the jar. This prevents the liquid from expanding and causing a mess during storage. Seal the jar tightly with the lid and give it a final gentle shake to ensure all the potatoes are coated evenly with the flavorful liquid. Real talk: this is where the magic happens—the proper ratio of vinegar to liquid creates that perfect tangy crunch we’re after.
Process and Store for Maximum Flavor
Place the sealed jar in the refrigerator and let it pickle for at least 24 hours before tasting. I’ve found that the flavor develops most beautifully after 3-5 days of refrigeration. The acid in the vinegar will gradually break down the potato cell walls, creating that signature crisp-tender texture while infusing them with all the aromatic flavors.
After the initial 24 hours, check the jar daily. The potatoes should be fully submerged in the brine at all times—if they rise to the surface, gently press them down with a clean spoon. Once the pickles reach your desired level of tang and crunch (usually around day 3), they’re ready to enjoy. They’ll keep in the refrigerator for up to 3 weeks, with flavor continuing to deepen over time.
Pro Tips For Making Pickled Potatoes
- COOL THE POTATOES FIRST: I learned this the hard way—dumping hot potatoes into cold brine makes them waterlogged and dull. Let them sit at room temp for 10 minutes after boiling, then shock them in ice water for 2 minutes. This keeps them firm and ready to soak up the vinegar flavor instead of turning mushy.
- USE 1:1 VINEGAR TO WATER: Equal parts white vinegar and water isn’t just a ratio—it’s the balance that keeps your pickles tangy without overpowering. Too much vinegar? They’ll taste harsh. Too little? The potatoes won’t pickle properly. Stick to the 1:1 split, and you’ll get that perfect bright, balanced flavor every time.
- SALT THE BRINE HEAVY: Skip the measuring spoon—Diamond Crystal kosher salt needs a full 1½ tablespoons per quart of liquid. I used to eyeball it, and the results were lackluster. This much salt isn’t excessive; it’s what makes the potatoes crisp and the brine actually work its magic.
- STORE IN THE FRIDGE IMMEDIATELY: Leaving pickled potatoes at room temp for more than 2 hours is an open invitation to bacterial growth. Even if they look fine, the texture and safety suffer. Pop them in the fridge ASAP—your future self (and your stomach) will thank you.
Creative variations of this recipe
Global-Inspired Twists
Swap the classic dill for Thai basil and add 1 tbsp fish sauce to the brine for an Asian-inspired version. The umami depth pairs beautifully with the vinegar’s sharpness—perfect for topping Vietnamese sandwiches or noodle bowls.
I first tried this after a trip to Hanoi and was hooked by how the flavors transformed the humble potato. 🌶️
Smoky Chipotle Heat
Infuse the brine with 2 chipotle peppers in adobo sauce and 1 tsp smoked paprika for a smoky, spicy kick. This works wonderfully with Mexican street tacos or grilled meats. For extra depth, add 1 tsp ground cumin to the jar before sealing.
The heat builds gradually over 5-7 days of pickling, making it ideal for those who love bold flavors.
Herb-Forward Mediterranean
Replace the dill with 1 tbsp each of chopped oregano and thyme, plus 1 tsp dried rosemary. Add 2 tbsp olive oil to the jar before sealing for a richer texture. This variation shines in Greek salads or as a topping for grilled lamb.
The herbs soften slightly during pickling but retain their aromatic punch—just like the dishes my Nonna used to make in Sicily. ✨
Sweet and Spicy Fusion
Add 2 tbsp honey to the brine and ½ tsp cayenne pepper for a sweet-spicy balance. This works amazingly with pulled pork sandwiches or as a topping for fried chicken.
The honey caramelizes slightly during pickling, creating a glossy finish. I like to add 1 tsp ground ginger for warmth—it’s a crowd-pleaser at summer barbecues.
Garlic-Infused Powerhouse
Double the garlic to 8 cloves and add 1 tsp black pepper for a bold, garlicky version. This is my go-to for hearty soups or as a topping for grilled steaks.
The extra garlic intensifies during pickling, creating a punch that pairs well with rich, fatty dishes. For an extra layer, add 1 tsp onion powder to the jar before sealing.
Citrus Zest Brightener
Add zest from 1 lemon and 1 orange to the brine for a citrusy twist. This variation works beautifully in seafood dishes or as a refreshing topping for grilled shrimp. The citrus zest brightens the vinegar’s sharpness, making it feel lighter and more vibrant.
I often add ½ tsp coriander seeds for a Middle Eastern touch—it’s a game-changer for summer meals. 💫
Nutrition facts
Frequently asked questions
Why do my pickled potatoes turn mushy instead of staying crisp?
Overcrowding or uneven slices are the main culprits. Thin, uniform slices (⅛-inch) and proper brine coverage are key—never pack potatoes too tightly in the jar. Also, ensure your vinegar ratio (1:1 with water) stays sharp. If they still soften, try adding 1 extra tablespoon of sugar to the brine for firmer texture.
Can I use sweet potatoes instead of russets?
Sweet potatoes work beautifully—they develop a caramelized edge and deeper flavor. Reduce the sugar in the brine to ¼ cup (their natural sweetness balances the acidity) and add ½ tsp cinnamon for warmth. The pickling time may need 1-2 extra days for full tenderness.
How do I know when the pickles are ready to eat?
Taste after 24 hours—they’ll be tangy but still firm. For peak flavor, wait 3-5 days in the fridge. The potatoes should be crisp-tender with vibrant color. If they float, press them down with a clean spoon (they’ll sink as they absorb brine).
Can I make this recipe without vinegar?
Vinegar is essential for safe preservation, but you can experiment with lemon juice + salt for a milder version. Use 2 cups lemon juice + 1 tbsp salt instead of vinegar, but these won’t last beyond 5 days in the fridge. For longer shelf life, stick with vinegar’s acidity.
What’s the best way to use up extra pickled potatoes?
Drain and toss with mayonnaise + smoked paprika for a quick potato salad, or chop finely for tacos. They’re also amazing in sandwiches (Reuben-style!), grain bowls, or even as a topping for burgers. Store extras in their brine for up to 3 weeks—the flavor only gets better.

- Mary Berry’s Boiled Fruit Cake Recipe: Moist Center and Spiced Crust Magic - November 5, 2026
- Atlantic Salmon Recipe: Honey-Dill Pan-Seared With Crispy Skin - November 5, 2026
- Blaze Pizza Copycat Dough Recipe: Chewy, Airy Crust That Mimics the Original - November 5, 2026