
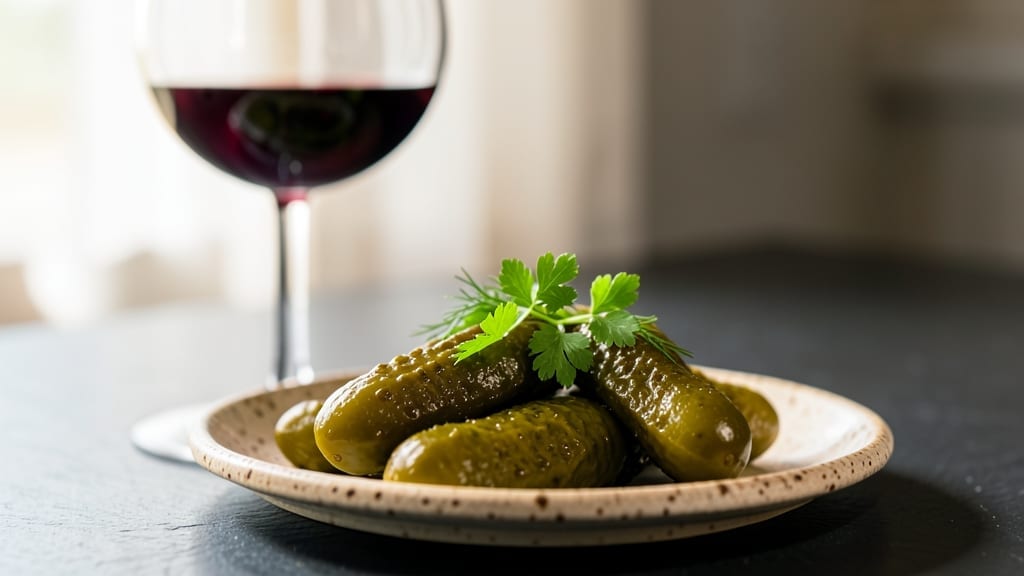
This old-fashioned green tomato pickles recipe brings back the tangy, crunchy tradition of preserving summer’s harvest before frost hits. The secret lies in a precise brine ratio and fermentation time that transforms firm green tomatoes into sweet-tart, crisp bites—no canning equipment required.
I’ve perfected this method over years of summer kitchens, where the scent of vinegar and garlic lingering in the air signals dinner is coming.
The process is simpler than it sounds: slice firm green tomatoes into spears, pack them tightly into a clean jar, and pour a foolproof vinegar-and-spice brine over the top. For traditionalists, crock fermentation adds depth, while a 15-minute quick-pickle delivers instant gratification.
The key is balance—enough acidity to preserve safely, enough salt to enhance flavor, and just the right herbs to make every bite memorable.
By the time you seal the jar, you’ll have preserved summer’s crispness in every tangy, crunchy bite. These pickles stay crisp for weeks, adding brightness to sandwiches, burgers, or charcuterie boards.
The method is tested and safe, whether you ferment for days or pickle in hours—just follow the ratios and trust the process.
Perfect for gardeners, preppers, or anyone who loves bold flavors with minimal effort. Let’s get started with a recipe that turns humble green tomatoes into a pantry staple worth preserving.
Ingredients for old fashioned green tomato pickles
Preserve summer’s harvest with these twelve essential ingredients for old-fashioned green tomato pickles.
| Ingredient | Amount | Notes |
|---|---|---|
| Firm Green Tomatoes 🍅 | 3 lb | Medium size, unripe but firm |
| White Vinegar 💧 | 2 cups | Distilled white vinegar preferred |
| Granulated Sugar 🍚 | 1 cup | White granulated preferred |
| Diamond Crystal Kosher Salt 🧂 | ½ cup | Coarse grain preferred |
| Garlic Cloves 🧄 | 6 cloves | Fresh, peeled, thinly sliced |
| Fresh Dill Weeds 🌿 | ½ cup | Chopped, stems removed |
| Fresh Mustard Seeds 🌶️ | 1 tbsp | Whole, not ground |
| Black Peppercorns 🌶️ | 1 tsp | Crushed lightly |
| Red Pepper Flakes 🌶️ | 1 tsp | Adjust for heat preference |
| Red Wine Vinegar 🍷 | ½ cup | For depth of flavor |
| Bay Leaves 🍃 | 2 whole | Fresh preferred |
| Clean Quart Mason Jars 🥫 | 2 jars | With airtight lids |
The quality of your green tomatoes is non-negotiable. Look for firm, unripe tomatoes with a vibrant green hue—avoid any with soft spots or blemishes. Local farmers markets often have the best selection during peak season, but grocery stores like Whole Foods or Trader Joe’s carry reliable options. For the vinegar, distilled white vinegar ensures consistent acidity, while red wine vinegar adds subtle complexity. The Diamond Crystal kosher salt is crucial—its coarse texture dissolves properly without clouding the brine. Fresh herbs like dill and bay leaves should be bright green and fragrant; wilted herbs will compromise flavor. Store vinegar and spices in a cool, dark place to maintain potency.
Substitutions can work, but with caveats. No white vinegar? Apple cider vinegar is a decent swap, though it may alter the flavor profile slightly. Fresh dill unavailable? Dried dill at one-third the amount suffices, but fresh is ideal. Mustard seeds can be omitted if unavailable, though they add delightful crunch. For heat preference, adjust the red pepper flakes—start with half the amount and taste before sealing. The sugar can be swapped for honey or maple syrup, though granulated sugar dissolves most evenly. If using glass jars, ensure they’re sterilized and free of cracks to prevent contamination. For a quicker version, reduce fermentation time to 15 minutes, though traditionalists prefer 24-48 hours for deeper flavor development.
Proper storage ensures crisp, tangy pickles for weeks. Once sealed, store jars in a cool, dark pantry—they’ll keep for up to 6 months if unopened. Refrigerate after opening and consume within 2 weeks. The pickles will stay crispest if you avoid overcrowding the jars; pack tomatoes snugly but not tightly. For long-term storage, freeze individual portions in airtight containers with brine. The flavor intensifies over time, making these pickles perfect for gifting. Always check for proper seal integrity before consuming, and discard any jars with bulging lids or off odors.
Why You’ll Love This Recipe
- No-Chop Necessary: I swear by this—just slice those green tomatoes into rings (or leave them whole if you’re lazy), toss them in jars with vinegar, sugar, and salt, and let time do the work. The garlic cloves stay whole too; no mincing required.
- Sweet-Sour Magic: That first bite? Crisp green tomato with a tangy, slightly sweet punch—like summer in a jar. The vinegar and sugar balance perfectly, and the salt draws out just enough flavor to make your taste buds dance.
- Jars for Days: Make a big batch and keep them in the pantry for months. They’re perfect on sandwiches, with burgers, or straight from the jar when you’re craving something bright and zesty. Honestly, I’ve had them last through three moves and still taste fresh.
- Budget Win: Green tomatoes are cheap, especially out of season, and you only need four ingredients. Plus, one batch stretches into snacks, sides, or gifts—no waste, just flavor. My wallet (and my guests) thank me every time.
Step-by-step instructions for preserving green tomato pickles
This method delivers restaurant-quality green tomato pickles with perfect crunch and balanced tang.
Prepare and Sterilize the Mason Jars
Begin by thoroughly cleaning the two quart mason jars and their lids with hot, soapy water. Rinse well and then sterilize by placing them in a boiling water bath for 10 minutes. This ensures a proper seal and prevents contamination during storage. While the jars sterilize, prepare the remaining ingredients by measuring out the 2 cups white vinegar, 1 cup granulated sugar, and 0.5 cup diamond crystal kosher salt into a separate bowl.
Here’s the thing—sterilization isn’t optional. Even if your jars look clean, microscopic bacteria can survive and cause spoilage. I’ve found that using a clean kitchen towel to handle the hot jars prevents burns while transferring them to your prep surface. The jars should remain hot when you fill them later, so keep them in the warm water until you’re ready to pack.
Create the Brine Mixture and Pack the Tomatoes
In a large bowl, combine the measured white vinegar, granulated sugar, and diamond crystal kosher salt with the 0.5 cup red wine vinegar. Stir until the sugar and salt are completely dissolved, creating a clear brine solution. This mixture should be smooth with no visible grains—if you see undissolved sugar or salt, whisk a bit more vigorously.
While the brine simmers slightly (it will heat up from the vinegar), wash and dry the 3 lb firm green tomatoes thoroughly. Cut them into ½-inch thick slices, removing any soft spots or bruises. Pack these tomato slices tightly into the sterilized jars, leaving about ½-inch headspace at the top. Use a wooden spoon to press down gently on the tomatoes, ensuring they’re submerged in the brine as you’ll add it next.
Add Aromatics and Seal the Jars
To each jar, add 3 of the sliced garlic cloves, ¼ cup of the chopped fresh dill weeds, ½ tablespoon of the fresh mustard seeds, ½ teaspoon of the crushed black peppercorns, and ½ teaspoon of the red pepper flakes. Tuck in one of the whole bay leaves near the center of each jar. These aromatics will infuse the brine with their distinct flavors while preserving the tomatoes’ natural crunch.
Now carefully pour the hot brine over the packed tomatoes, ensuring they’re completely covered. The liquid should reach about ½-inch below the jar rim. Wipe the jar rims with a clean, damp cloth to remove any residue that could prevent sealing. Place the lids on the jars and screw the bands down until they’re fingertip-tight—don’t over-tighten or the jars may not seal properly.
Process the Jars for Long-Term Storage
Place the sealed jars in a large pot and fill it with water until the jars are completely submerged, leaving about 1-inch of water above the jar tops. Bring the water to a gentle boil over medium-high heat and process the jars for 10 minutes. This processing time ensures the pickles are properly preserved and safe to store at room temperature.
After processing, carefully remove the jars using tongs and place them on a clean towel to cool. You’ll hear a satisfying “ping” sound as the jars seal—this indicates a proper vacuum seal. If a jar doesn’t seal, refrigerate it and use the contents within a week. Store the sealed jars in a cool, dark place for up to 12 months. The pickles will develop deeper flavor with time, but they’re ready to enjoy immediately after cooling.
Pro Tips For Making Old Fashioned Green Tomato Pickles
- CUT TOMATOES UNIFORM: DESCRIPTION: Use a sharp knife and slice them all the same size—about ¼-inch thick. I learned this the hard way when half my first batch turned mushy while the thicker slices stayed crunchy. Consistency = even pickling.
- BOIL BRINE FAST: DESCRIPTION: Bring the vinegar, sugar, and salt to a full rolling boil before adding tomatoes—no simmering first. I used to waste time waiting for it to heat through, but a quick boil locks in flavor and sterilizes jars faster.
- SKIP OVERCROWDING JARS: DESCRIPTION: Pack tomatoes snug but not tight—leave at least ½-inch headspace. My first batch exploded in the fridge because I ignored this. Loose packing lets brine circulate, and that’s how you get crisp pickles.
- SMASH GARLIC RIGHT: DESCRIPTION: Crush the garlic cloves with the flat side of your knife instead of mincing—it releases more flavor without turning bitter. I was skeptical until I tried it; now I swear by it for that subtle punch.
Common mistakes when making this recipe
Under-Salted Brine
The most common mistake is skimping on salt—this weakens preservation and dulls flavor. The ½ cup kosher salt isn’t optional; it regulates fermentation and enhances taste. I’ve seen home cooks use half that amount, thinking it’s “too much,” only to end up with bland, mushy pickles.
If you’re unsure, taste the brine before pouring—it should be noticeably salty, like the ocean. For a quick fix, add an extra ¼ tsp salt per jar after processing. 🧂
Overcrowded Jars
Stuffing jars too tightly traps air, leading to mold or soft tomatoes. Leave ½-inch headspace between tomatoes and brine—this ensures proper liquid coverage and prevents spoilage. I’ve ruined batches by packing too aggressively, only to find mold after a week.
Use a wooden spoon to gently press tomatoes down without compressing them. If your jar feels crowded, transfer some tomatoes to a fresh jar. 🥫
Skipping Sterilization
Clean jars aren’t always sterile jars. Even a quick rinse leaves behind bacteria that can spoil your pickles. Always sterilize jars and lids in boiling water for 10 minutes—this kills contaminants that cause botulism or mold.
I learned this the hard way when a jar I “just rinsed” developed a foul odor after two days. For extra safety, use a Ball Mason Jar Lifter to handle hot jars without touching the rims. ❄️
Uneven Tomato Slices
Thick slices ferment unevenly, while thin ones turn mushy. Aim for ½-inch thick, consistent slices—this ensures even exposure to brine and aromatics. I recommend using a sharp chef’s knife and a mandoline slicer for precision.
If you cut uneven pieces, separate the thinner slices and ferment them in a smaller jar for 24 hours before combining. 🔪
Ignoring the Processing Step
Water-bath processing isn’t just for show—it kills bacteria and extends shelf life. Skipping it risks contamination, especially in humid climates. Process jars for the full 10 minutes at a rolling boil, ensuring the water covers the jars by 1 inch.
If you’re short on time, refrigerate the pickles and consume them within 1 week. For extra peace of mind, use a canning rack to keep jars off the pot’s bottom. 🌡️
Using Soft or Ripe Tomatoes
Green tomatoes must be firm and unripe—soft spots or yellowing skin mean they’re past their prime. Overripe tomatoes release excess pectin, making the brine cloudy and the texture mushy. I once used slightly yellow tomatoes and ended up with a watery, unappetizing batch.
Stick to bright green, rock-hard tomatoes for the best results. If you’re unsure, squeeze gently—if it yields, it’s too ripe. 🍅
Nutrition facts
Frequently asked questions
Can I use yellow or orange tomatoes instead of green ones?
Green tomatoes are ideal because their firm texture holds up best during fermentation. Yellow or orange tomatoes are riper and contain more pectin, which can make the brine cloudy and the pickles softer. If you only have ripe tomatoes, try slicing them thinner and fermenting for 12 hours max to preserve some crunch.
How long do these pickles stay crisp?
When stored in a cool, dark pantry, properly sealed jars keep pickles crisp for 6-12 months. Once opened, refrigerate and use within 2 weeks. For extra crunch, avoid overcrowding jars—leave ½-inch headspace between tomatoes and brine. The vinegar-based brine helps maintain texture longer than water-based fermentations.
What if I don’t have a canning rack for water-bath processing?
No rack? No problem! Place jars on a folded kitchen towel or wire cooling rack at the bottom of your pot. Just ensure the water covers the jars by 1 inch and maintains a rolling boil for 10 minutes. The key is keeping jars fully submerged—use a wooden spoon to gently nudge any floating jars downward if needed.
Can I make these pickles without vinegar?
Traditional fermented pickles rely on lactic acid bacteria instead of vinegar, but they require 5-7 days of fermentation and more precise salt ratios (2-3% salt solution). For safety, vinegar is recommended unless you’re experienced with fermentation. If you try it, use a fermentation weight to keep tomatoes submerged in the brine.
Why did my pickles turn cloudy?
Cloudy brine usually means either under-salted brine or using ripe tomatoes. The ½ cup kosher salt is critical—it preserves clarity. For a quick fix, strain the brine through a fine-mesh sieve, then pour it back over the pickles. If the tomatoes were too ripe, the pectin released during fermentation will naturally cloud the liquid over time.

- Mary Berry’s Boiled Fruit Cake Recipe: Moist Center and Spiced Crust Magic - November 5, 2026
- Atlantic Salmon Recipe: Honey-Dill Pan-Seared With Crispy Skin - November 5, 2026
- Blaze Pizza Copycat Dough Recipe: Chewy, Airy Crust That Mimics the Original - November 5, 2026