
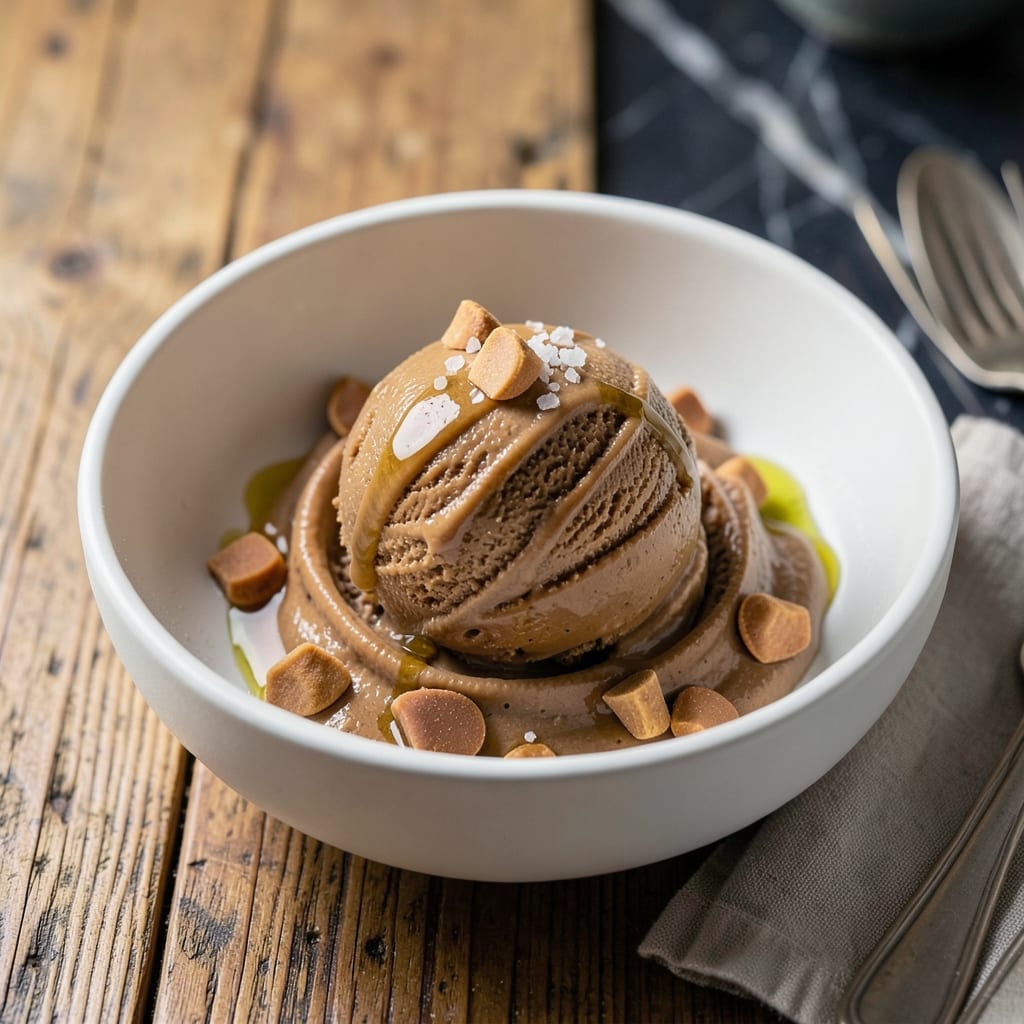
This no-egg peanut butter ice cream delivers creamy richness without dairy or complicated methods. I developed this recipe to satisfy ice cream cravings with minimal effort and maximum flavor.
The base uses full-fat coconut milk and natural peanut butter for a velvety texture that freezes beautifully. Sweetened with maple syrup, it achieves the perfect balance of sweet and nutty without overpowering.
What emerges from the freezer is a scoopable, creamy treat with pure peanut butter flavor. The texture stays smooth for days, unlike some homemade versions that turn icy.
No churning required—just mix, freeze, and enjoy. This recipe proves you can have decadent ice cream without eggs or dairy.
Ingredients for Peanut Butter Ice Cream Recipe No Eggs
Eight simple ingredients create this rich, creamy frozen treat with no dairy or eggs.
| Ingredient | Amount | Notes |
|---|---|---|
| Full-Fat Coconut Milk 🥥 | 2 cups | Canned, well-shaken before using |
| Natural Peanut Butter 🥜 | 1 cup | Unsweetened, creamy variety |
| Maple Syrup 🍁 | ½ cup | Pure, not pancake syrup |
| Vanilla Extract 🌿 | 1 tsp | Pure vanilla, not imitation |
| Sea Salt 🧂 | ¼ tsp | Fine grain for even distribution |
| Peanut Butter Chips 🍫 | ½ cup | Optional, for extra texture |
| Chopped Roasted Peanuts 🥜 | ¼ cup | Unsalted, for garnish |
| Coconut Oil 🫒 | 1 tbsp | Melted, helps with smoothness |
The coconut milk is the MVP here. Full-fat from a can (not the carton stuff) gives you that ultra-creamy texture. I grab Thai Kitchen or Native Forest brands—they’re reliably thick and rich. Natural peanut butter with just peanuts and salt works best; Jif Natural or Smucker’s Natural are solid picks. Avoid the regular stuff with added oils and sugars, which can throw off the flavor balance.
No maple syrup? Agave nectar or date syrup at a 1:1 ratio works fine. If you’re out of peanut butter chips, chopped dark chocolate adds a nice contrast. For a smoother finish, skip the peanuts as garnish. The vanilla extract is worth the splurge—pure vanilla from Madagascar gives the best depth. And if you’re watching sugar, you can cut the maple syrup by a quarter without sacrificing too much.
This keeps beautifully for up to 2 weeks in an airtight container. Freeze it flat against the bottom of the container first—makes scooping easier later. Thaws enough to scoop after about 5 minutes at room temp, but don’t leave it out too long or it’ll get soupy.
Why You’ll Love This Recipe
- No Churn Needed: I just blend, freeze, and it’s ready—no fancy equipment, no eggs, no stress.
- Creamy PB Heaven: That rich peanut butter swirl with coconut milk is honestly the best bite in my freezer.
- Dietary Hero: Vegan friends, gluten-free cousins—everyone digs in without hesitation.
- Freezer Staple: I always keep a batch on hand because it lasts and satisfies any late-night craving.
Step-by-Step Instructions for Peanut Butter Ice Cream
This method delivers ultra-creamy frozen dessert with minimal effort and maximum flavor.
Step 1: Blend the Creamy Base
In a blender, combine the 2 cups Full-Fat Coconut Milk, 1 cup Natural Peanut Butter, 0.5 cup Maple Syrup, 1 tsp Vanilla Extract, and 0.25 tsp Sea Salt. I always start with the coconut milk first—it helps the other ingredients blend smoothly.
Blend on high speed for 1-2 minutes until the mixture is completely smooth and creamy. Scrape down the sides as needed—you want no visible peanut butter streaks. The mixture should look like thick, pourable caramel. This is your base, and it needs to be silky smooth for that perfect creamy texture.
Step 2: Incorporate the Coconut Oil
With the blender still running on low speed, slowly drizzle in the 1 tbsp Coconut Oil. I melt mine first if it’s solid—this ensures it incorporates evenly without leaving little oil globules in your ice cream.
The coconut oil adds richness and helps prevent ice crystals, giving you that ultra-smooth finish. Blend for another 30 seconds after adding it to make sure it’s fully emulsified. You’ll notice the mixture becomes even glossier—that’s how you know it’s ready.
Step 3: Chill Thoroughly for Best Texture
Pour the blended mixture into a shallow, freezer-safe container. I like using a metal loaf pan because it conducts cold well, helping the ice cream freeze evenly. Cover with plastic wrap pressed directly against the surface—this prevents ice crystals from forming on top.
Refrigerate for 4-6 hours or until completely chilled. This step is crucial—if you skip it and go straight to freezing, you’ll end up with icy patches instead of creamy perfection. The mixture should be as cold as your fridge can make it before the next step.
Step 4: Freeze and Add Mix-Ins
After chilling, pour the mixture into your ice cream maker and churn according to the manufacturer’s instructions, usually 20-25 minutes. You’ll know it’s ready when it looks like soft-serve ice cream and holds its shape when scooped.
During the last 2 minutes of churning, add the 0.5 cup Peanut Butter Chips. If you’re not using an ice cream maker, pour the chilled mixture into a shallow container, freeze for 1 hour, then stir vigorously with a fork every 30 minutes for 3-4 hours until frozen, adding the chips during the final stir.
Step 5: Garnish and Serve
Transfer the churned ice cream to a lidded container. Here’s the thing—I like to press plastic wrap directly against the surface again before sealing the lid. This extra step really helps maintain that creamy texture.
Freeze for at least 2 hours to firm up completely. When ready to serve, let it sit at room temperature for 5-10 minutes for easier scooping. Garnish with the 0.25 cup Chopped Roasted Peanuts for a satisfying crunch contrast. Each bite should be rich, smooth, and packed with peanut butter flavor.
Pro Tips For Making Peanut Butter Ice Cream Recipe No Eggs
- Chill the Coconut Milk: Pop your can of full-fat coconut milk in the fridge overnight—I learned this the hard way after my first batch turned out soupy instead of creamy.
- Warm the Peanut Butter: Microwave the natural peanut butter for 20-30 seconds to soften it, so it blends smoothly into the coconut milk without leaving stubborn lumps.
- Skip the Low-Fat Swap: Full-fat coconut milk is non-negotiable here; the lighter versions just won’t give you that rich, scoopable texture.
- Add Salt Last: Taste the mixture before adding sea salt, then adjust—peanut butter and maple syrup can vary wildly in saltiness, and you don’t want to overdo it.
Common Mistakes When Making This Dish
Skipping the Chill
Never skip chilling the base mixture for 4-6 hours before freezing. I learned this the hard way—rushing straight to freezing creates ice crystals that ruin the creamy texture you’re after. The mixture needs to be as cold as your fridge can make it.
Overmixing the Base
Blend just until smooth—about 1-2 minutes on high. Overmixing incorporates too much air, which leads to a fluffy, icy texture instead of that dense, creamy consistency. Stop as soon as you see no peanut butter streaks.
Using Low-Fat Coconut Milk
Always use full-fat canned coconut milk, not the carton version. The lower fat content in light coconut milk won’t give you that rich, velvety texture. I stick with Thai Kitchen or Native Forest for best results.
Skipping the Coconut Oil
That 1 tbsp coconut oil might seem small, but it’s crucial for preventing ice crystals. Melt it first if solid, then drizzle slowly while blending. This creates an emulsified base that freezes smoothly. 💡
Adding Mix-Ins Too Early
If using an ice cream maker, add the peanut butter chips only during the last 2 minutes of churning. Adding them earlier causes them to sink or clump. For no-churn methods, fold them in during the final stir.
Improper Storage
Press plastic wrap directly against the surface before sealing the container. This prevents ice crystals and freezer burn. I also freeze it flat at first for easier scooping later. Store for up to 2 weeks for best quality.
Nutrition Facts
Frequently Asked Questions
Can I make this without an ice cream maker?
Freeze the chilled mixture in a shallow container, stirring vigorously with a fork every 30 minutes for 3-4 hours. This breaks up ice crystals for a creamy result.
Why use full-fat coconut milk?
The high fat content prevents iciness and creates that ultra-creamy texture. Light or carton versions lack the richness needed for smooth results. Stick with canned full-fat for best quality.
Can I substitute the maple syrup?
Yes! Try agave nectar or date syrup at a 1:1 ratio. Honey works too, though it may add a distinct flavor. Adjust sweetness to taste after blending.
How long does it keep in the freezer?
Store in an airtight container with plastic wrap pressed to the surface. It stays creamy for up to 2 weeks. Let sit at room temp for 5-10 minutes before scooping.

- Potato Candy Recipe 1933: Vintage Peanut Butter Roll Delight - October 30, 2026
- Potato Chip Cookie Recipe With Pecans: Buttery Crunch Meets Nutty Richness - October 30, 2026
- Potato Patty Recipe No Egg: Crispy Edges Without the Binder - October 30, 2026