
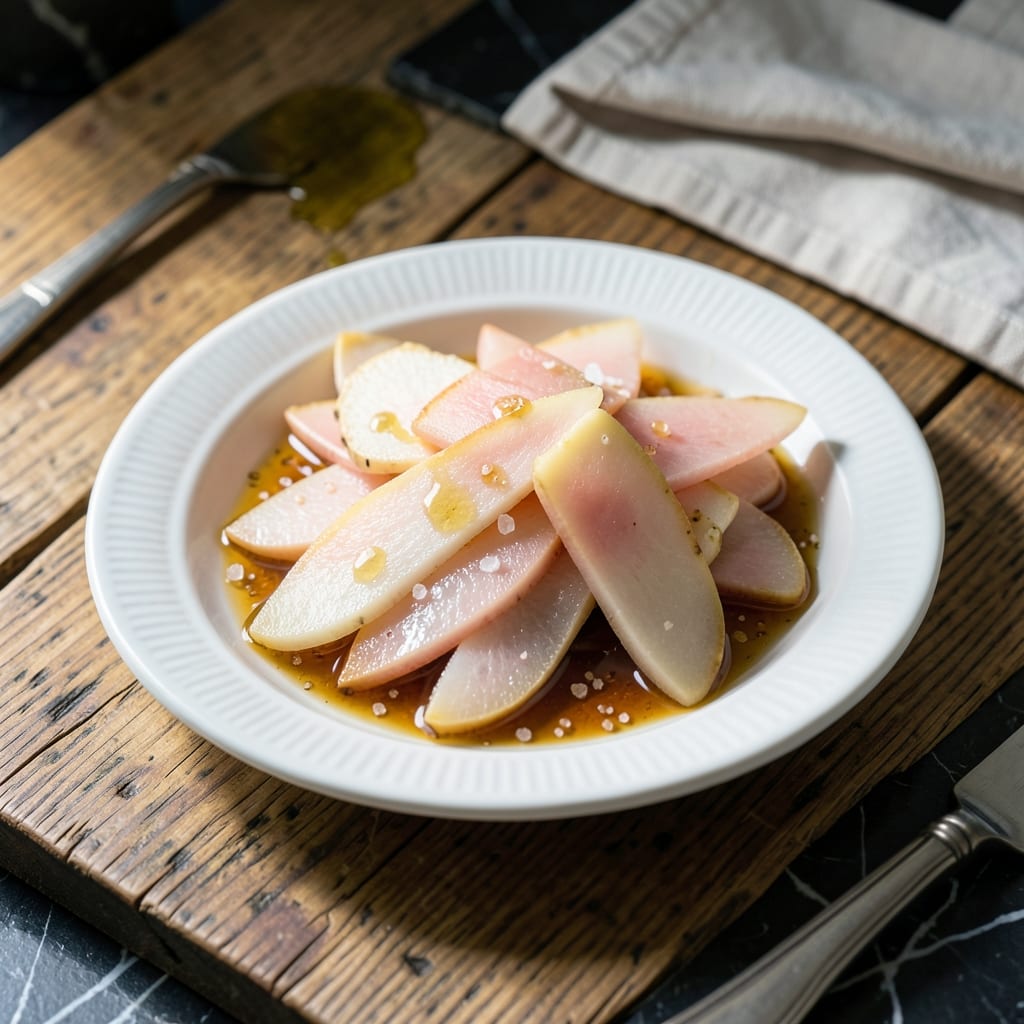
This tangy pickled ginger brings bright, zesty flavor to any meal with minimal effort.
Apple cider vinegar creates the perfect balance of sweet and sharp, transforming fresh ginger into a quick condiment that’s ready in under 24 hours. The thinly sliced ginger absorbs the vinegar’s complexity while maintaining its natural spice.
You’ll end up with tender, pink-hued ginger that adds a refreshing crunch to sushi, salads, or charcuterie boards. It keeps well in the fridge for weeks, making it a practical addition to your pantry staples.
No special equipment needed—just a jar, vinegar, and fresh ginger. Here’s how to make it.
Ingredients for Pickled Ginger Recipe Apple Cider Vinegar
Seven ingredients for a bright, tangy condiment that punches above its weight.
| Ingredient | Amount | Notes |
|---|---|---|
| Fresh Ginger Root 🌿 | 8 oz | Peeled, thinly sliced |
| Apple Cider Vinegar 🍏 | 1 cup | Raw, unfiltered preferred |
| Granulated Sugar 🍚 | 2 tbsp | Or substitute maple syrup |
| Sea Salt 🧂 | 1 tsp | Fine grain preferred |
| Water 💧 | ½ cup | Filtered for best taste |
| Rice Vinegar 🍚 | 2 tbsp | Optional for extra tang |
| Red Pepper Flakes 🌶️ | ¼ tsp | Adjust for heat preference |
Ginger quality matters here. Look for firm, smooth roots with a strong aroma—avoid any with wrinkled skin or soft spots. I grab mine from Asian markets or the produce section at Whole Foods. The apple cider vinegar should be raw and unfiltered (like Bragg) for the best depth of flavor. Organic isn’t necessary, but avoid anything with added preservatives.
No apple cider vinegar? White wine vinegar or rice vinegar work in a pinch (use the same amount). Swap sugar for maple syrup or agave—just reduce slightly to compensate for the thicker consistency. Want it spicier? Double the red pepper flakes. For a milder pickling liquid, cut the vinegar with a bit more water (but don’t exceed a 1:1 ratio).
This keeps beautifully in the fridge for 3-4 weeks. The ginger will turn a gorgeous pink over time. Store in a clean glass jar with a tight lid. It’s ready in 24 hours, but the flavor deepens after a few days.
Why You’ll Love This Recipe
- 5-Minute Prep: I slice the ginger, boil the brine, and it’s done—no fancy steps, just simple mixing.
- Zesty Sweet Kick: The apple cider vinegar gives it that tangy brightness, while the sugar balances it into this addictive little bite.
- Sushi Night Essential: Between us, I make a big batch so it’s ready for homemade sushi, rice bowls, or even just snacking straight from the jar.
- Fridge Staple: Honestly, it keeps for weeks, so I always have some on hand to jazz up salads or marinate proteins in a pinch.
Step-by-Step Instructions for Pickled Ginger
Here’s the method that turns fresh ginger into a tangy, spicy condiment in just hours.
Step 1: Prepare the Ginger for Pickling
Peel the 8 oz Fresh Ginger Root using a vegetable peeler or the edge of a spoon, which works especially well for knobby pieces. The spoon method wastes less ginger and follows the natural contours better.
Using a sharp knife or mandoline, slice the ginger into very thin pieces—paper-thin if possible. The thinner the slices, the faster they’ll absorb the pickling liquid and the more delicate the texture. I prefer to cut against the grain for a more tender bite. Set the prepared ginger aside in a heatproof bowl.
Step 2: Create the Pickling Brine
In a small saucepan, combine the 1 cup Apple Cider Vinegar, 0.5 cup Water, 2 tbsp Granulated Sugar, and 1 tsp Sea Salt. Heat over medium-high heat until the mixture just comes to a boil and the sugar and salt fully dissolve, which should take about 2-3 minutes.
Watch for the moment when the liquid turns clear and no graininess remains at the bottom of the pan. This is your signal that the brine is ready. Remove from heat immediately to prevent over-reduction. For extra complexity, stir in the 2 tbsp Rice Vinegar and 0.25 tsp Red Pepper Flakes now—the residual heat will infuse their flavors perfectly.
Step 3: Combine and Begin the Pickling Process
Pour the hot brine over the sliced ginger, ensuring all pieces are fully submerged. I use a small plate or a clean weight to keep the ginger under the liquid—this prevents discoloration and ensures even pickling. The ginger will turn from pale yellow to a soft pink as it pickles, which is completely normal.
Let the mixture cool to room temperature, which typically takes about 30-45 minutes. You’ll notice the ginger becoming slightly translucent at the edges as it begins to absorb the vinegar solution. This visual change is your first sign that the pickling process has started.
Step 4: Refrigerate and Wait for Perfection
Once cooled, cover the bowl tightly with plastic wrap or transfer to a clean jar with a lid. Refrigerate for at least 4 hours before serving, though I’ve found the flavor develops best after 24-48 hours. The ginger will become more tender and the flavors more pronounced with time.
During refrigeration, give the container a gentle shake or stir once or twice to redistribute the flavors. The pickled ginger will keep in the refrigerator for up to 3 weeks, though I doubt it’ll last that long. The liquid will turn a beautiful pale pink as it absorbs color from the ginger, which makes for a lovely presentation when serving.
Pro Tips For Making Pickled Ginger Recipe Apple Cider Vinegar
- Slice Thinly: Use a mandoline or sharp knife to cut the ginger into paper-thin slices—any thicker and the vinegar won’t penetrate evenly, leaving some bits under-pickled.
- Boil the Brine: Dissolve the sugar and salt in the vinegar and water over medium heat until fully combined, then cool to room temp before pouring over ginger. Hot brine can make the ginger mushy.
- Peel the Ginger: Skip the spoon trick—use a teaspoon to scrape off the skin. It removes the tough fibers without wasting as much ginger as a peeler does.
- Wait 24 Hours: I learned this the hard way—let the ginger sit in the fridge for at least a full day before eating. The flavor deepens dramatically after resting.
Regional Styles of This pickled ginger recipe apple cider vinegar
Japanese Sushi Style
In Japan, this creation often uses rice vinegar exclusively for a milder, cleaner taste that pairs perfectly with sushi. I add 1 tbsp sugar per cup of vinegar for authenticity. The ginger turns bright pink and is served in thin, delicate slices. 🌸
Korean Kimchi Twist
Korean versions incorporate gochugaru (Korean chili flakes) for heat and 1 tsp toasted sesame seeds for nutty depth. I replace ½ cup apple cider vinegar with white vinegar for extra sharpness, balancing the spice with 1 tbsp honey.
Thai Sweet-Sour
Thai-style pickled ginger often includes 1 stalk lemongrass (bruised) and 3 kaffir lime leaves in the brine. I use palm sugar instead of granulated for a deeper caramel note. The result is aromatic with citrusy brightness.
American Quick-Pickle
For a faster version, I reduce the ginger to ¼-inch slices and use 1.5 cups apple cider vinegar with ½ cup water. Adding 1 tsp mustard seeds gives it a deli-style tang. It’s ready in just 4 hours but best after 24 hours. 💛
Indian Spiced Version
Indian-style pickled ginger often includes 1 tsp black mustard seeds, 1 tsp turmeric, and 3-4 curry leaves in the brine. I toast the spices in 1 tbsp oil first for maximum flavor. The turmeric adds a golden hue to the ginger.
Mexican Escabeche
This variation incorporates 1 sliced jalapeño and ½ red onion (thinly sliced) into the jar. I use white vinegar for a sharper bite and add 1 tsp dried oregano for earthiness. It’s bold and perfect for tacos.
Nutrition Facts
Frequently Asked Questions
Can I use white vinegar instead of apple cider vinegar?
Yes, you can substitute white vinegar in a 1:1 ratio. The flavor will be sharper, less sweet than with apple cider vinegar. For best results, add 1 extra tablespoon of sugar to balance the acidity.
How long does it last in the fridge?
Properly stored in an airtight container, your pickled ginger will stay fresh for 3-4 weeks. The flavor actually improves after a few days as the ginger absorbs more of the brine.
Why did my ginger turn blue?
Thinly sliced ginger can sometimes turn blue-green due to a natural reaction between its acids and the vinegar. It’s harmless and safe to eat. To prevent this, ensure ginger is fully submerged in the brine.
Do I need to peel the ginger first?
Yes, always peel ginger before pickling. The skin can be tough and may contain dirt or pesticides. Use a spoon to scrape off the skin—it’s easier than a peeler for knobby pieces.

- Pina Colada Dip Recipe Red Lobster: Tropical Creaminess With Toasted Coconut - October 12, 2026
- Pickled Sweet Cherry Peppers Recipe Canning: Tangy Heat for Pantry Staples - October 12, 2026
- Peppercorn Sauce Recipe Vegan: Rich Umami Depth Without Cream - October 12, 2026