
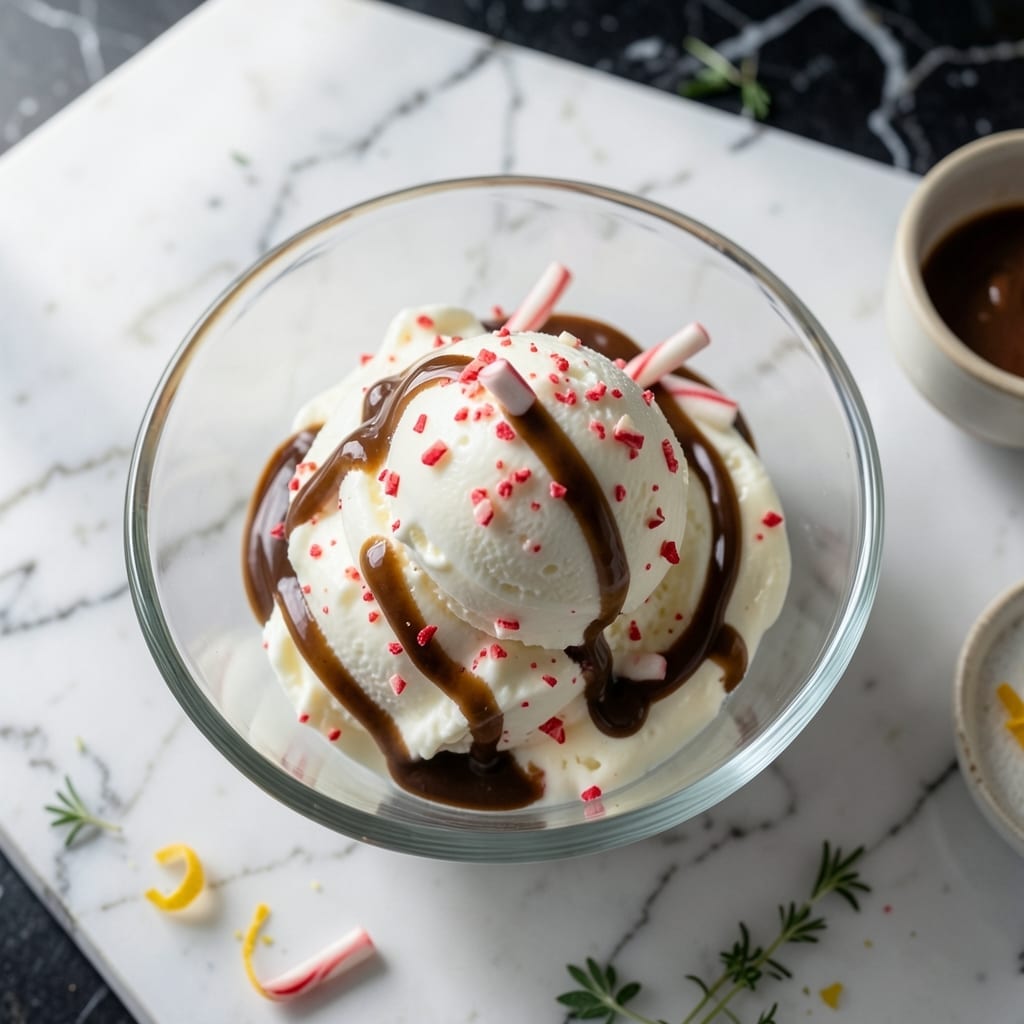
This egg-free peppermint ice cream brings holiday cheer without the fuss. I developed this recipe to capture that classic candy cane flavor using simple, no-cook techniques. The result is smooth, creamy, and perfectly minty.
The base comes together quickly with heavy cream, whole milk, and sweetened condensed milk—no custard cooking required. Crushed candy canes add festive crunch and that signature peppermint punch everyone loves during the season.
You’ll need an ice cream maker for the smoothest texture, but the active prep takes just 10 minutes. The machine does the rest while you relax, making this one of the easiest frozen treats for gatherings.
Perfect for Christmas parties or cozy nights by the fire. The vibrant red and white specks look as festive as they taste.
Ingredients for Peppermint Ice Cream Recipe No Eggs
Nine simple ingredients for creamy, festive peppermint ice cream with no eggs required.
| Ingredient | Amount | Notes |
|---|---|---|
| Heavy Cream 🥛 | 2 cups | Full-fat for creaminess |
| Whole Milk 🥛 | 1 cup | Cold, for smooth base |
| Sweetened Condensed Milk 🥛 | 1 can | 14 oz size preferred |
| Peppermint Extract 🌿 | 1 tsp | Pure, not imitation |
| Pure Vanilla Extract 🌿 | 1 tsp | For depth of flavor |
| Red Food Coloring 🎨 | ½ tsp | Optional, for festive color |
| Candy Canes 🍬 | 6 pieces | Crushed for texture |
| Granulated Sugar 🍚 | ½ cup | Adjust to taste preference |
| Salt 🧂 | ¼ tsp | Enhances all flavors |
| Light Corn Syrup 🫒 | 2 tbsp | Prevents iciness |
The heavy cream is the foundation here. Whole Foods or Trader Joe’s have great organic options if you’re avoiding additives. Sweetened condensed milk from Eagle Brand is my go-to—consistent quality and widely available. For the peppermint extract, pure extract (not oil) gives the best flavor without being overpowering. Candy canes should be crushed just before adding to keep the crunch sharp.
No candy canes? Crushed peppermint candies work the same. Swap the vanilla for almond extract if you want a different twist. The food coloring is optional but adds that festive look—gel-based colors work better than liquid. Want it richer? Replace a quarter cup of milk with half-and-half. The corn syrup helps texture, but honey or agave can sub in a pinch.
Store crushed candy canes in an airtight container at room temp for 1 week. The ice cream keeps in the freezer for 2-3 months, though it’s best within the first month. Let it sit out 5-10 minutes before scooping for easiest serving.
Why You’ll Love This Recipe
- No Churn Needed: I just mix, freeze, and forget—no ice cream maker, no eggs, no fuss.
- Cool Mint Rush: The peppermint extract hits that perfect sweet-spicy note, while the vanilla keeps it smooth.
- Holiday Ready: Honestly, it’s my go-to for Christmas parties or just a cozy night in with hot cocoa.
- Leftovers? Yes Please: Between us, it freezes solid for weeks, so I can sneak a scoop whenever the craving hits.
Step-by-Step Instructions for Peppermint Ice Cream
This no-churn method delivers creamy, festive ice cream with minimal effort.
Step 1: Prepare the Candy Cane Pieces
Place the 6 pieces Candy Canes in a heavy-duty plastic bag and seal tightly. Using a rolling pin, crush them into small pieces with some powder—this gives you both texture and flavor distribution throughout the ice cream.
Set aside about 2 tablespoons of the crushed candy canes for garnish. The rest will be folded into the base for that signature peppermint crunch. I’ve found that crushing them just before use preserves their crispness and prevents them from dissolving into the mixture.
Step 2: Create the Creamy Base Mixture
In a large mixing bowl, combine the 2 cups Heavy Cream, 1 cup Whole Milk, and 1 can Sweetened Condensed Milk. Whisk vigorously for 1-2 minutes until the mixture is smooth and slightly thickened.
The sweetened condensed milk eliminates the need for eggs while providing both sweetness and a velvety texture. For best results, ensure your heavy cream is full-fat and cold—this creates the ideal consistency for no-churn ice cream.
Step 3: Add Flavorings and Sweeteners
Stir in the 1 tsp Peppermint Extract, 1 tsp Pure Vanilla Extract, 0.5 cup Granulated Sugar, 0.25 tsp Salt, and 2 tbsp Light Corn Syrup. The light corn syrup is crucial—it prevents the ice cream from developing an icy texture by lowering the freezing point.
Add the 0.5 tsp Red Food Coloring if using, and mix until the color is evenly distributed. I always taste the base at this stage to ensure the peppermint flavor is pronounced but not overwhelming. The vanilla extract adds depth to the peppermint’s brightness.
Step 4: Incorporate the Candy Cane and Freeze
Gently fold in the crushed candy canes (reserving your garnish portion) using a spatula. Be careful not to overmix—you want visible pieces throughout. Pour the mixture into a standard loaf pan or airtight container.
Cover with plastic wrap, pressing it directly onto the surface to prevent ice crystals from forming. Freeze for at least 6 hours, though overnight is ideal. The mixture should be firm but still scoopable when ready.
To serve, let the ice cream sit at room temperature for 5-10 minutes to soften slightly. Scoop into bowls and sprinkle with the reserved crushed candy canes for a festive touch that highlights the holiday spirit.
Pro Tips For Making Peppermint Ice Cream Recipe No Eggs
- Chill the Base: Let your cream, milk, and condensed milk mixture chill in the fridge for at least 4 hours—overnight is even better. I learned this the hard way after ending up with icy, grainy ice cream because I rushed it.
- Measure Extracts Carefully: Peppermint extract is potent—start with 1/2 teaspoon, taste, then add more in 1/4 teaspoon increments. After overdoing it once, I now measure with a dropper for precision.
- Skip the Overmixing: Once the extracts are in, give it just 2-3 gentle stirs to combine. Overmixing can introduce too much air, making the ice cream frothy instead of creamy.
- Use Cold Bowls: Place your mixing bowl and utensils in the freezer for 15 minutes before combining ingredients. It keeps everything colder longer, which makes a real difference in texture.
Essential Equipment for This Dish
Ice Cream Maker
For the creamiest texture, use a 1.5-quart ice cream maker like the Cuisinart ICE-21. This model handles the base perfectly and is widely available. I’ve found it consistently produces smooth, professional-quality results in 20-25 minutes of churning time. 🔥
Mixing Bowls
A large stainless steel mixing bowl (at least 3-quart capacity) gives you plenty of room to whisk the base without spills. I prefer All-Clad for durability, but any heavy-duty bowl works. Ensure it’s completely chilled before starting to maintain the cold temperature of your ingredients.
Whisk and Spatula
A sturdy balloon whisk helps incorporate air into the base for a lighter texture. I use a 12-inch silicone spatula for folding in the candy canes—it scrapes every last bit from the bowl. Both tools should be heat-resistant and food-safe, which most modern kitchen brands offer.
Crushing Tools
For the candy canes, a heavy rolling pin and a gallon-sized freezer bag work perfectly. The bag contains the sharp pieces, and the rolling pin gives you control over the texture. I’ve also used a food processor for larger batches—just pulse 3-4 times for coarse chunks.
Storage Containers
Use a 9×5-inch loaf pan or an airtight container with a tight lid for freezing. I recommend glass containers for visibility and easy scooping. Press plastic wrap directly on the surface before sealing to prevent freezer burn and ice crystals. ❄️
Measuring Tools
Prevent flavor mishaps with precise measurements. I use a 1-tablespoon measure for extracts and a liquid measuring cup for dairy. A kitchen scale (like OXO Good Grips) ensures accuracy for the sugar and corn syrup, especially if scaling the recipe up or down.
Nutrition Facts
Frequently Asked Questions
Why use sweetened condensed milk instead of eggs?
Sweetened condensed milk replaces eggs by providing both sweetness and a thick, creamy base without cooking. It eliminates the risk of scrambling eggs and simplifies the process. The result is just as rich and smooth.
How long does it need to freeze?
Freeze the mixture for at least 6 hours, though overnight is ideal. This ensures a firm but scoopable texture. Don’t skip this step—it’s crucial for the perfect consistency.
Can I make this without an ice cream maker?
Yes! Pour the mixture into a shallow container and freeze, stirring vigorously every 30-45 minutes for 3-4 hours. This breaks up ice crystals for a smoother texture.
What if my ice cream turns icy?
An icy texture usually means it needs more fat or sugar. Add 1-2 tbsp corn syrup or replace some milk with half-and-half next time. Stirring during freezing also helps.

- Pina Colada Dip Recipe Red Lobster: Tropical Creaminess With Toasted Coconut - October 12, 2026
- Pickled Sweet Cherry Peppers Recipe Canning: Tangy Heat for Pantry Staples - October 12, 2026
- Peppercorn Sauce Recipe Vegan: Rich Umami Depth Without Cream - October 12, 2026